Google Analytics UA
danger
Universal Analytics will no longer process new data in standard properties beginning July 1, 2023. Uniform for Sitecore now supports dispatching analytics data to Google Analytics 4.
info
This section cover Universal Analytics only. See Google Analytics 4 for details on GA4.
Uniform Optimize provides a client-side tracker that decouples tracking from the Sitecore CD instance. Uniform tracker provides the ability to send the data it collects to external systems. Google Analytics is an example of one such external system.
Uniform implements this functionality in the dispatch process. For more information on the dispatch process, see Dispatch documentation.
caution
Uniform sends data to Google Analytics as non-interaction events. In order for your site visitors to be recognized as active users in Google Analytics, at least one non-non-interaction event must be sent. This happens automatically when the Google Analytics global site tag is added to a site.
In other words, be sure that the Google Analytics global site tag is available on your site before you configure integration with Uniform. Information on setting up the global site tag is available from Google.
How does it work?#
The Uniform tracker collects visit activity and stores it locally on the browser. After the tracker stores the data, it checks to see if any "dispatch destinations" are defined. If there are, the tracker starts the dispatch process.
A Google Analytics property can be a dispatch destination. For GA destinations, the tracker converts the data it has collected into a format that can be sent to GA. You configure the tracker to specify what data is sent to which GA properties.
note
For details on how the dispatch process works with Google Analytics destinations, see Google Analytics UA dispatch documentation.
Supported visit activities#
The following visit activities captured by the Uniform tracker can be dispatched to Google Analytics as non-interaction events:
- Goals
- Page events
- Page views
- Personalization
note
For details on how the properties from visit activities are mapped to events, see Google Analytics UA dispatch documentation.
Supported visitor data#
The following visitor data captured by the Uniform tracker can be dispatched to Google Analytics as custom dimension values:
- Visitor id
- Pattern matches
note
For details on how visitor data is mapped to custom dimensions, see Google Analytics UA dispatch documentation.
Google Analytics configuration#
When Uniform dispatches tracker data to Google Analytics, Google Analytics must be able to handle the tracker data. This section describes what must be configured in Google Analytics in order for Uniform dispatch to work properly.
Add property#
tip
If you already have a Google Analytics property that you want to use, skip this section.
In Google Analytics, in the left menu, click Admin.
In the center column click Create Property.
Enter the required values in the section Property details.
Click Show advanced options.
Select the option for Create a Universal Analytics property.
Enter your website URL.
Select the option Create a Universal Analytics property only.
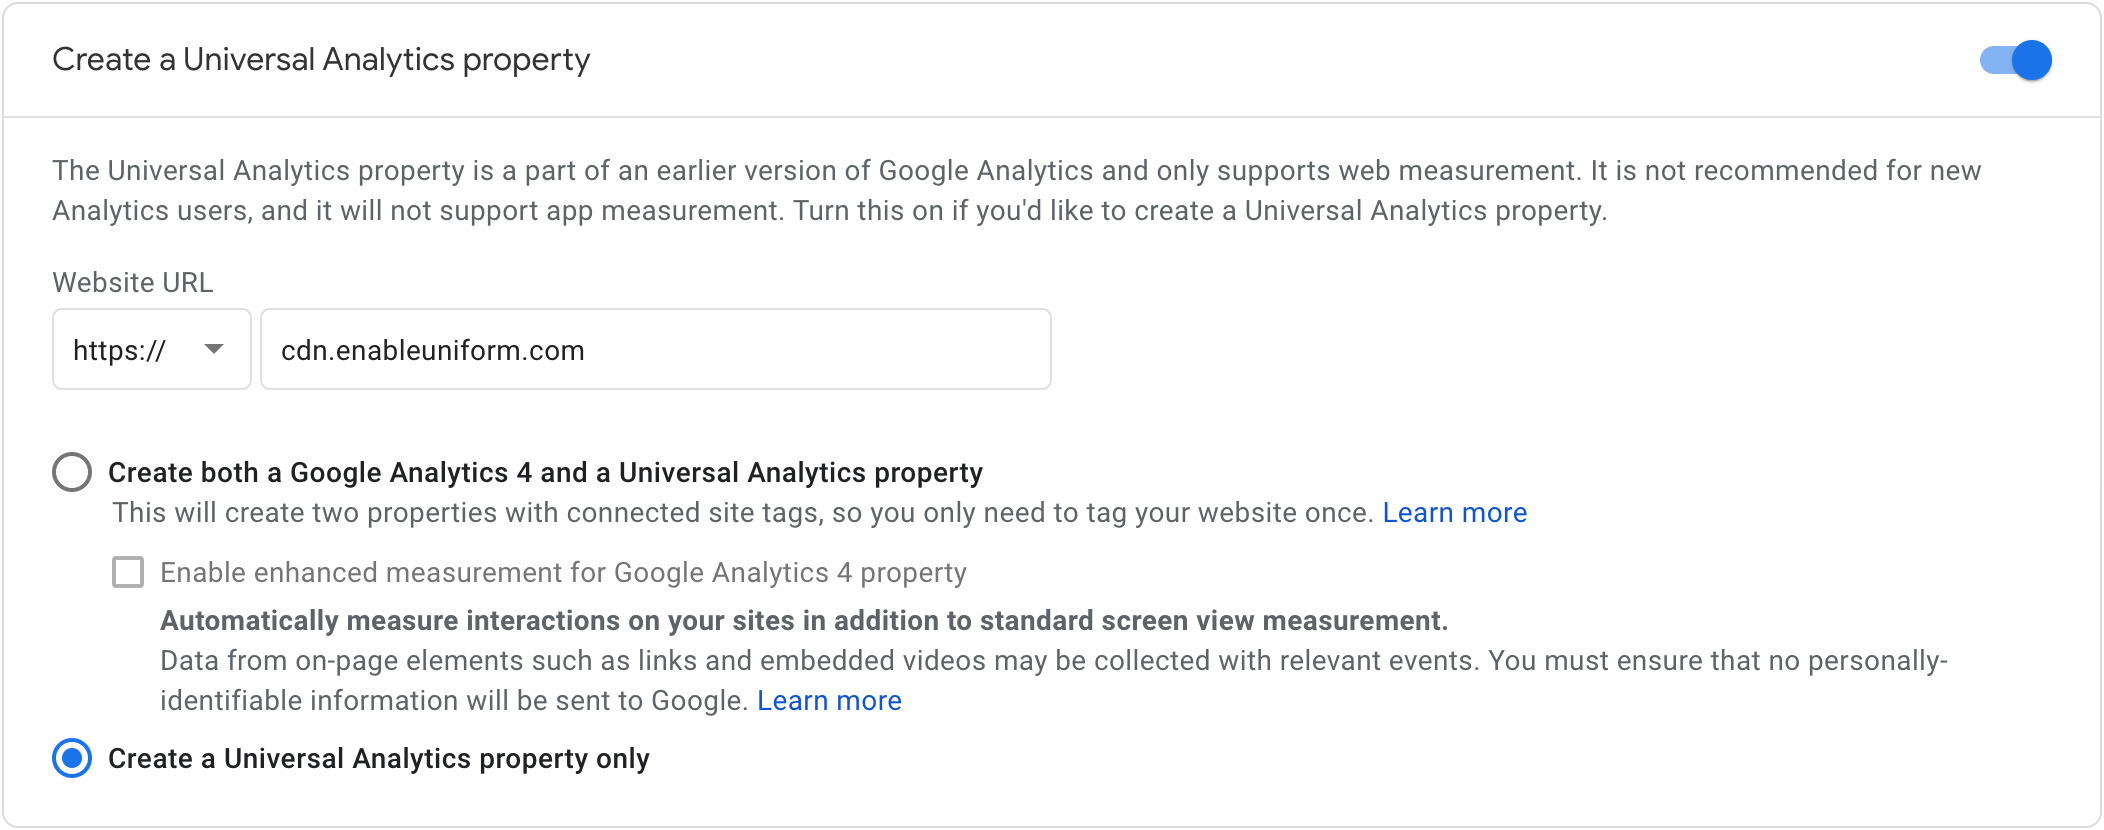
Click Next.
Click Create.
Accept the terms of service agreement.

Add custom dimensions#
In Google Analytics, custom dimensions allow you to capture non-analytics data. Uniform can dispatch visitor data such as contact id and pattern matches to custom dimensions. This can be useful for custom reporting.
Before Google Analytics can capture data in custom dimensions, the custom dimensions must be defined in Google Analytics.
tip
This configuration is optional. If you do not want to store visitor data in Google Analytics, skip this section.
note
This section describes how to configure two specific custom dimensions: one to store the visitor's contact id and another to store the pattern match for a custon Sitecore profile named Layers. You should adjust this configuration to match your requirements.
In Google Analytics, in the left menu, click Admin.
In the center column, click Custom Definitions.
Click Custom Dimensions.
Click NEW CUSTOM DIMENSION.

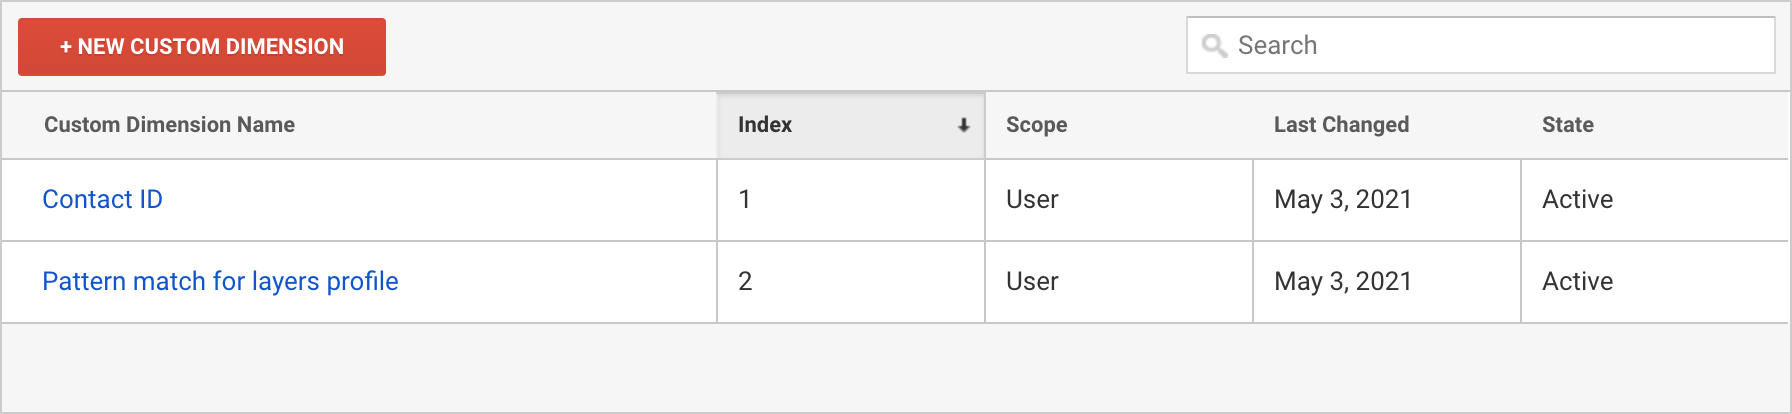
Enter the following values and click Create:
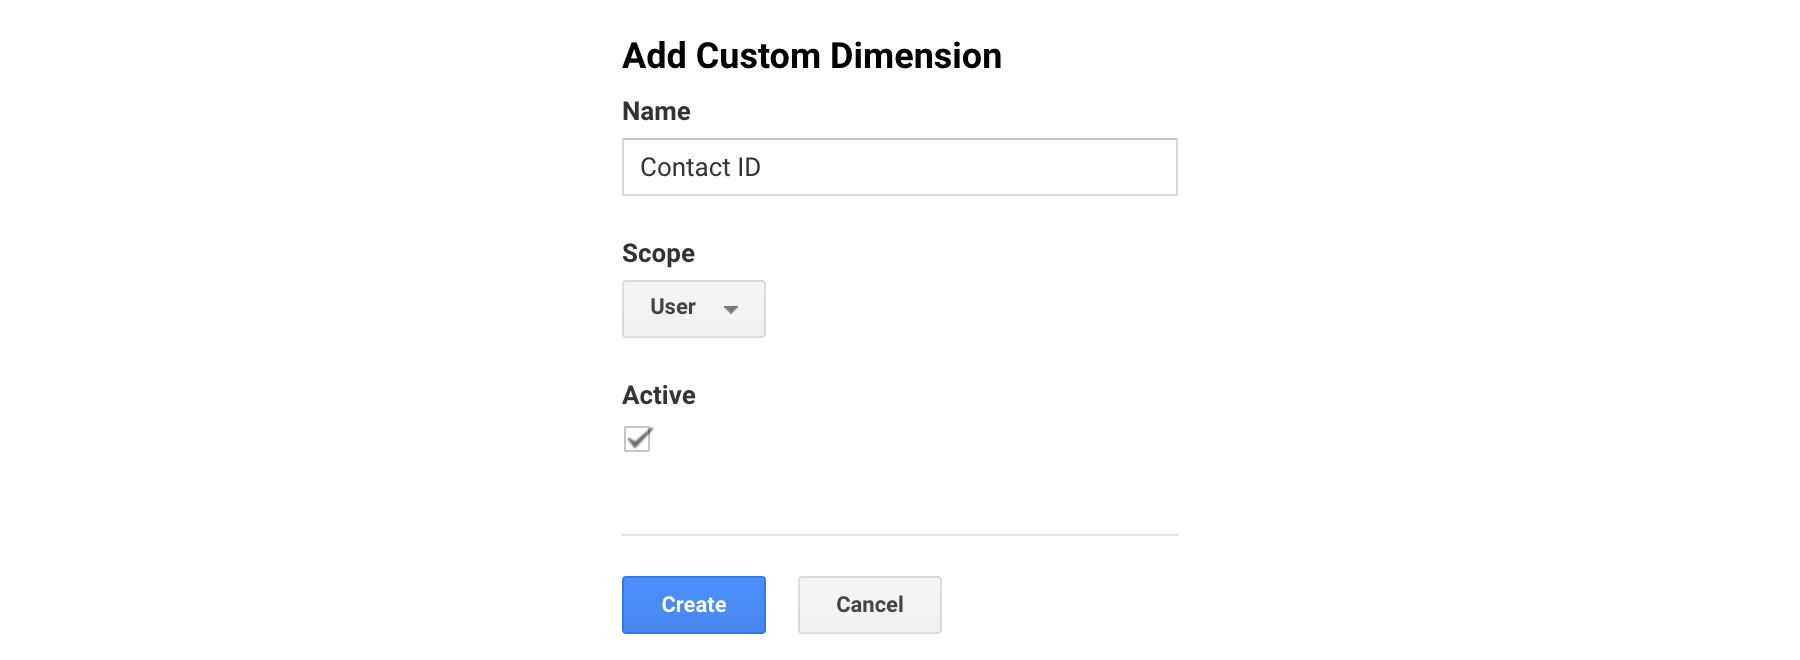
Click Done.
Click NEW CUSTOM DIMENSION.

Enter the following values and click Create:
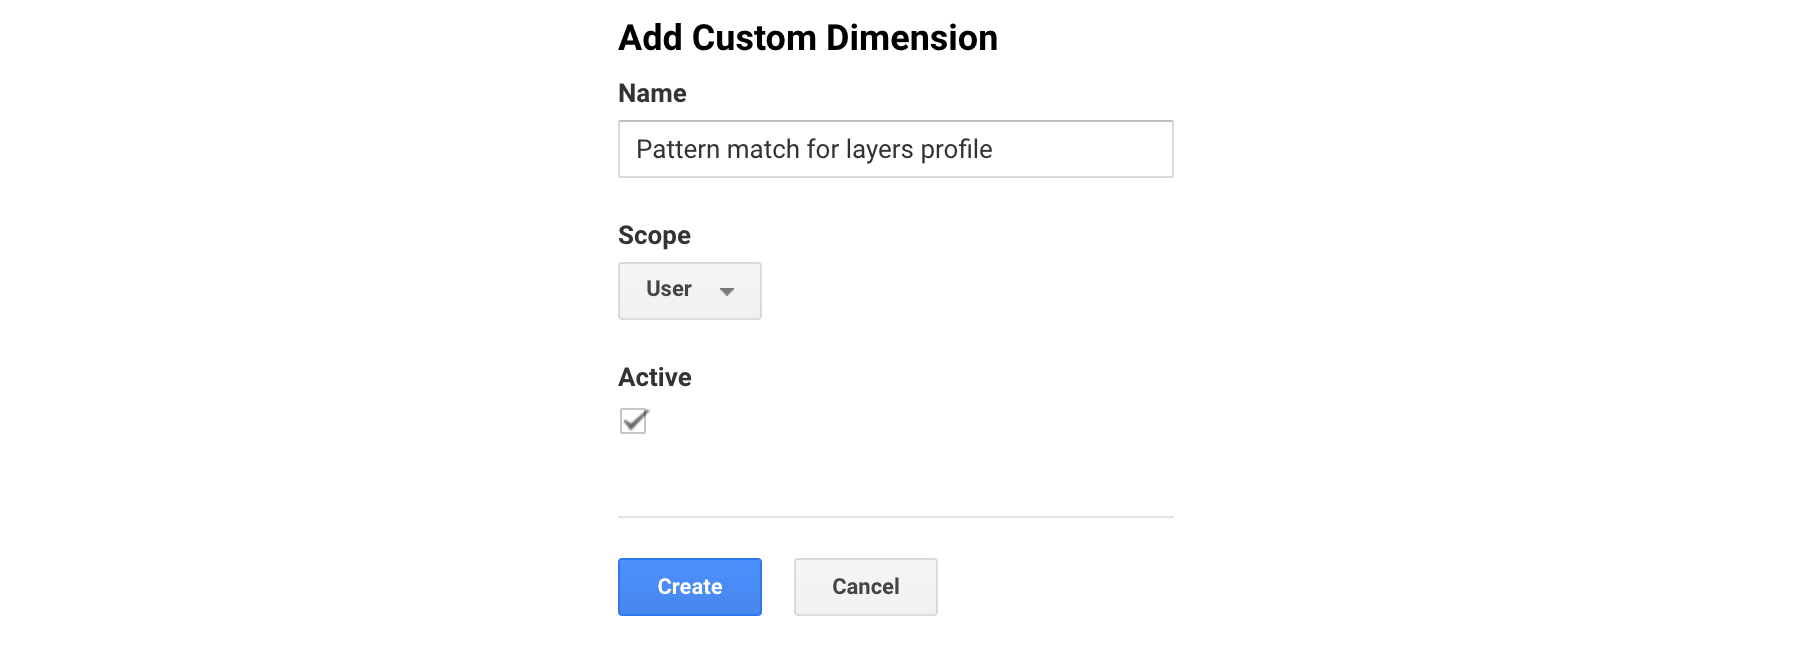
Click Done.
You will see two custom dimensions defined.
Sitecore configuration#
In order to dispatch visit activity data to Google Analytics, the tracker must be configured to answer the following questions:
- Which Google Analytics properties should tracker data be dispatched to?
- Which visit activity (analytics data) should be dispatched?
- Which visitor data (non-analytics data) should be dispatched?
- Which Sitecore sites do these settings apply to?
This configuration is handled using Sitecore Content Editor. Uniform provides the configuration to the tracker when the tracker is rendered. No front-end code changes are required.
note
The instructions below refer to the "Google Analytics destination item". That item is accessed using Sitecore Content Editor, at the following path:
sitecore > System > Uniform > Optimize > Tracking > Destinations > Google Analytics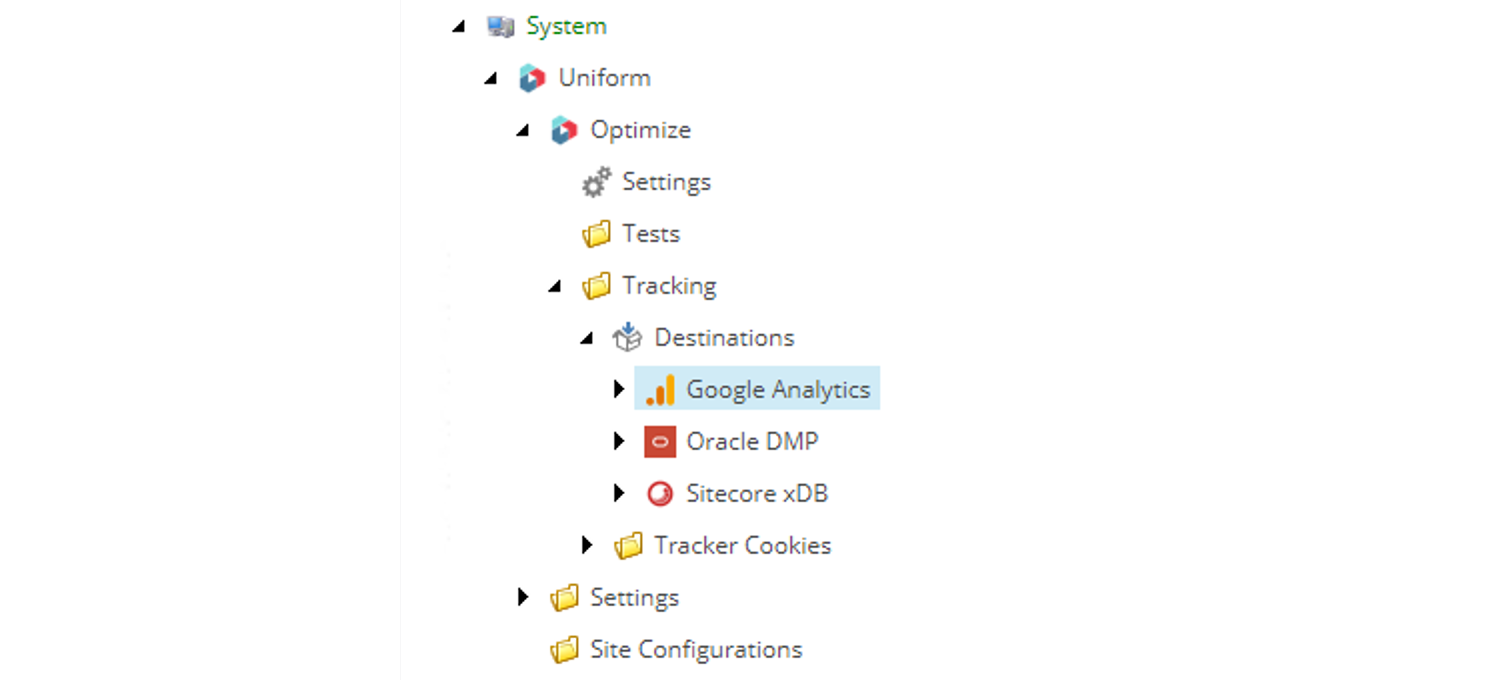
Add GA property#
The mapping process uses a Sitecore item to represent each GA property you can dispatch tracker data to. You must add these items yourself.
note
Uniform integrates with Universal Analytics properties only. Google Analytics 4 properties are not currently supported.
In Google Analytics, find the "tracking code" for your GA property. This value usually begins with
UA-. You can find the tracking code in the account summary screen in Google Analytics.
In Sitecore Content Editor, navigate to the Google Analytics destination item.
Select the item Properties.
Create a new item using the template Property.
Enter the following field values:
- Tracking ID - The Google Analytics tracking ID associated with your property.
Save and publish the item.
Add GA custom dimensions#
The mapping process uses a Sitecore item to represent each GA custom dimension that you can dispatch tracker data to. You must add these items yourself.
tip
Mapping custom dimensions is optional. You can skip this section if you do not need to store extra visitor data in Google Analytics.
note
This section describes how to configure the custom dimensions added above. You should adjust this configuration to match your requirements.
In Sitecore Content Editor, navigate to the Google Analytics destination item.
Select the item Custom Dimension Mappings.
Create the following item:
- Template: Custom Dimension Mappings Folder
- Name: Production site dimensions
In the folder, create the following item:
- Template: Contact Property Mapping
- Name: Dimension 1
Enter the following field values:
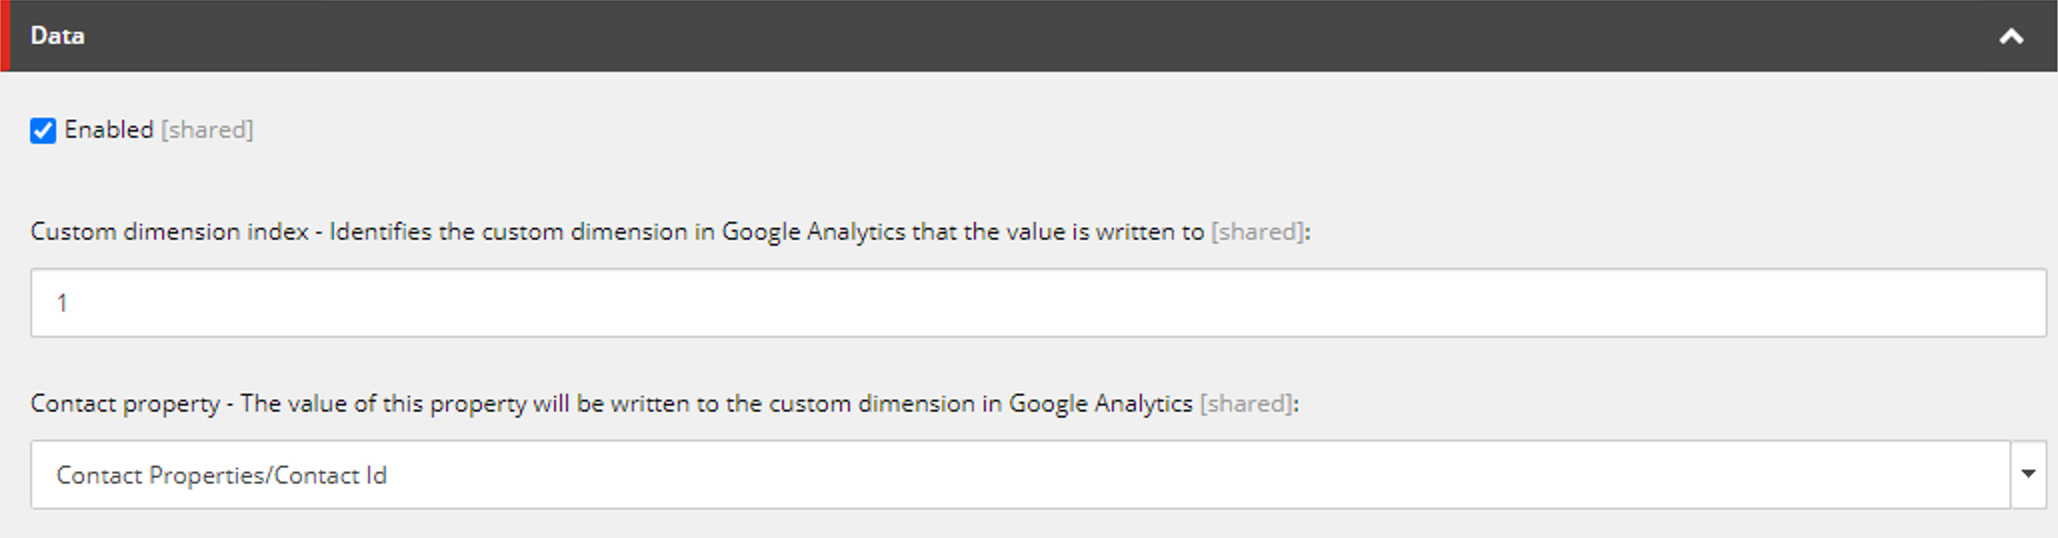
Save the item.
In the folder, create the following item:
- Template: Profile Pattern Mapping
- Name: Dimension 2
Enter the following field values:
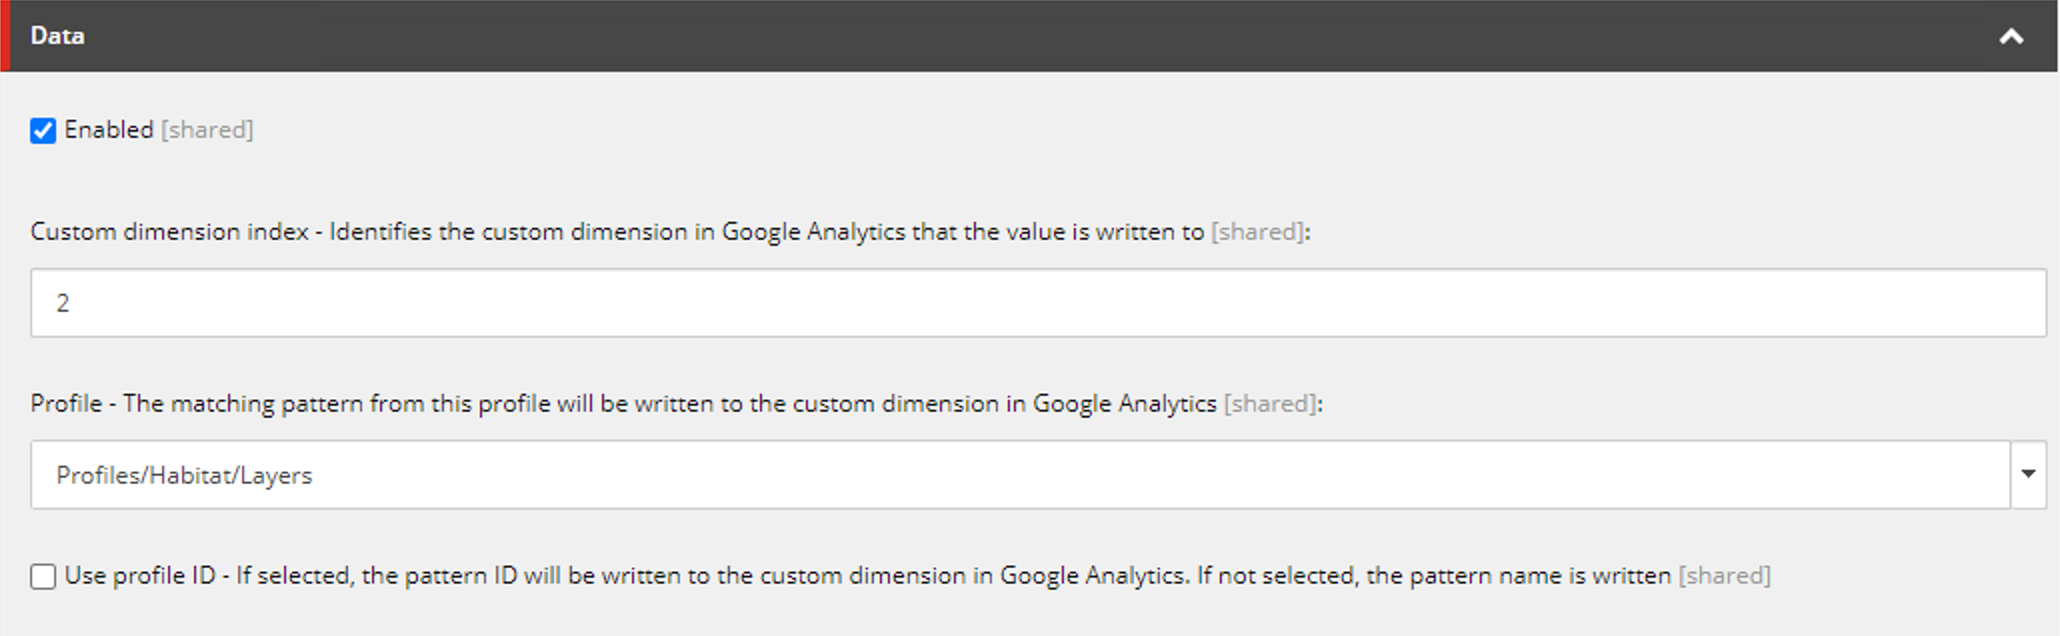
Save the item.
Publish the items.
note
See Visitor data mapping documentation for more information on the items used to configure custom dimension mappings.
Add tracking configuration#
The mapping process uses a Sitecore item to describe the mapping that is applied to a Sitecore site.
In Sitecore Content Editor, navigate to the Google Analytics destination item.
Select the item Tracking Configurations.
Create the following item:
- Template: Tracking Configuration
- Name: Production site config
Enter values for the following fields:
- Enabled - A tracking configuration must be enabled in order for it to be active.
- Sitecore sites - Select the Sitecore sites that the tracking configuration will apply to.
- Google Analytics properties - Select the Google Analytics properties that data will be sent to.
- Activities - Select the visit activities captured by the Uniform tracker that you want sent to Google Analytics.
- Custom dimension mappings - Select the folders that contain the custom dimension mappings you want sent to Google Analytics.
- Script url - Uniform tracker uses the Google Analytics tracker script to send data to Google Analytics. If this script is already loaded in the browser, the Uniform tracker uses it. If the script is not already loaded, the Uniform tracker will load the script from this url.
Save and publish the item.
Troubleshooting#
Confirm GA script is loaded#
Uniform depends on the Google Analytics tag to dispatch tracker data to Google Analytics. The following steps can be used to confirm this tag is loaded on your site:
- Using your browser, navigate to your site.
- Open Developer Tools.
- Navigate to the Network tab.
- Confirm a response for a request for
https://www.google-analytics.com/analytics.jswas received.
Confirm tracking includes GA destination#
When the Uniform tracker is rendered, details about any dispatchers that are assigned to the Sitecore site are rendered, as well.
In Sitecore Content Editor, get the item id for the Google Analytics tracking configuration item configured above.
Using your browser, navigate to your site.
Open Developer Tools.
Navigate to the Console tab.
For MVC sites, enter the following command (replace the guid with the item id from step 1):
uniform .tracking.destinations .find(d => "{AAAAAAAA-AAAA-AAAA-AAAA-AAAAAAAAAAAA}" .toLowerCase() .indexOf(d.configId) > -1)For JSS sites, enter the following command (replace the guid with the item id from step 1):
JSON.parse(__JSS_STATE__.innerHTML).sitecore.context .tracking.destinations .find(d => "{AAAAAAAA-AAAA-AAAA-AAAA-AAAAAAAAAAAA}" .toLowerCase() .indexOf(d.configId) > -1)For Next.js sites, enter the following command (replace the guid with the item id from step 1):
window.__NEXT_DATA__.props.pageProps.layoutData.sitecore.context .tracking.destinations .find(d => "{AAAAAAAA-AAAA-AAAA-AAAA-AAAAAAAAAAAA}" .toLowerCase() .indexOf(d.configId) > -1)
Confirm tracker data is dispatched#
Using your browser, navigate to your site.
Open Developer Tools.
Navigate to the Network tab.
Find a request that matches the following criteria:
- Name:
collect?... - Type:
XHR - Initiator:
analytics.js
- Name:
The following values will be set in the query string parameters. For details on the values to expect for each activity type, see Google Analytics UA event mapping.
- ec: Event category
- ea: Event action
- el: Event label
- ev: Event value
There is a query string parameter that specifies the Google Analytics "client id", which uniquely identifies the visitor in GA. This value is useful when you want to find the data collected in GA for a specific visitor.
- cid:
198173773.1620069158
note
The GA tag adds a cookie
_gato the visitor's browser. The value of this cookie is the client id.note
Technically, the client id does not identify a visitor. It identifies a device (i.e. browser) used by one or more visitors to view the site. But if you know the device is only used by one visitor, and that the visitor is only using one device to access the site, the client id can act as an identifier for a specific visitor.
- cid:
If visitor data is dispatched, there will be a query string parameter for each custom dimension. The name of the parameter will include the index of the custom dimension. For example, if custom dimension 4 is set to the contact id, you would see something like the following:
- cd4:
fd145dee-cd59-4442-8dfe-ba013d9b3825
- cd4:
Confirm dispatched events are received#
Since Uniform tracker dispatches visit activity to Google Analytics as events, you can use Google Analytics's realtime event reports to monitor these events as Google Analytics receives them:
In Google Analytics, in the left menu, navigate to REPORTS > Realtime > Events.
Click Events (Last 30 min).
In another browser window, navigate to your site. You will see visitor activity appearing in the report.

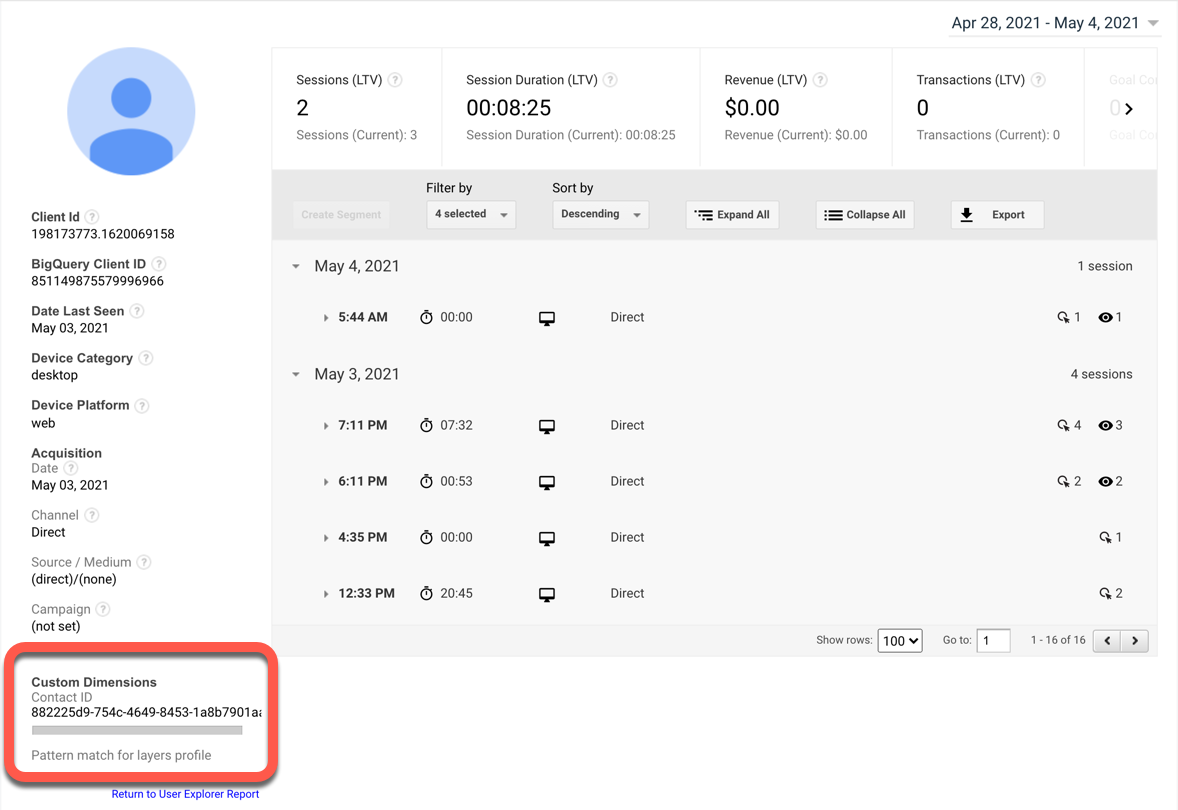
Confirm dispatched custom dimensions are received#
You can view the values that were received by Google Analytics using the Google Analytics User Explorer.
note
Unlike the realtime events report, the User Explorer is not updated in realtime. It may take 24 hours or longer before a new visitor appears in the report. For returning visitors, there may be a delay of 20 minutes or more new activity appears in the report.
In Google Analytics, in the left menu, navigate to REPORTS > Audience > User Explorer.
Set the date range to include the current date.
In the list of users, select the user whose client id matches the value for your browser.
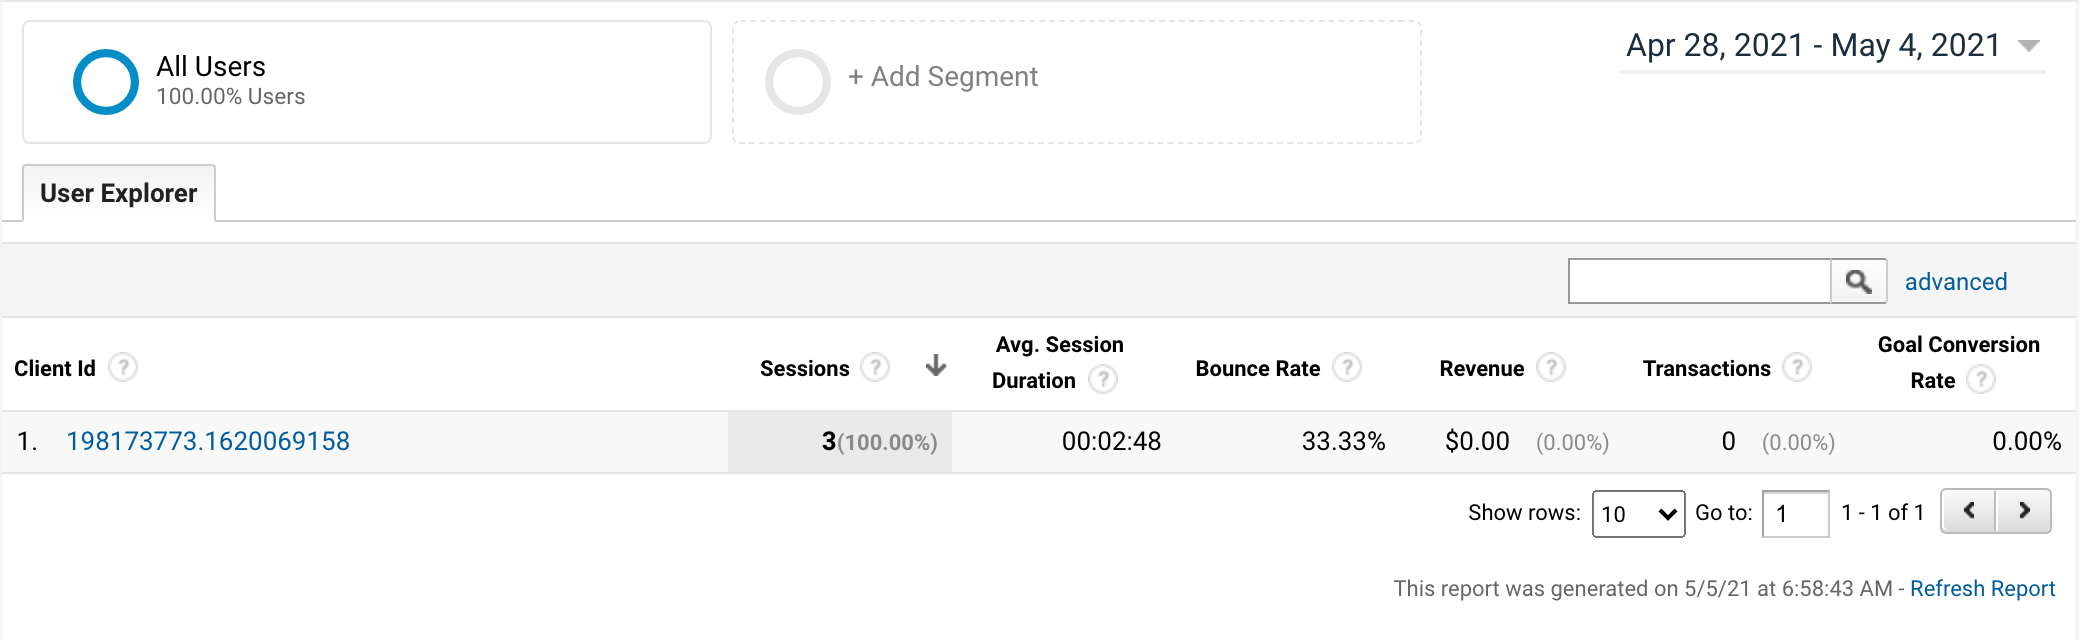
At the bottom of the report you can see the custom dimension values that are associated with the visitor.