Cache purge configuration
When content is changed in Sitecore, it is likely the corresponding cache is Akamai must be purged. Uniform enables:
- Sitecore users to purge Akamai cache manually
- Sitecore to automatically purge Akamai cache when publishing is completed.
Both of these options require that Sitecore is able to use the Fast Purge v3 API in Akamai.
note
Customizing the cache purge process can give you greater control over when and how the process runs. Details are available on the customize Akamai cache purge page.
Create API client#
When an API client is created in Akamai, credentials are generated that Sitecore will use to make calls to Akamai to purge cache.
caution
You must have administrator access to Akamai Control Panel in order to add an API client.
In Akamai Control Center, open the left menu and navigate to ACCOUNT ADMIN > Identity * access.
Click New API client for me.

Click Advanced.
Enter the following values:
- Name:
Sitecore cache purge - Description:
API client Sitecore uses to purge cache
- Name:
For the APIs field, select Select APIs.
Click Clear API selection.

For the row CCU APIs, select READ-WRITE.

Click Submit.
Click Manage purge options.
Select the following values:
- Purge by CP codes
- All current and new CP codes
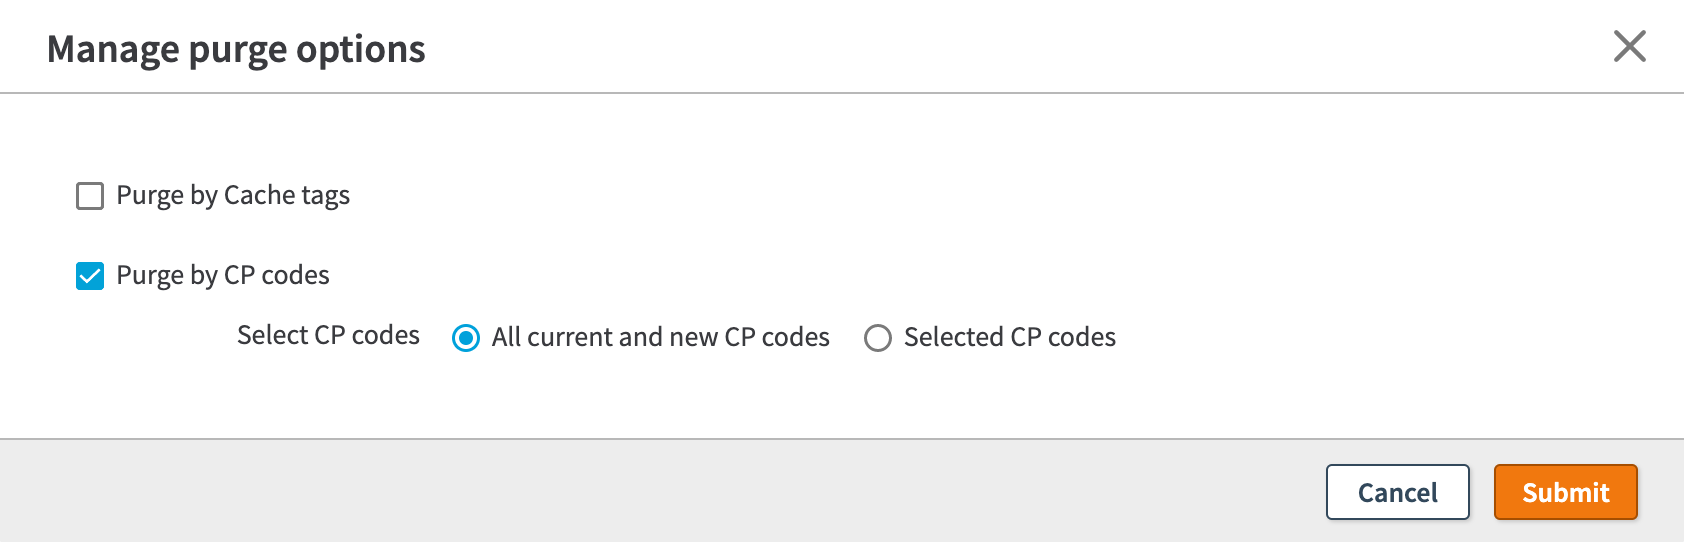
Click Submit.
Click Create API client.
Credentials are displayed. These values are needed in the next section.
caution
Do not close this window without first copying the values displayed. Some of the details displayed cannot be retrieved later.
Collect settings#
In order for cache purge commands to be sent to Akamai, several settings must be configured in the following sections. Some of these values are the API credentials identified in the previous section, but some additional values are needed, as well.
Determine which Akamai purge method you want to use. The following values are supported:
deleteinvalidate
Determine which Akamai network you want to use. These options correspond to the networks configured in the Akamai Property Manager.
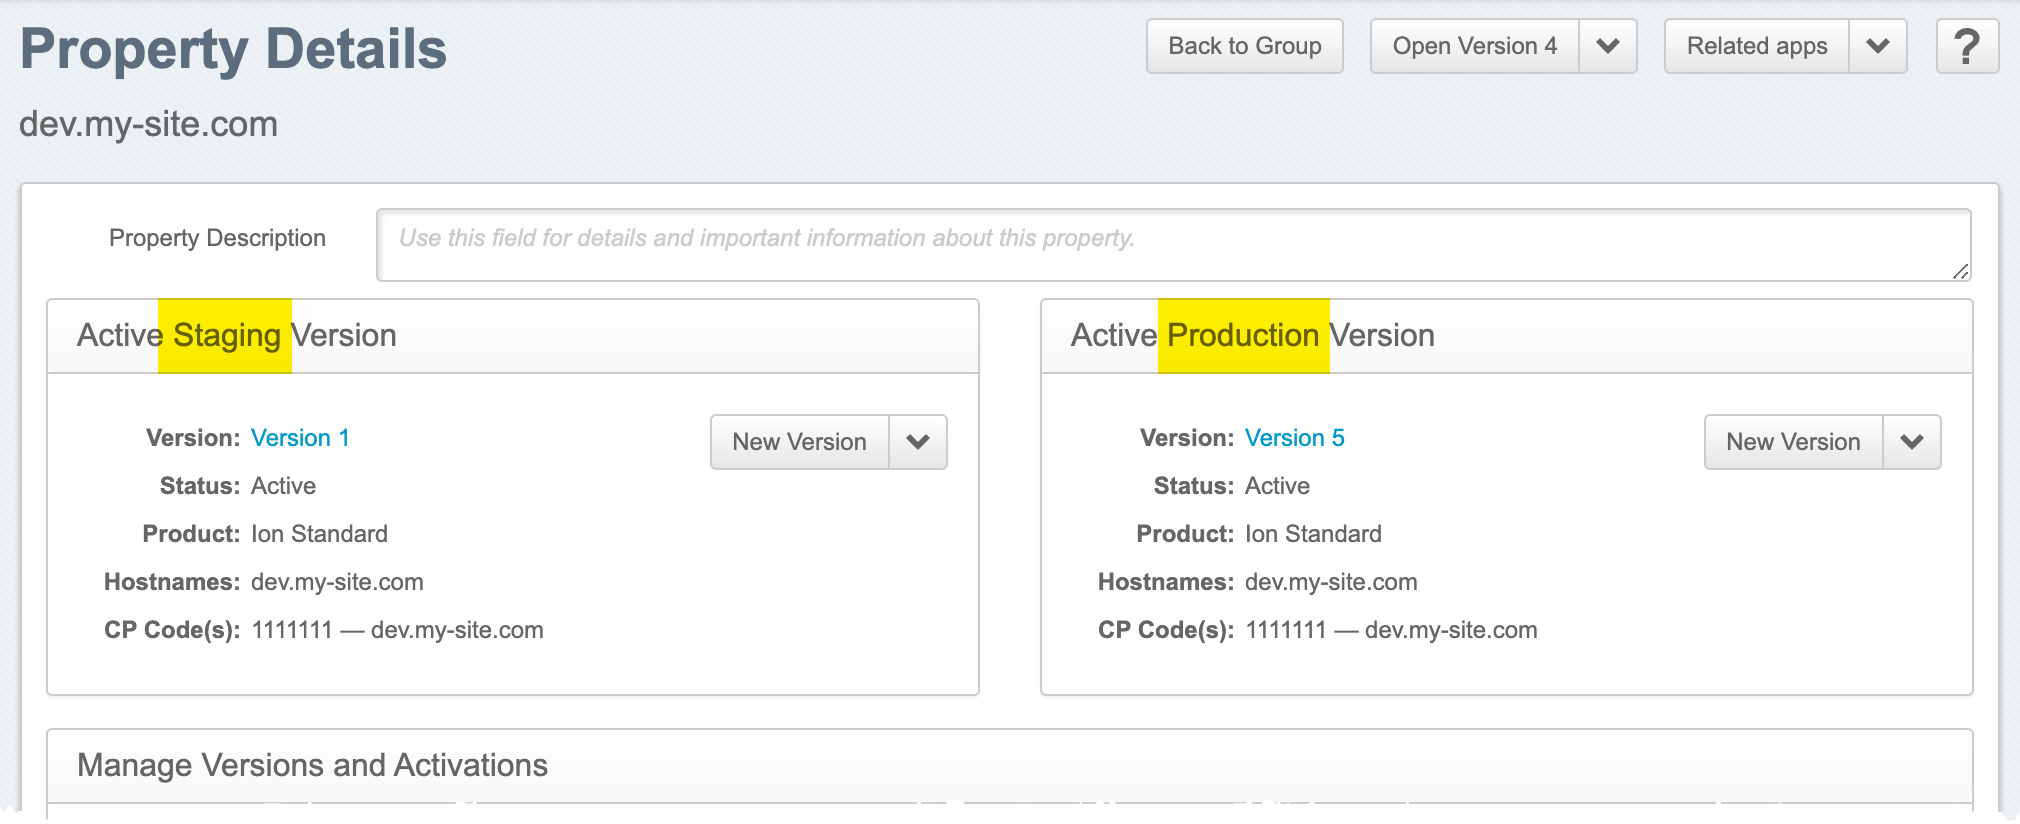
Find the Hostname(s) from the Akamai Property Manager.
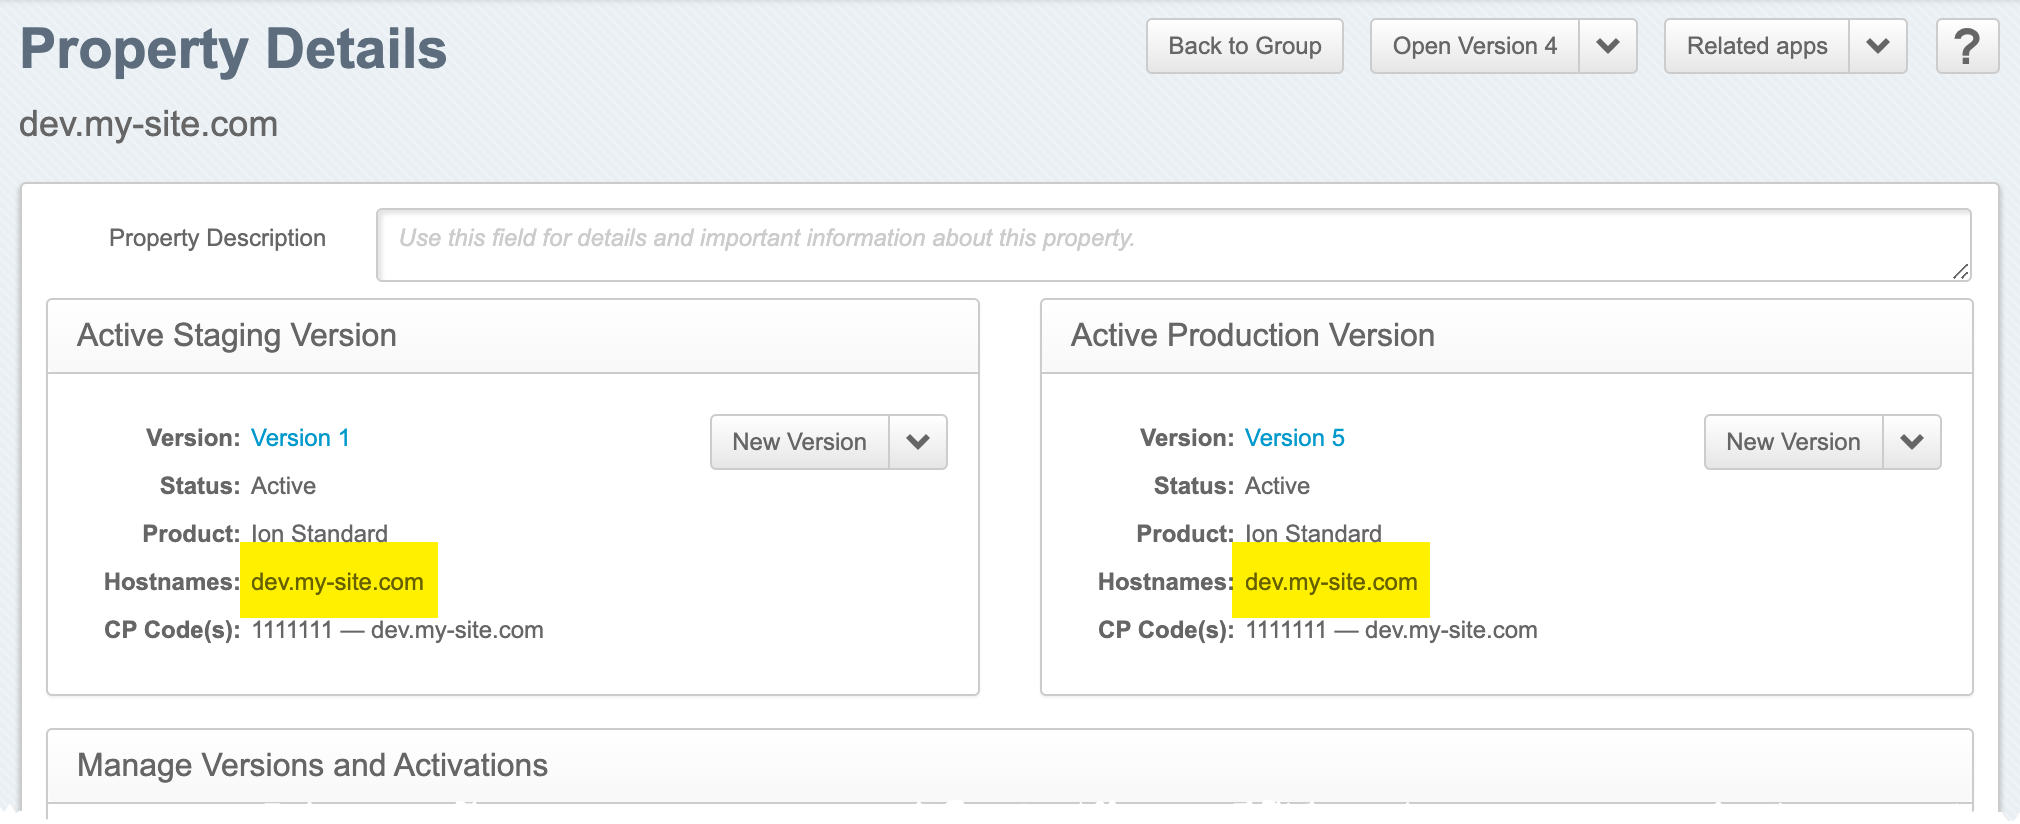
Find the CP Code(s) from the Akamai Property Manager.

Add API client to Sitecore#
You must configure Sitecore to associate the API client with your Sitecore site. The way this is configured depends on how you configured the deployment service.
Option 1. Sitecore config files#
- Update the config file used to configure the deployment service to the following:
<configuration> <sitecore> <uniform> <siteConfigurations> <siteConfiguration name="<YOUR-SITECORE-SITE-NAME>"> <site inherits="<YOUR-SITECORE-SITE-NAME>" /> <deployment> <deploymentService ref="uniform/services/nopDeploymentService" /> </deployment> <optimizeIntegrationService ref="uniform/services/optimizeIntegrationService" /> <purge> <purgeService set:ref="uniform/services/akamaiPurgeService"> <method><YOUR-AKAMAI-PURGE-METHOD></method> <clientToken><YOUR-AKAMAI-CLIENT-TOKEN></clientToken> <accessToken><YOUR-AKAMAI-ACCESS-TOKEN></accessToken> <secret><YOUR-AKAMAI-CLIENT-SECRET></secret> <apiUrl>https://<YOUR-AKAMAI-API-CLIENT-HOST></apiUrl> <network><YOUR-AKAMAI-NETWORK></network> <hostNames hint="list:AddHostName"> <hostName><YOUR-AKAMAI-HOST-NAME></hostName> </hostNames> <cpCodes hint="list:AddCpCode"> <cpCode><YOUR-AKAMAI-CP-CODE></cpCode> </cpCodes> </purgeService> </purge> </siteConfiguration> </siteConfigurations> </uniform> </sitecore></configuration>note
The CP codes value is optional. It is only used for full-site purge operations. Full-site purge means the cache for an entire Akamai property is purged. For more information, see the Akamai reference section.
Option 2. Sitecore items#
In Sitecore, open Content Editor.
Navigate to sitecore > system > Uniform > Site Configurations.
Select the item that corresponds to your site.
Select the item Configuration.
Add a new item using the template Configure: Akamai Purge Service....
For the field Method, select the Akamai purge method you want to use.
For the field ClientToken, enter the credential value client_token.
For the field AccessToken, enter the credential value access_token.
For the field Secret, enter the credential value client_secret.
For the field ApiUrl, enter the credential value host, but add
https://in front of the value. The following is an example of what the value should look like:https://akab-0000000000000000-0000000000000000.luna.akamaiapis.netFor the field Network, select the Akamai network you identified in the previous section.
For the field HostNames, enter the hostname(s) you identified in the previous section. If you have multiple hostnames, add each host name on its own line in the multi-line text box.
For the field CpCodes, enter the CP code(s) you identified in the previous section. If you have multiple CP codes, add each CP code on its own line in the multi-line text box.
note
The CP codes value is optional. It is only used for full-site purge operations. Full-site purge means the cache for an entire Akamai property is purged. For more information, see the Akamai reference section.
Enable automated purge#
Uniform can send cache-purge instructions to Akamai when Sitecore publishing tasks are finished. This is called "automated purge". This functionality is disabled by default. Complete the following steps to enable automated purge:
- In Content Editor, navigate to sitecore > System > Uniform > Akamai > Settings.
- Tick the checkbox Clear Akamai cache on publish.
- Save the item.
note
For more information on how automated purge works, see the Akamai reference section.
note
To configure purge request timeout use Uniform.PurgeCache.Akamai.RequestTimeout, the default value is 60 seconds.
Configure media handling#
Sitecore is responsible for generating URLs for images and other media files stored in the Sitecore Media Library. The specific approach you must take to ensure media files are handled properly depends on your site.
The following questions should be considered when developing a plan for handling media files:
- After an image is added, is it every updated?
- Are images used in multiple sites?
- Are images added to rich-text fields? If so, how are they added?
- Are images used in fields on items that represent pages?
- Are images used in fields on items that are connected to pages using renderings?
- Do you have components that load images from folders? If so, how is this implemented (e.g. the folder is a data source, or the component is hard-coded to reference a specific folder)?
- Are images used outside of Sitecore? If so, how are they used?
caution
The options below are not recommendations. The specific approach you take to handling images should be based on your site's requirements. The questions above can help you understand what those requirements are.
Version-specific URLs#
If images are cached in Akamai, when an image is updated, the image in the cache is no longer valid. Determining the URL for the image and then purging that URL from the cache is one approach. Another option is to generate version-specific URLs for an image so that when an image is updated, it gets a unique URL.
In this case, when a new image version is available, any page that links to the image will have new URLs. This means the URLs for the pages that use the image must be purged from the cache, not the URL for the image itself.
Enabling version-specific URLs#
Sitecore supports this functionality. In a Sitecore config file, add the following settings:
<setting name="Media.AlwaysAppendRevision" value="true" /><setting name="Media.Cacheability" value="Public" />note
For more information on these settings, see the Sitecore product documentation.