How to configure Media Sync
This guide is going to use Azure Blob Storage as the target provider. As of version 4, "Uniform for Sitecore" officially supports Azure Blob Storage and Tencent Cloud Object Storage (COS) as targets. That being said, you can add a new provider as an extension to the Connector. Contact support if you need to make it work on a platform that we do not support at the moment.
Introduction#
The Media Sync capability allows decoupling the storage and serving of the Sitecore Media Library items from a Sitecore Content Delivery server.
When activated, the Media Sync capability takes all the media items (blobs) from a configured Media Scope and deploys it to the target blob storage container.
Media Scope#
Media Scope describes what media items are going to be included in the scope of the Media Sync process.
Media Scope based on Media Folders#
For this scope you configure particular folders from your media library to be deployed. The logic that selects media from the folders can be full or incremental (default)
- full: when all the media items in specified folders will be recursively included in the scope
- incremental: when all the media items in specified folders will be recursively included in the scope based on their updated timestamp. Media Sync will only include media items changed since the previous successful Media Sync operation.
To learn how to configure Media Folders, see this section.
The role of Media Item Revision#
Independently of the Media Scope type (folders-based or related), Media Sync will use the revision field on the media items to do comparison before upload takes place. The revision field from the Media Item is persisted along with the corresponding blob metadata in target storage. This means that the actual upload of the blob will be skipped if the revision hasn't been changed.
How is Media Sync triggered?#
- From GUI during Initial Content Sync, see this chapter for more details.
- Immediately after publish (this operation blocks the publishing thread) right before the site deployment action is invoked.
Media Scope Configuration#
It is the type of scope that is enabled by default, you only need to specify media folders that are going to be synced during Media Sync. You can specify them by items or config files.
Option 1: using Sitecore items#
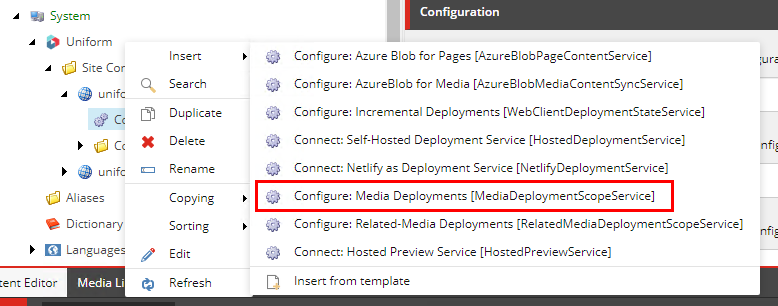
- Locate your site configuration in Content Editor under /sitecore/system/Uniform/SiteConfigurations. Right click and select
Configure: Media Deployments [MediaDeploymentScopeService]from insert options:
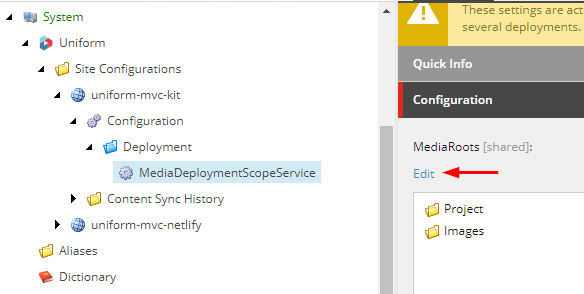
- For the created
MediaDeploymentScopeServiceitem, select media folders in MediaRoots field. These media folders will be uploaded to Azure storage during Media Sync and scanned for changes during subsequent syncs.
Option 2: using config files#
To configure specific media library root for the Media Scope through config files, add a config file with the following content to your App_Config/Include/zzz_sitename folder.
Notice the mediaLibraryPath setting in the file, in the example below it is set up to include the whole Media Library:
<configuration xmlns:patch="http://www.sitecore.net/xmlconfig/" xmlns:set="http://www.sitecore.net/xmlconfig/set/"> <sitecore> <uniform> <siteConfigurations> <siteConfiguration name="[site-configuration-name]"> <deployment> <mediaDeploymentScopeService ref="uniform/services/mediaDeploymentScopeService"> <mediaRoots hint="list:AddMediaRoot"> <mediaLibraryPath>/sitecore/media library</mediaLibraryPath> </mediaRoots> </mediaDeploymentScopeService> </deployment> </siteConfiguration> </siteConfigurations> </uniform> </sitecore></configuration>For your use case, you may want to only include specific folders for a given Site Configuration.
You can also specify several folders, as long as they are located in /sitecore/media library
<mediaRoots hint="list:AddMediaRoot"> <my-site>/sitecore/media library/project/my-site</my-site> <shared>/sitecore/media library/shared</shared></mediaRoots>Azure Blob Configuration#
Step 1. Target storage container strategy#
There are options to configure the desired behavior for the Content Sync process to upload the blobs to:
- you can use the same Azure Blob Storage as you use for your static site deploy process
- you can also use another container within the same Azure Blob Storage Account
- you can use completely different storage account.
Depending on your choice, there will be a slight difference in configuration.
Step 2. Configure connection to the storage account#
In this case, you are going to reuse Azure Blob Storage for both media and rest of the static content. We consider it a default option that works for the most solutions.
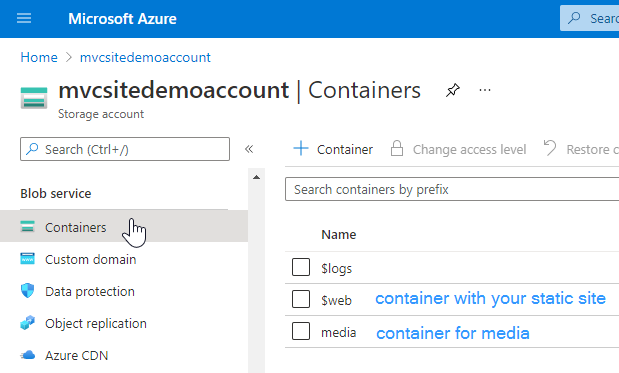
Step 2.1 Get connection details#
For further configuration, we'll need container name from Container menu option, connection string from Access Keys menu option, and Primary endpoint from Static website menu option. They'll look approximately like this:
container name: your_container_nameconnection string: DefaultEndpointsProtocol=https;AccountName=mvcsitedemoaccount;AccountKey=xndvf_some_letters_and_numbers_Wia6CA==;EndpointSuffix=core.windows.netprimary endpoint: https://mvcsitedemoaccount.z6.web.core.windows.net/Option 1. Same container in the same Azure Storage.
Then you already have all these values and will just need to copy them from corresponding menu options in Azure Portal. In this case your_container_name will most of all be $web
Option 2. Different container in the same Azure Storage.
If you want to store media in another container, you first will add a container to your existing Azure Storage account. Let's name it media :
Make sure to update access permissions for this container following Step 1.2.2 from this guide.
In this case, your container_name will be media.
Option 3. Different Azure Storage
First, configure Azure Storage account and get connection details from it. This can be done following Step 1 and Step 2.1 from this guide.
Step 2.2 Configure connection to a storage#
If you are using own website already, add this config to your website configs folder:
<configuration xmlns:set="http://www.sitecore.net/xmlconfig/set/"> <sitecore> <uniform> <siteConfigurations> <siteConfiguration name="uniform-mvc-kit"> <contentSync> <mediaContentSyncService set:ref="uniform/services/azureBlobMediaContentSyncService"> <ContainerName>container_name</ContainerName> <ConnectionString>connection_string</ConnectionString> </mediaContentSyncService> </contentSync> </siteConfiguration> </siteConfigurations> </uniform> <settings> <!-- this is required because file URLs of Azure Blob Containers are case-sensitive --> <setting name="Media.LowercaseUrls" set:value="true" /> </settings> </sitecore></configuration>Replace container_name and connection_string with corresponding pieces from previous step (Get connection details).
If you are using one of our starter kits, instead of adding file above, just enable App_Config\Include\zzz_[starter-kit-name]\[starter-kit-name].Uniform.ContentSync.Media.AzureBlob.config file by removing .disabled extension and update ContainerName and ConnectionString in this file.
Step 3. Configure Media settings#
The following two Sitecore settings need to be adjusted depending on which option of storage you use.
Media.AlwaysIncludeServerUrlMedia.MediaLinkServerUrl
Option 1. If you use the same container as for the static site files
When you are using same container in the same Azure storage for media items, as you use for your static website, you don't need to include server URL to media links. Why is that? When we deploy both media and static to the container, files in the storage are going to look like this:
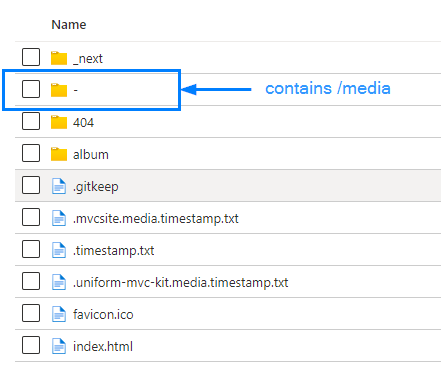
<setting name="Media.MediaLinkServerUrl" set:value="" />- make sure it is set to an empty string. When we don't set upMediaLinkServerUrl, our media links in HTML will be relative, e.g./-/media/project/uniform-mvc-kit/bird.ashx. So when later we access this media file from our static site, paths likehttps://[storage-account-name].z6.web.core.windows.net/-/media/project/uniform-mvc-kit/bird.ashxwill point to the correct file.<setting name="Media.AlwaysIncludeServerUrl" set:value="false" />Make sure that you have
Media.AlwaysIncludeServerUrlthe Sitecore setting set tofalseIf you had it enabled before, set it to false explicitly or just comment out the setting.
If you are using one of our starter kits, you need to disable App_Config\Include\zzz_[starter-kit-name]\[starter-kit-name].Uniform.Deployment.Media.Sitecore.config by adding .disabled extension
Option 2 and Option 3
If you use a different container within the same Azure Storage or using a different Azure Storage account.
When you are using different container in the same Azure Storage or a completely different Azure Storage, media files won't be relative to your static site anymore. Therefore, relative media paths like /-/media/project/uniform-mvc-kit/bird.ashx won't work anymore. Now we need to make Sitecore to include our new media container URLs to media links.
If you are using own website already, add this config to your website configs folder:
<configuration xmlns:env="http://www.sitecore.net/xmlconfig/env/" xmlns:set="http://www.sitecore.net/xmlconfig/set/"> <sitecore> <settings> <setting name="Media.AlwaysIncludeServerUrl" set:value="true" /> <setting name="Media.MediaLinkServerUrl" set:value="https://[storage-account-name].blob.core.windows.net/container_name" /> </settings> </sitecore></configuration>Make sure that Media.MediaLinkServerUrl contains proper storage account name and container name.
If you are using one of our starter kits, instead of adding file above, just enable App_Config\Include\zzz_[starter-kit-name]\[starter-kit-name].Uniform.Deployment.Media.Sitecore.config file by removing .disabled extension and update these settings inside of it.
Step 4. Initial deploy of the media#
Now that we are done with all the configuration steps, let's try to check if our media is actually being deployed. There are two options of doing it.
Option 1: using Initial Content Sync GUI#
Because Media Sync is considered a part of Content Sync process, you can use Initial Content Sync functionality to deploy the media. This is a recommended process after you have configured the feature, as it is a more visual way to sync all the media included in scope.
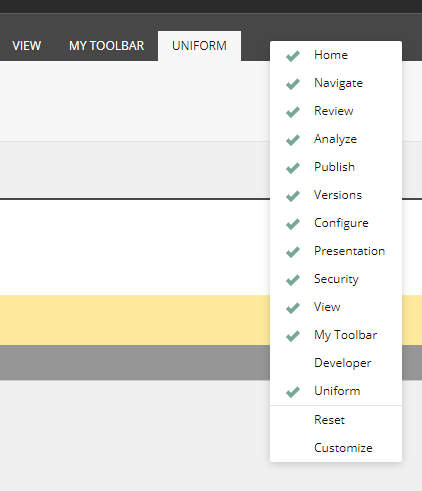
Make sure you've enabled Uniform toolbar in Sitecore Content Editor's ribbon:
Find your Site Configuration item in master database under System/Uniform/Site Configurations item in the content tree:

If you haven't configured any Site Configuration yet, you can follow Defining a Site Configuration using Sitecore items instructions.
- Using the Uniform tab on the ribbon, click on the Initial Content Sync button:

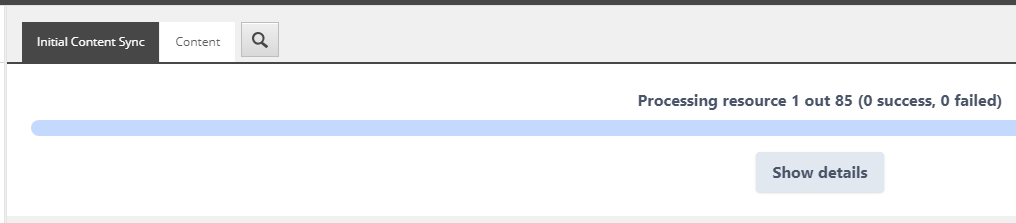
- This will start the Initial Content Sync process, and you should be able to see messages like this:
- After Content Sync finishes successfully, you should see the similar info, if you press on Show details:
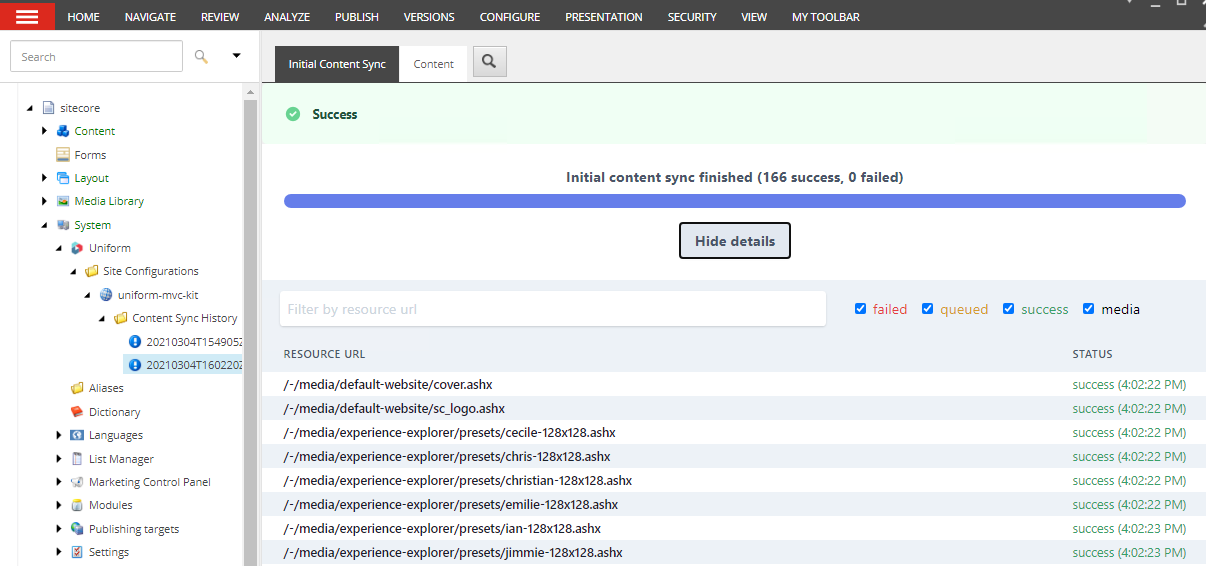
Note, you can also re-run Initial Content Sync at any time. The Media Sync part of this process will compare all the media from your configured Media Scope with what you have in Azure blob storage, and if there are any changed media items, those will be re-uploaded.
Option 2: from the publishing pipeline#
This mode is what is used during normal operation of the Sitecore Connector on a Sitecore Content Management server.
- If you are using a self-hosted Deployment Service configuration, first, make sure your Build Service is up (start it with
npm run start), as the Publishing handler will verify that the Uniform service baked inside the Next app is operational. The app runs onhttps://localhost:3000by default. If you are using Netlify, you can skip this step. - Make any content change and smart publish any item. This will trigger a check if media has been deployed already and if not, media will be deployed to the Azure container that we've configured in Step 2.
If you observe Sitecore logs during publishing, you should be able to see messages like this:
1588 16:02:24 INFO == UNIFORM == Writing media to blob: -/media/project/uniform-mvc-kit/cherries.ashx, mime: image/jpeg, rev: 59680784-31a8-4b09-a3b5-9799ed3d1bca7696 16:02:24 INFO == UNIFORM == Writing media to blob: -/media/system/email/thumbnails/image-focus.ashx, mime: image/png, rev: b167f727-63e6-4541-b981-611bba79c9811588 16:02:24 INFO == UNIFORM == Writing media to blob: -/media/project/uniform-mvc-kit/lanterns.ashx, mime: image/jpeg, rev: e2abe484-1364-4f59-97a9-b6f585db4626These messages indicate that the Media Sync is configured correctly.
Also, the Sitecore Publishing wizard will display a quick summary of the Media Sync operation on the last step within the logs textbox.
Top tip#
Azure Storage Explorer tool is a great way to inspect your Azure Blob Storage container and perform various operations such as bulk delete.

Gotchas#
- Media items with duplicate names at the same level of the content tree will be re-synced every time. There is no way to detect which media item should be synced, so this is currently a limitation.
We recommend configuring Sitecore to prevent duplicate media and content items from being created at the same level, in order to prevent this from happening.
Content Delivery Network for Media#
Now you have successfully configured Azure Blob Storage as the new origin for media files. This means that Sitecore Content Delivery servers are not involved in the process of serving media requests at all. This is an important step in the decoupling of dynamic functionality from Sitecore CD servers.
That being said, serving media assets from a Storage Account directly is not the end of the story. In order to achieve global distribution of your media assets and optimizations (both runtime resizing/compression/smart cropping and device specific optimization), we highly recommend adding a capable CDN in front of the Azure Blob Storage. Ideally, a CDN that will allow runtime image optimization and transformation. Having such CDN setup will also increase Google Lighthouse score dramatically for your static website and will help it to become even faster. There are many options to configure such CDNs, depending on your current provider and budget, just to name a few:
- Akamai Image Manager
- Cloudinary
- Cloudflare
- Piio (allows to also do automatic lazy loading)
- imgix
- Cloudimage
At the time of writing this article, Azure CDN doesn't provide image optimization capabilties.
Netlify Large Media feature is not compatible with Azure Blob Storage approach since it requires the media files to be committed into git.
Example of media optimization with Cloudinary#
Any of these CDNs will work with Media Sync. Let's take one of them as an example. Let's configure Cloudinary's CDN in front of our Azure Blob Storage. After you've registered with Cloudinary and got your account, the easiest way to get images fetched into Cloudinary CDN is to use Auto-fetch, so that your media urls should become:
https://res.cloudinary.com/[cloudinary_cloud_name]/image/fetch/https://[storage-account-name].z6.web.core.windows.net/-/media/project/uniform-mvc-kit/bird.ashxTo achieve this:
- set the value of the setting
Media.AlwaysIncludeServerUrltotrue - set the value of the
Media.MediaLinkServerUrlsetting to the Cloudinary URL.
<configuration xmlns:env="http://www.sitecore.net/xmlconfig/env/" xmlns:set="http://www.sitecore.net/xmlconfig/set/"> <sitecore> <settings> <setting name="Media.AlwaysIncludeServerUrl" set:value="true" /> <setting name="Media.MediaLinkServerUrl" set:value="https://res.cloudinary.com/[cloudinary_cloud_name]/image/fetch/https://[storage-account-name].z6.web.core.windows.net" /> </settings> </sitecore></configuration>After this change is made, trigger static site export again. The easiest will be to run npm run export (or npm run export:esi) from your NextJs app.
The new media URLs will now be prepended by Cloudinary fetch api URLs and therefore will automatically be uploaded and served from Cloudinary.