How to deploy to Netlify
Introduction#
Netlify is the first platform that is centered around Jamstack. It is not only a "Content Delivery Network (CDN)" but it is also the new origin for all your static files and a place to run your build/export jobs. There are many cool features and the main differentiators here in contrast to the self-hosted option are:
- Netlify runs the application build for you, and can support fast parallel builds on premium tiers.
- There is no need for blob storage and CDN in front of it - Netlify encapsulates both into a single layer, therefore simplifying the delivery stack.
- Netlify manages cache invalidation automatically and it is instant.
- Netlify comes with a powerful URL redirect/rewrite mechanism that works at the edge, which is quite handy in scenarios with existing / legacy applications.
- Platform to deploy edge functions - to facilitate the API proxying scenarios or build your own serverless APIs.
- Edge-side forms - ability to process submitted form data on Netlify edge therefore minimizing the use cases for a Sitecore Content Delivery server (if Sitecore Forms is used).
- Netlify Edge Handlers in Beta - allowing to execute arbitrary code to modify the response before it is sent to the visitor.
Pre-requisites#
One of the relevant "Getting Started" tutorials is complete and you have a functional app that connects to Uniform APIs and able to run static export locally.
A Netlify account - you can start for free at Netlify.com.
Your Sitecore instance that hosts Uniform APIs needs to be available from outside, so the Netlify build worker can establish HTTP connection with it and fetch content.
If that is problematic, consider two options:
- Setup an ngrok tunnel (it's ok for development but not recommended for production)
It's easy to expose your local Sitecore instance with ngrok. In this case your
UNIFORM_API_URLwill be something likehttps://c4a33d659e79.ngrok.io/ - Configure Content Sync This allows Uniform Connector to sync the Uniform API output into Azure Blob Storage account, which can be used as the origin instead of the Sitecore instance.
- Setup an ngrok tunnel (it's ok for development but not recommended for production)
It's easy to expose your local Sitecore instance with ngrok. In this case your
Step 1. Configure Netlify Deploy#
Log into Netlify account.
Create a new token via
User Settings→Applications→Personal Access Tokens,New access token.Clone one of the starter kits from our GitHub into your own repo.
Netlify supports different version control systems, so use the one that makes sense to you.
Go back to your Netlify account, click New site from git and specify this repository as the source.
You may need to connect your Github account here if you have never done it before.
In Basic build settings, make sure to set your Build command to
npm run exportand Publish directory toout/: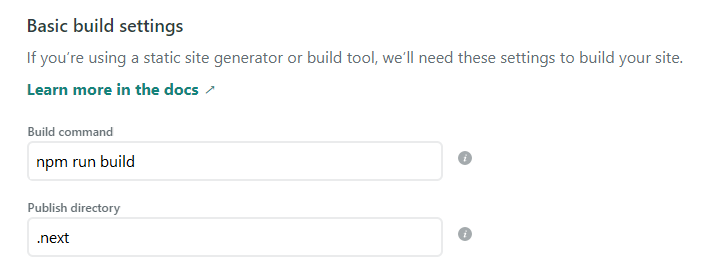
You can always change these settings in Settings → Build & deploy → Continuous Deployment.
Now let's configure the environment variables.
On the same page, click on
Show advancedand add next environment variables:
The minimal set of the env vars depends on the current state of your app and usually is. Consult your current state of the
.envfile, all these need to go here as well:NPM_TOKEN- this allows the Netlify build to download the@uniformdevprivate packages. Your.npmrcfile should have this line in order for this to work://registry.npmjs.org/:_authToken=${NPM_TOKEN}NPM_FLAGS=--forceUNIFORM_API_URL=https://your-sitecore-endpoint serving Uniform APIsUNIFORM_API_TOKEN=whatver value you have in Uniform.API.Token settingUNIFORM_API_SITENAME= uniform-mvc-kit ****(the name of your website in Uniform's Site Configuration, same that you use in your Next.js app for connection to Sitecore). In starter kits this value is set in defaultuniform.config.jsfile so you may not need it.
Instead of specifying these values in the Netlify dashboard, you can always switch to the netlify.toml file instead, learn more here.
What is happening behind the scenes?
UNIFORM_API_URL is needed for exporting process. During build events on Netlify, npm run export will be triggered for our Next.js app deployed to Netlify. To be able to export the website statically, Next.js app will need to get the output Uniform Connector APIs (e.g. map.json and page.json), because these services will provide the static site generation process with the required page content.
If you forget to set environment variables during site creation process in Netlify, later you can add these settings in Site Settings → Build & Deploy → Environment.
Step 2: Trigger deployment manually#
First, let's ensure both build and deployment work if we trigger it manually.
Open Netlify Dashboard, go to Deploys → Trigger Deploy button.
When deploy runs through, you should be able to preview your site live:
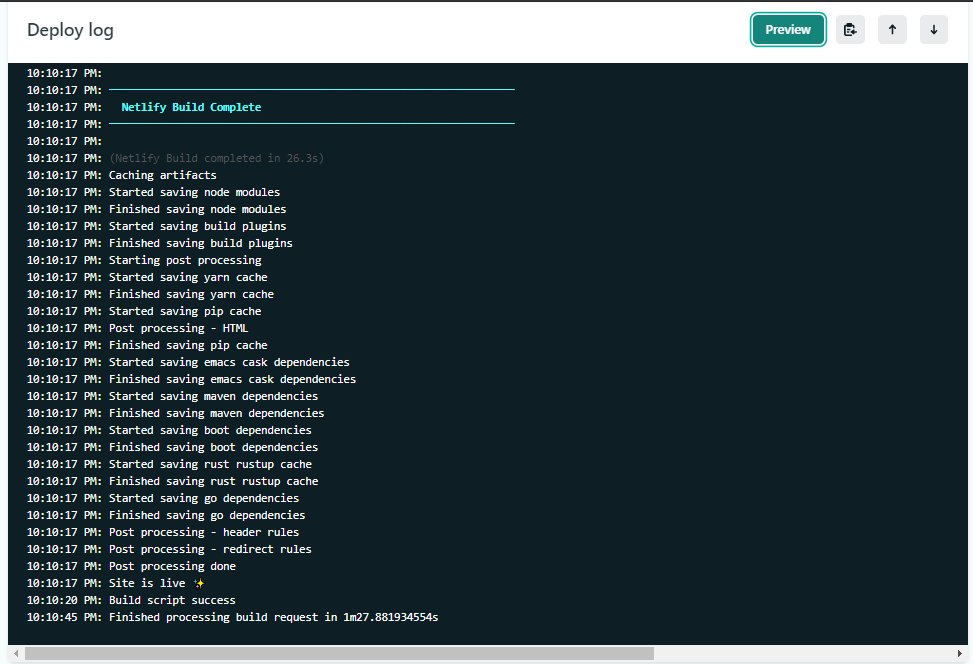
Congrats! 🎉 now you can run static deploys of your Sitecore site through Netlify! Now let's configure this process to trigger automatically on Sitecore Publishing.
Step 3. Configure Uniform Connector to trigger Netlify deploys#
Step 3.1: Configure your site for Netlify target#
If you have [SiteName].Uniform.Deployment.Hosted.config enabled in App Config\Include\zzz_[SiteName], disable it - we are now going to use Netlify deployment service instead of the self-hosted one.
In App Config\Include\zzz_[SiteName] folder find [SiteName].Uniform.Deployment.Netlify.config file and enable it. In this config file, you'll need to fill two settings: ExternalSiteId and NetlifyAccessToken:
<deployment> <deploymentService ref="uniform/services/netlifyDeploymentService"> <ExternalSiteId>netlify-external-site-id</ExternalSiteId> <NetlifyAccessToken>your-netlify-PAT</NetlifyAccessToken> <!-- Experimental feature that prevents checking netlify build status and blocking Sitecore publish--> <FireAndForget>false</FireAndForget> </deploymentService> </deployment>ExternalSiteIdis API ID that can be found in your Site settings → Site details: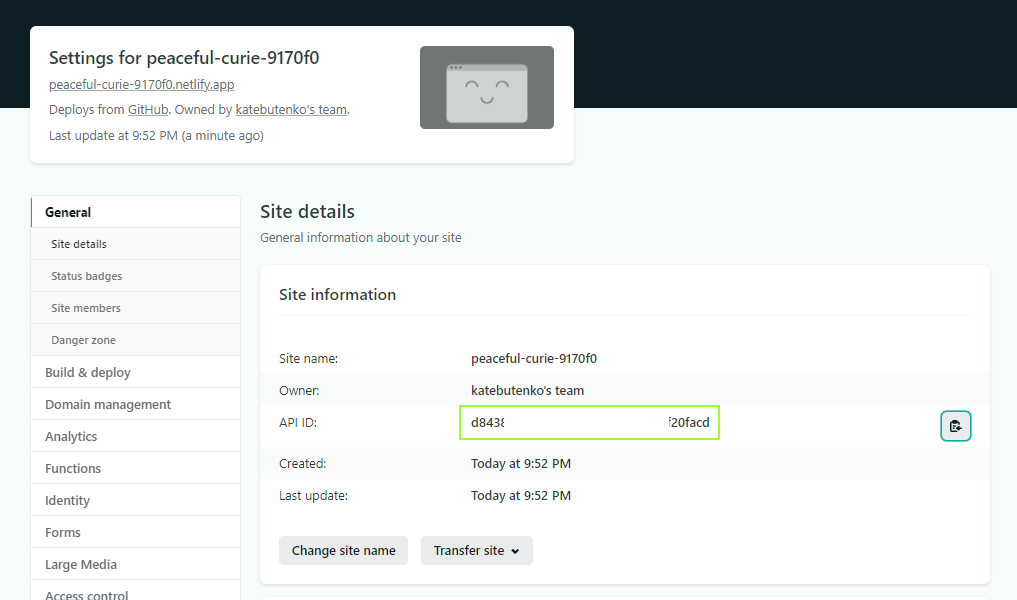
NetlifyAccessTokenis a token you've created in Step 1.Alternative, global way to setting up the
NetlifyAccessToken, you can define it in a Sitecore config setting calledUniform.Deploy.NetlifyAccessToken. The "netlifyDeploymentService" will use it as a fallback if noNetlifyAccessTokenis specified within a given instance of the service.<sitecore> <settings> <setting name="Uniform.Deploy.NetlifyAccessToken" value="your-netlify-PAT" /> </settings> </sitecore>
Step 3.2: Run Sitecore publishing#
Now that the site is configured, let's run Sitecore publishing!
You don't need to republish the whole website, publishing just one item underneath your site in the content tree is sufficient.
Note, that the publishing operation will run a bit longer than usual in this case, because the Sitecore Publishing dialog will wait till the Netlify build completes.
Successful completion of the publishing indicates successful deployment. You can also observe the build being triggered and finished in Netlify itself, while the publishing is running!

Optional step 3.3: enable the "Fire and forget"#
In case if your business users report that the publishing dialog hangs in the Processing state too long, consider changing the FireAndForget setting in [SiteName].Uniform.Deployment.Netlify.config file in App Config\Include\zzz_[SiteName] folder:
<FireAndForget>true</FireAndForget>Important to note, that this is an experimental feature that you need to be careful with. "Fire and forget" means that Sitecore will just trigger the export process on Netlify, but the publishing dialog won't wait till the end of the whole build process and just report that the publishing finished successfully. However, if exporting fails on Netlify for some reason you won't know about the issue unless you check Netlify itself. Therefore, we recommend setting up build notifications in Netlify, so the business users who publish the site are notified when the deployment goes live.
Congrats! You have successfully wired up the Netlify platform for your Sitecore site together with Uniform. Now every content change will trigger site deployment in Netlify and you can enjoy the benefits of a fully decoupled site served from a global CDN: speed, security, resiliency, scale.
What else you can do?#
Try instant rollback after a publish - open the deployment history in Netify and preview a previous deployment, you can rollback with a single click!
Trigger code change, seeing how git commit hooks initiate build and deployment of your Netlify site.
Repeat this process for another Sitecore site, if you have more than one.
Netlify makes it easy to configure many sites and achieve full physical isolation.
Configure Preview mode on Netlify following this guide.
Check out Netlify Functions to run serverless functions that can compliment your app.