How to host static export service in Azure DevOps
The Uniform deployment process is managed by the Uniform service. Making sure the Uniform service is available to handle deployments and that the service is up-to-date are important tasks when using Uniform.
This section guides you through the process of incorporating the Uniform service into a CI/CD process using Azure DevOps.
Prerequisites#
This section assumes you have completed the following:
- Section How to deploy to Azure blob storage.
- Section How to configure media sync to Azure blob storage.
- Docker installed on your local machine.
- Azure CLI installed on your local machine.
- Sitecore server that can be accessed from the internet.
Create Azure web app#
Configure Azure CLI#
If you already have the Azure Devops extension for Azure CLI installed and configured, you can skip this section.
Log into Azure Portal.
In the list of all services, select Azure DevOps organizations.
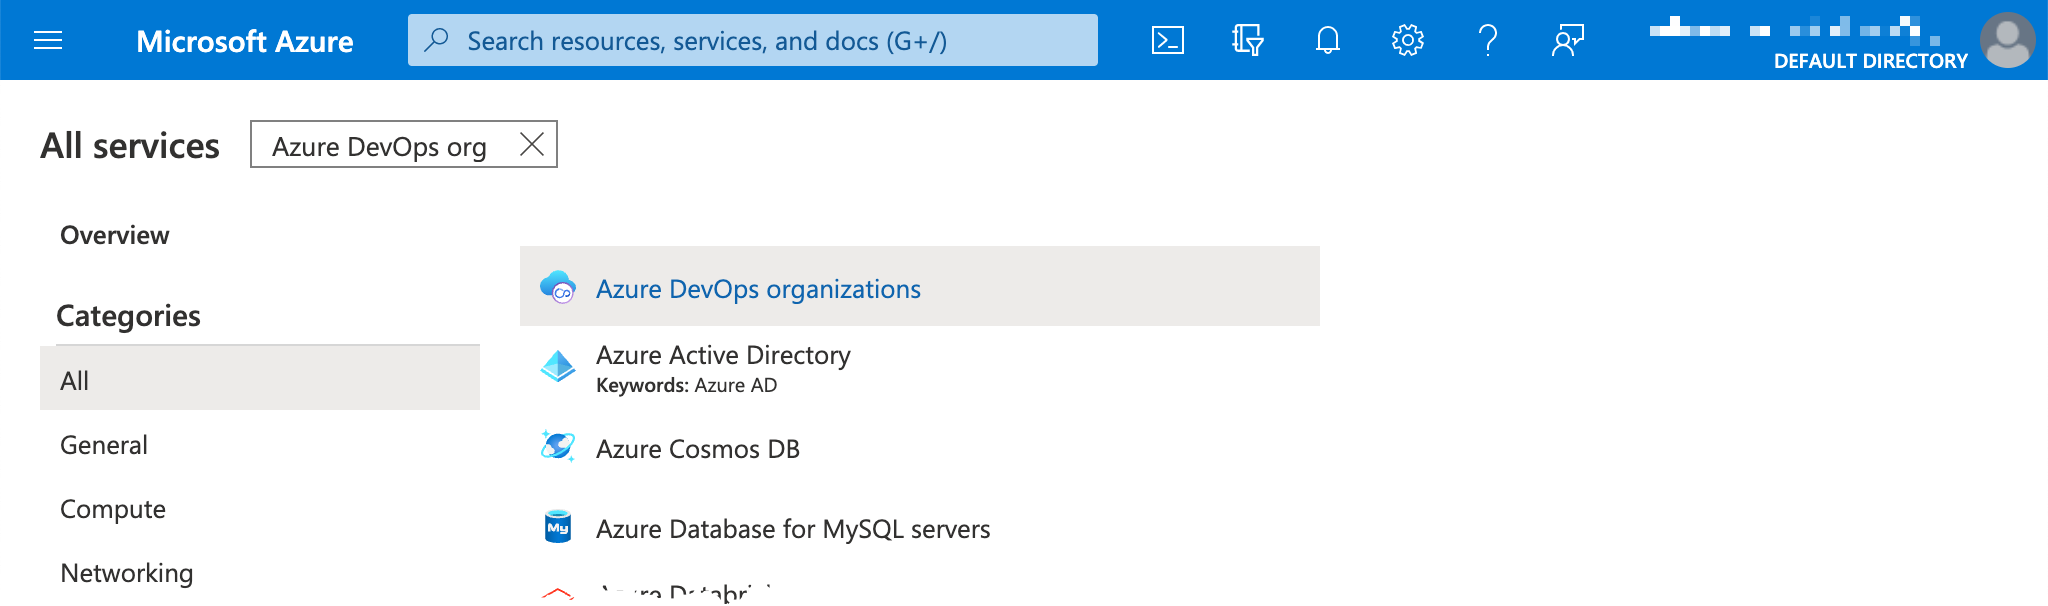
At the bottom of the page, click the link My Azure DevOps Organizations.
Your organizations are listed. Each organization has a link. This link is the organization uri. Note the value for the organization you want to use. For example, in the screenshot below, the value is
https://dev.azure.com/enableuniform.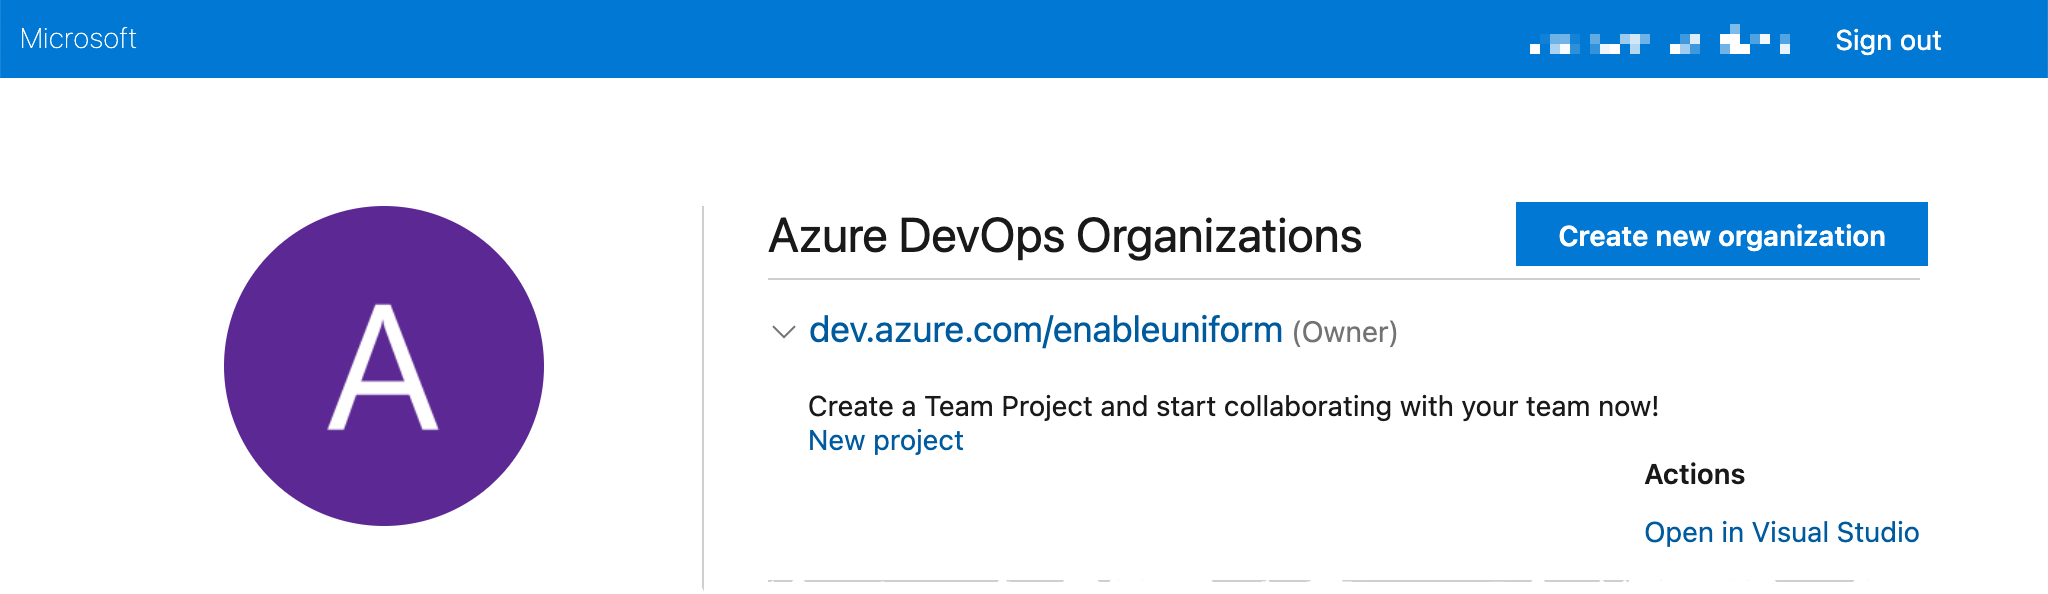
Open a terminal window (or Command Prompt or PowerShell).
Enter the following commands:
az extension add --name azure-devopsaz devops configure --defaults organization=<YOUR-ORGANZIATION-URL>
Create Azure DevOps project#
- In the terminal window, enter the following commands:
az devops project create --name uniform-serviceaz devops configure --defaults project=uniform-service - Enter the following command to get the url for the project's source code repository:
az repos list --query "[].webUrl" --output tsv - Enter the following value to clone the repository:
git clone <SOURCE-CODE-REPO-URL> - Copy the source code for your Uniform service into the root folder of the repository.
- In a text editor, open the file
.gitignore. - If either of the following file names are included in this file, remove them:
.env.npmrcimportant
In a real world scenario you should not make this change because it will cause files with private information from being included in your repo. Normally you would take the values configured in these files and set them as variables in a variable group in Azure. In order to keep these instructions as simple as positive, we use this shortcut.
- Enter the following commands to commit and push your changes to the repository:
git add --allgit commit -m "Initial commit"git push
Add AzCopy to repository#
AzCopy is a command-line utility that copies file to Azure blob storage. The deployment process generates static files and then uses AzCopy to upload those files to storage.- Download the Linux version of AzCopy.
important
You must download the Linux version because the Uniform service will run in a Linux container.
- Move the downloaded file into the root folder of your repository.
- In the terminal window, enter the following commands
(you may need to change the commands based on the
version of the file you downloaded):
npx tar -xf .\azcopy_linux_amd64_10.11.0.tar.gzmv .\azcopy_linux_amd64_10.11.0\azcopy .npx rimraf azcopy_linux_amd64_10.11.0npx rimraf azcopy_linux_amd64_10.11.0.tar.gz - In your
.envfile, set the following variable (replace the existing value if the variable is already defined):UNIFORM_PUBLISH_PROVIDER_AZUREBLOB_AZCOPY_PATH=./azcopy - Enter the following commands to commit and push your changes to the repository:
git add azcopy .envgit commit -m "Add azcopy"git push
Determine your region#
When you create Azure resources, you must specify the region where the resource is created. If you already know the name of the region you want to use, you can skip this section.
The following command can be entered in the terminal window. The will return a list of regions. The value from the column Name is the value you will use in later sections.
For a list of all available regions:
az account list-locations --query 'sort_by([], ®ionalDisplayName)' --output tableThe output will look like the following:
Name DisplayName RegionalDisplayName------------------- ------------------------ -------------------------------------southafricanorth South Africa North (Africa) South Africa Northsouthafricawest South Africa West (Africa) South Africa Westaustraliacentral Australia Central (Asia Pacific) Australia Centralaustraliacentral2 Australia Central 2 (Asia Pacific) Australia Central 2australiaeast Australia East (Asia Pacific) Australia EastFor a list of regions filtered by continent:
az account list-locations --query "sort_by([?contains(regionalDisplayName, '<YOUR-CONTINENT>')], &displayName)" --output tableThe output will look like the following:
Name DisplayName RegionalDisplayName------------------ -------------------- -----------------------------europe Europe Europefrancecentral France Central (Europe) France Centralfrancesouth France South (Europe) France Southgermanynorth Germany North (Europe) Germany Northgermanywestcentral Germany West Central (Europe) Germany West CentralCreate container registry resource#
The Uniform service is a web application that you want to run in a container. This section walks you through the process of creating an image with the Uniform service in it. After the image is created, you will create an Azure web app that runs a container based on the image.
- In the terminal window, enter the following command to create a new resource group named UniformResources:
az group create --name UniformResources --location <YOUR-REGION-NAME> - Enter the following commands to create a new container registry named UniformRegistry:
az acr create --resource-group UniformResources --name UniformRegistry --sku Basicaz acr update -n UniformRegistry --admin-enabled true - Enter the following command to get the container registry login server. You will need this value later:
az acr list --query "[?name=='UniformRegistry'].{loginServer:loginServer}" --output tsv
Build a Docker image#
In the root folder of your repository, add a file
dockerfile:FROM node:alpineARG NPM_TOKEN #azure only works with "home" directoryCOPY ["package.json", "package-lock.json", "/home/"]WORKDIR /home/ RUN echo "//registry.npmjs.org/:_authToken=$NPM_TOKEN" > .npmrc && \ npm install && \ rm -f .npmrc COPY . . ENV NODE_ENV=production RUN npm run buildEXPOSE 3000 CMD [ "node", "./server.js" ]In the root folder of your repository, add a file
docker-compose.yml:version: '3.8' services: app: ports: - 3000:3000 build: context: ./ dockerfile: dockerfile args: - NPM_TOKEN=${NPM_TOKEN} environment: - NODE_ENV=productionOpen a terminal window (or Command Prompt or PowerShell) in the root folder of your repository.
If you are running Docker on Windows, switch to "Linux containers" mode.
Enter the following command:
docker-compose up -d --buildIf you are running Docker on Windows and Sitecore is running in Docker, you must switch back to "Windows containers" mode in order to access the Sitecore server.
Open your browser to http://localhost:3000. You should see your site being served from the Linux container.
Enter the following commands to commit and push your changes to the repository:
git add .env docker-compose.yml dockerfilegit commit -m "Add docker files"git push
Push image to Azure container registry#
- In the terminal window, enter the following commands:
az loginaz acr login --name <YOUR-CONTAINER-REGISTRY-NAME> - If you are running Docker on Windows, switch to "Linux containers" mode.
- In a terminal window, enter the following command:
docker image ls - Your image name will be displayed. You will need this value in the next step. In this example the name is
uniform-service_app:REPOSITORY TAG IMAGE ID CREATED SIZE uniform-service_app latest a7e62e34fa4a 10 minutes ago 533MB - Enter the following command to tag your image. The default tag name ("latest") will be used.
docker tag <YOUR-IMAGE-NAME> <YOUR-CONTAINER-REGISTRY-LOGIN-SERVER>/<YOUR-IMAGE-NAME> - Enter the following command to push the image to the container registry:
docker push <YOUR-CONTAINER-REGISTRY-LOGIN-SERVER>/<YOUR-IMAGE-NAME> - Enter the following command to confirm the image was pushed to the registry. You should see a JSON object that describes the image.
az acr repository show --name uniformregistry --repository uniform-service_app - If you are running Docker on Windows, switch to "Windows containers" mode.
Create & configure an Azure web app#
- In the terminal window, enter the following command to create a service plan:
az appservice plan create --name UniformAppServicePlan --resource-group UniformResources --is-linux --sku B1note
The app service plan controls the runtime environment for your container. You can change the sku value to something larger in order to increase the time it takes to deploy a site. The App Service pricing page details the available skus and their costs.
- Enter the following command to create a web app:
az webapp create --name <YOUR-WEB-APP-NAME> --resource-group UniformResources --plan UniformAppServicePlan --deployment-container-image-name <YOUR-CONTAINER-REGISTRY-LOGIN-SERVER>/<YOUR-IMAGE-NAME> - Enter the following command to get the default hostname for the web app:
az webapp list --resource-group UniformResources --query "[?name=='<YOUR-WEB-APP-NAME>'].defaultHostName" --output tsv - In a browser window, open
https://<YOUR-DEFAULT-HOSTNAME>. It may take a moment for the web app to start up. You should see the same site as when you ran the Uniform service locally on port 3000.
Troubleshooting an Azure web app#
The following steps take you to where you can see the output from the Uniform service.
- Log into the Azure portal.
- Navigate to your app service.
- Open the Log stream.
Configure build process#
Now that you have the ability to start up the Uniform service in Azure, the next step is to add that as a step in your CI/CD process.
Add agent#
A build agent is responsible for running the build process. This example describes how to configure a build agent that runs on your own infrastructure (as opposed to on Azure).
The machine that runs the build agent must have the following:
- Internet connection with firewall settings configured to allow Azure DevOps to send commands to the build agent.
- Docker is installed.
tip
If you are running your build agent on a Windows machine, you must make sure that Docker is running in "Linux containers" mode. However, this will cause a problem if you are running Sitecore in Docker. Therefore, it is recommended that you not run the build agent on a machine that is running Sitecore in Docker.
note
Build agents cannot be managed through the Azure CLI. You must use the Azure DevOps site.
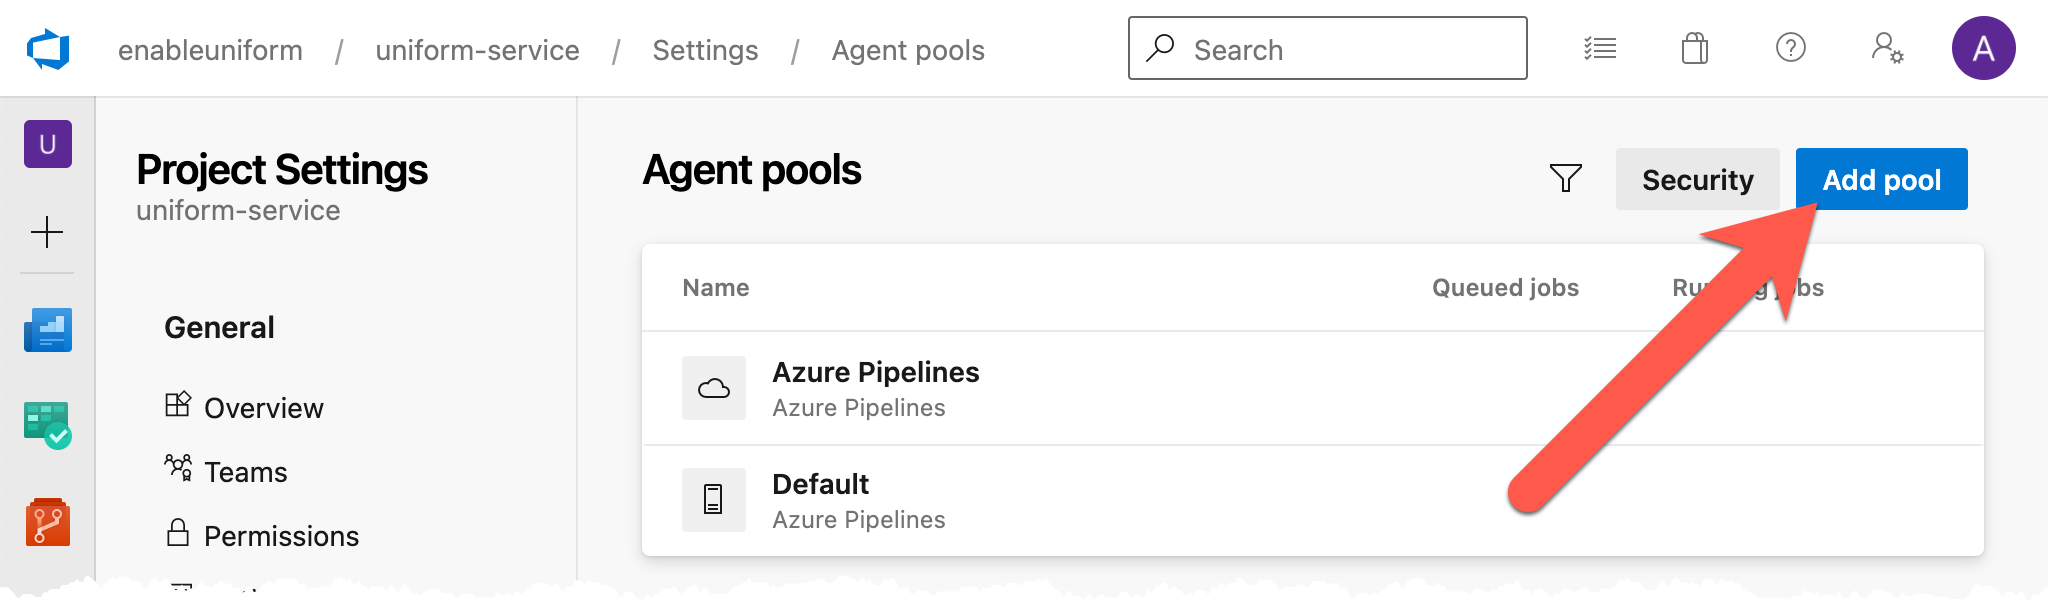
In Azure DevOps, navigate to Project settings.
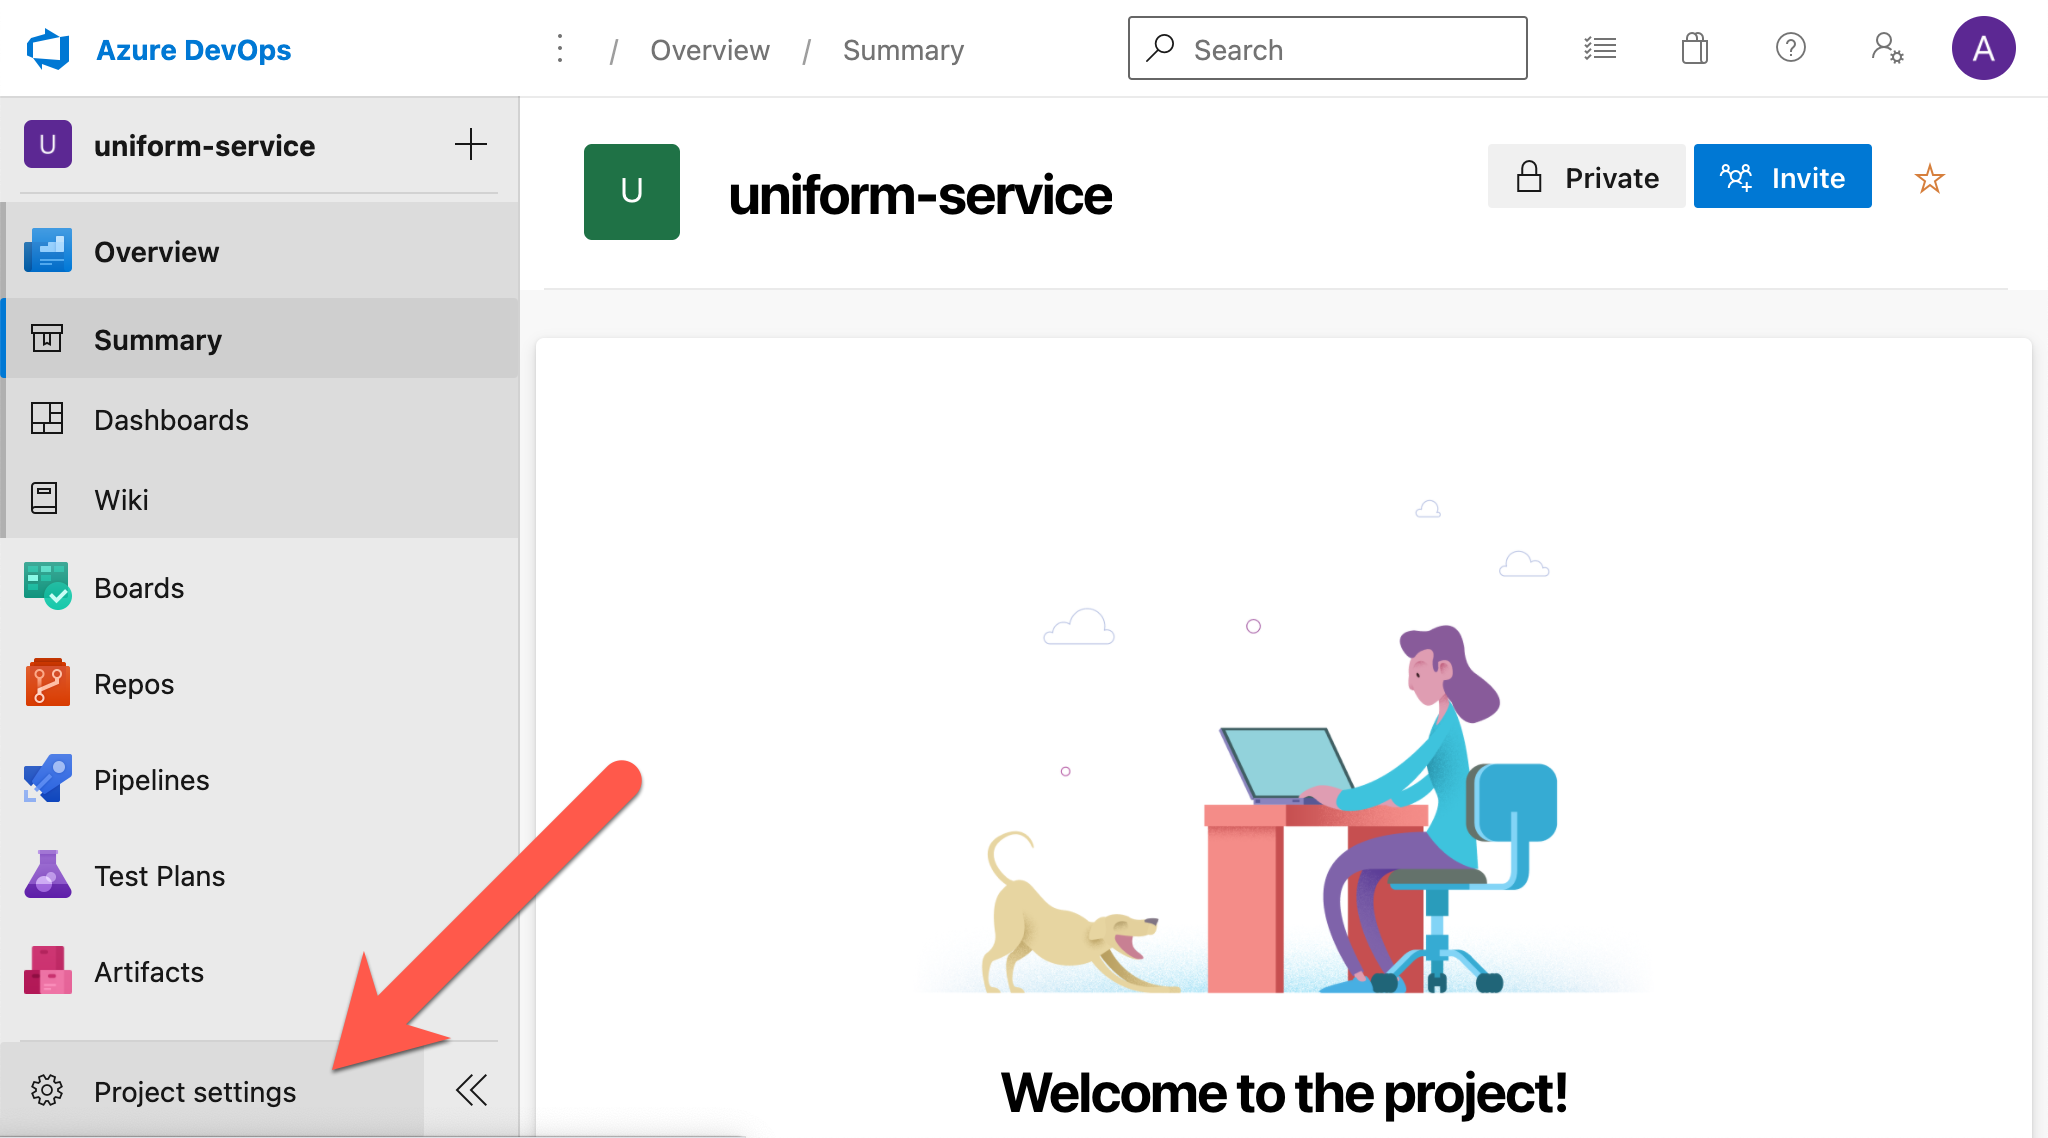
Navigate to Pipelines > Agent pools.
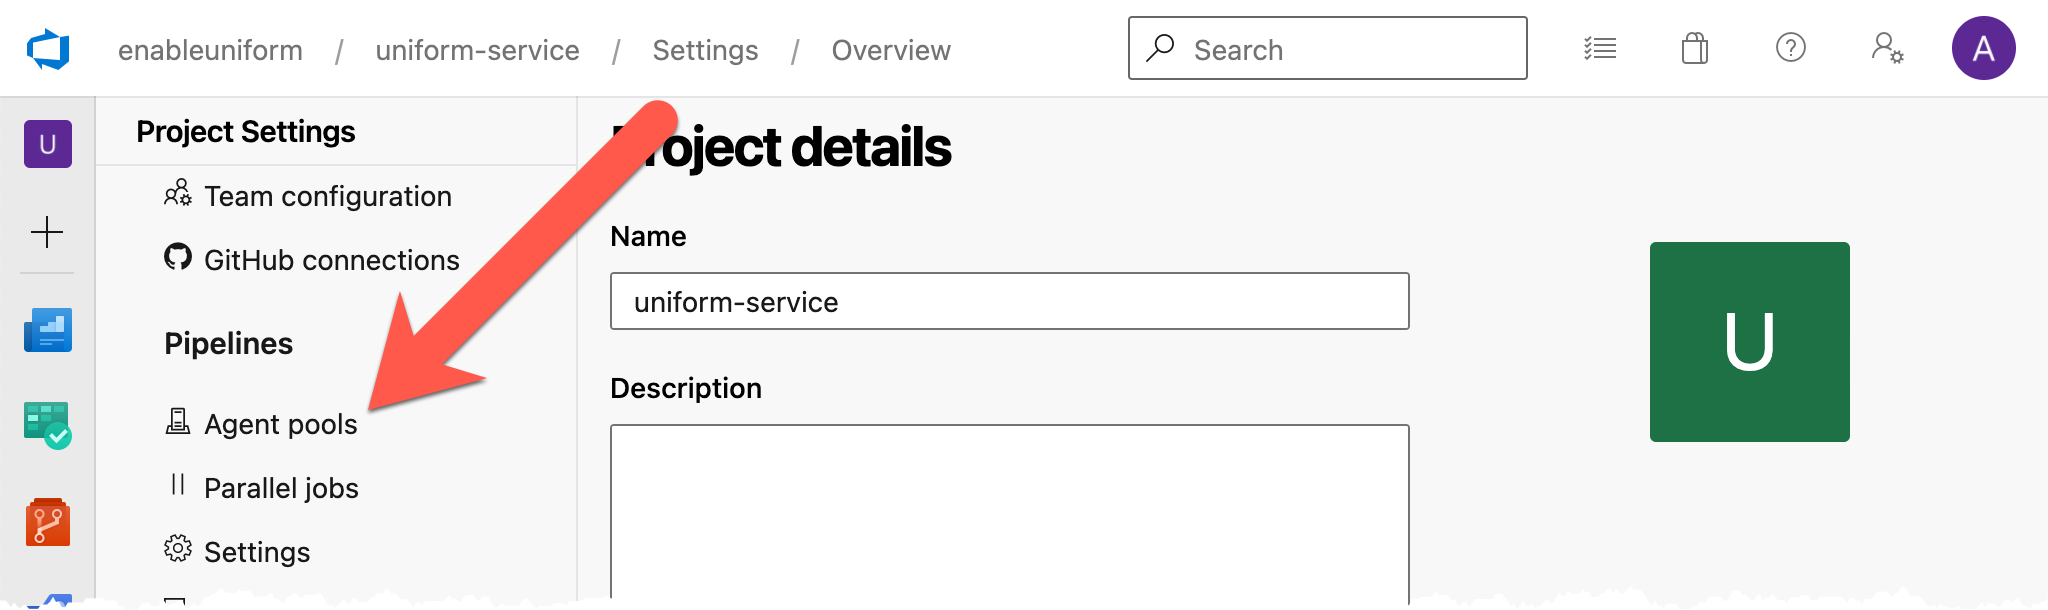
Click Add pool.
Enter the following values:
- Pool to link -
New - Pool type -
Self-hosted - Name -
<YOUR-AGENT-POOL-NAME>
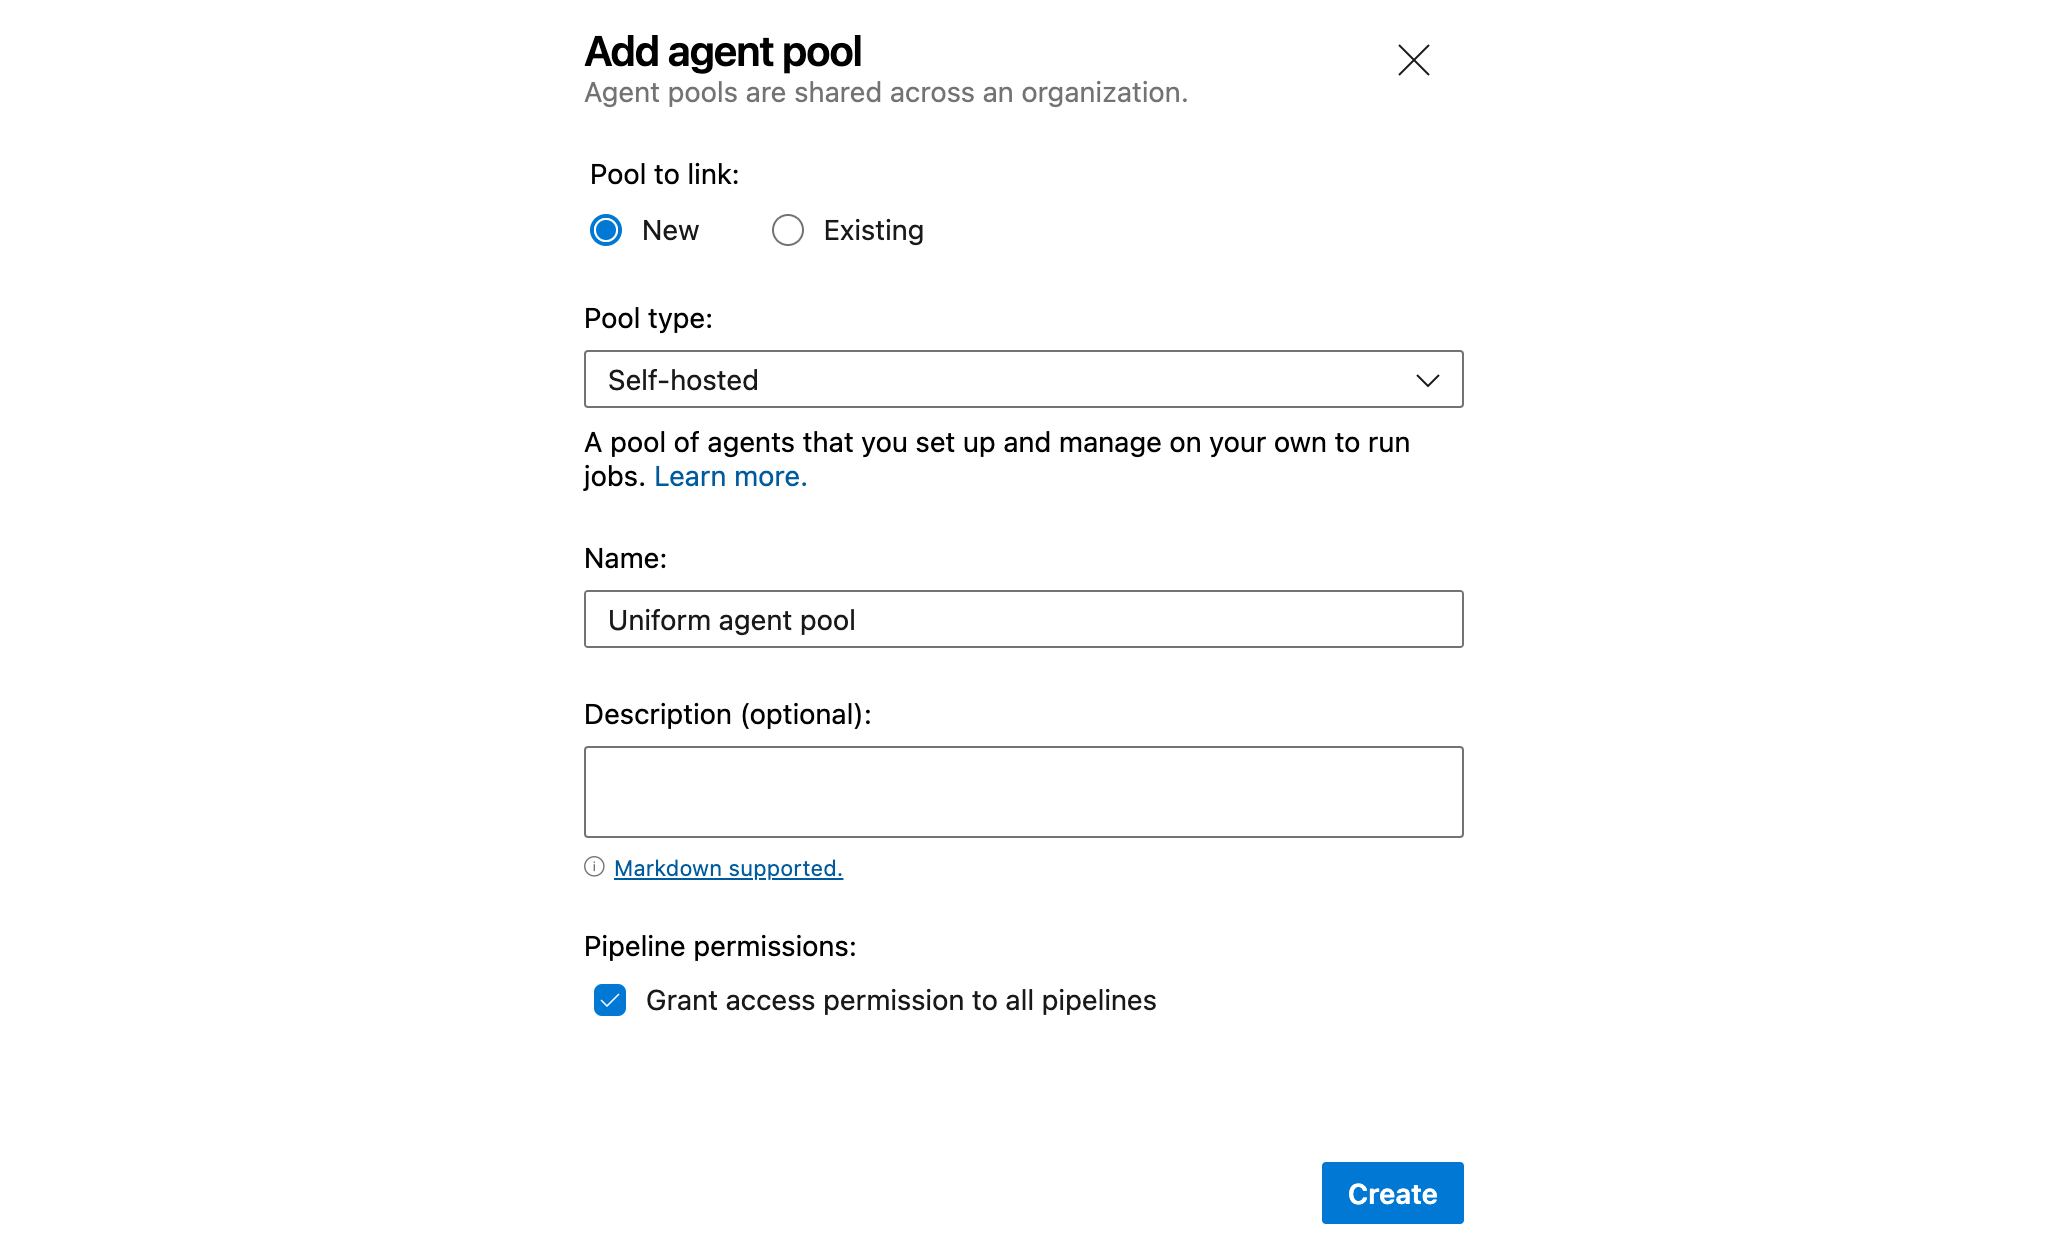
- Pool to link -
Click Create.
Click on your agent pool.
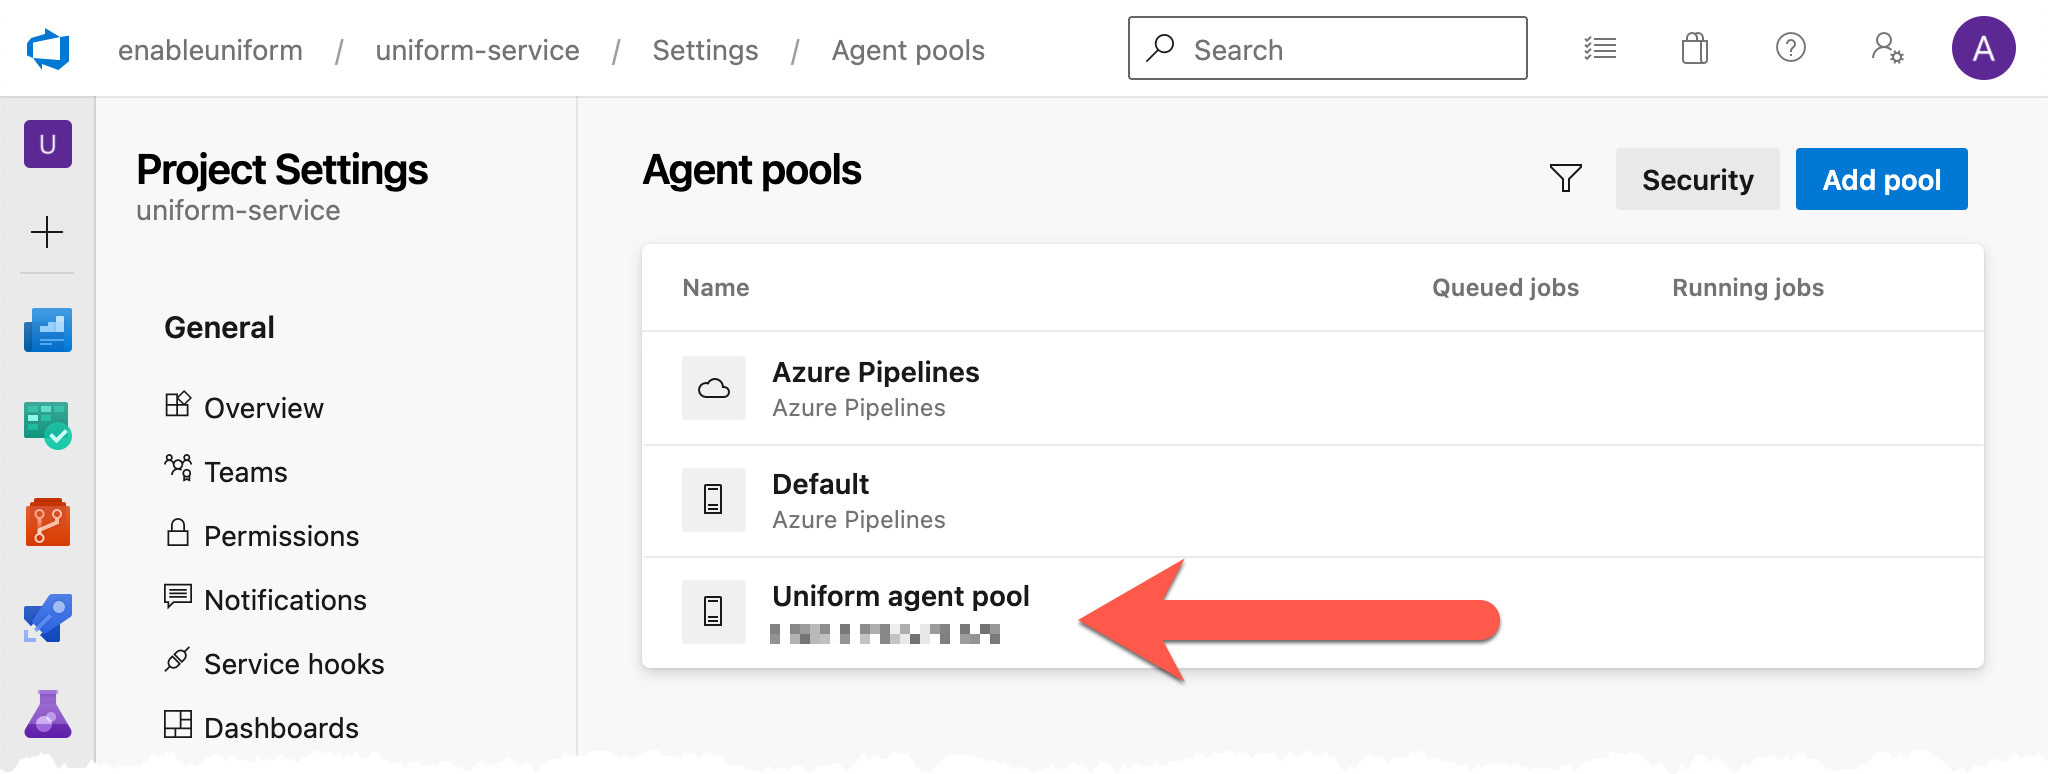
Click New agent.

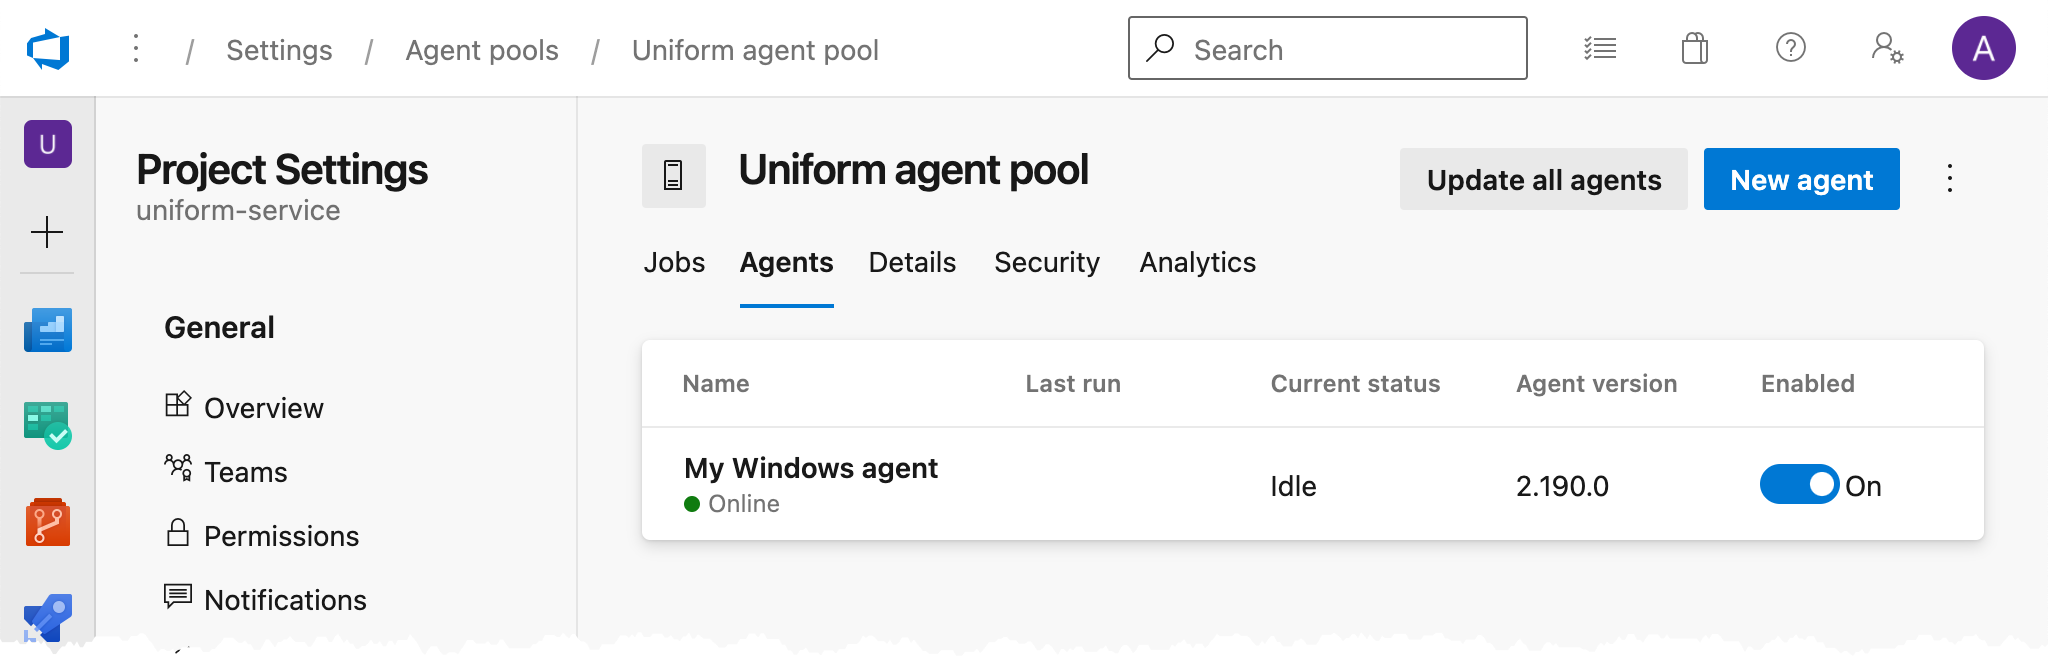
Select the operating system you plan to run the agent on and follow the instructions. Be sure to start your agent.
On the agent pool page, click Agents.
You should see your agent online.
Create Azure pipeline#
The ability to create and configure Azure pipelines using Azure CLI is currently in preview and is subject to change. Since the Azure DevOps site is more stable, these instructions use that instead of the CLI.
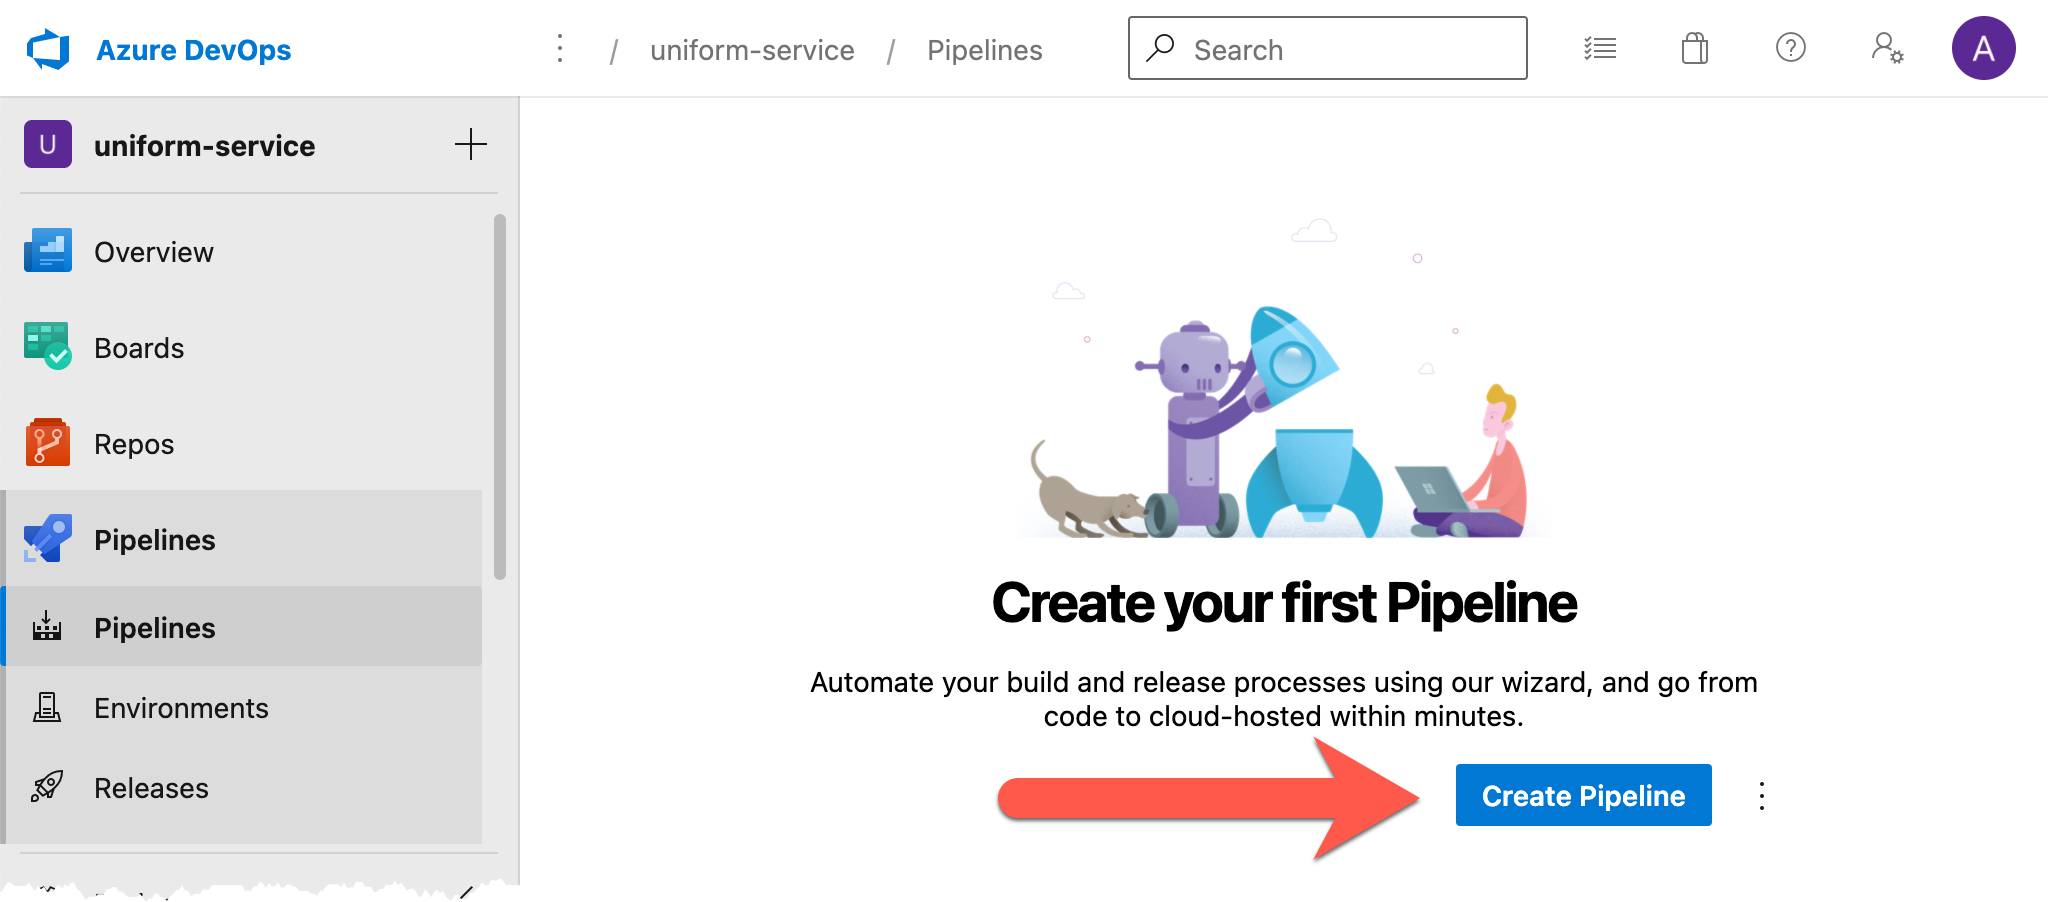
In Azure DevOps, navigate to Pipelines > Pipelines.
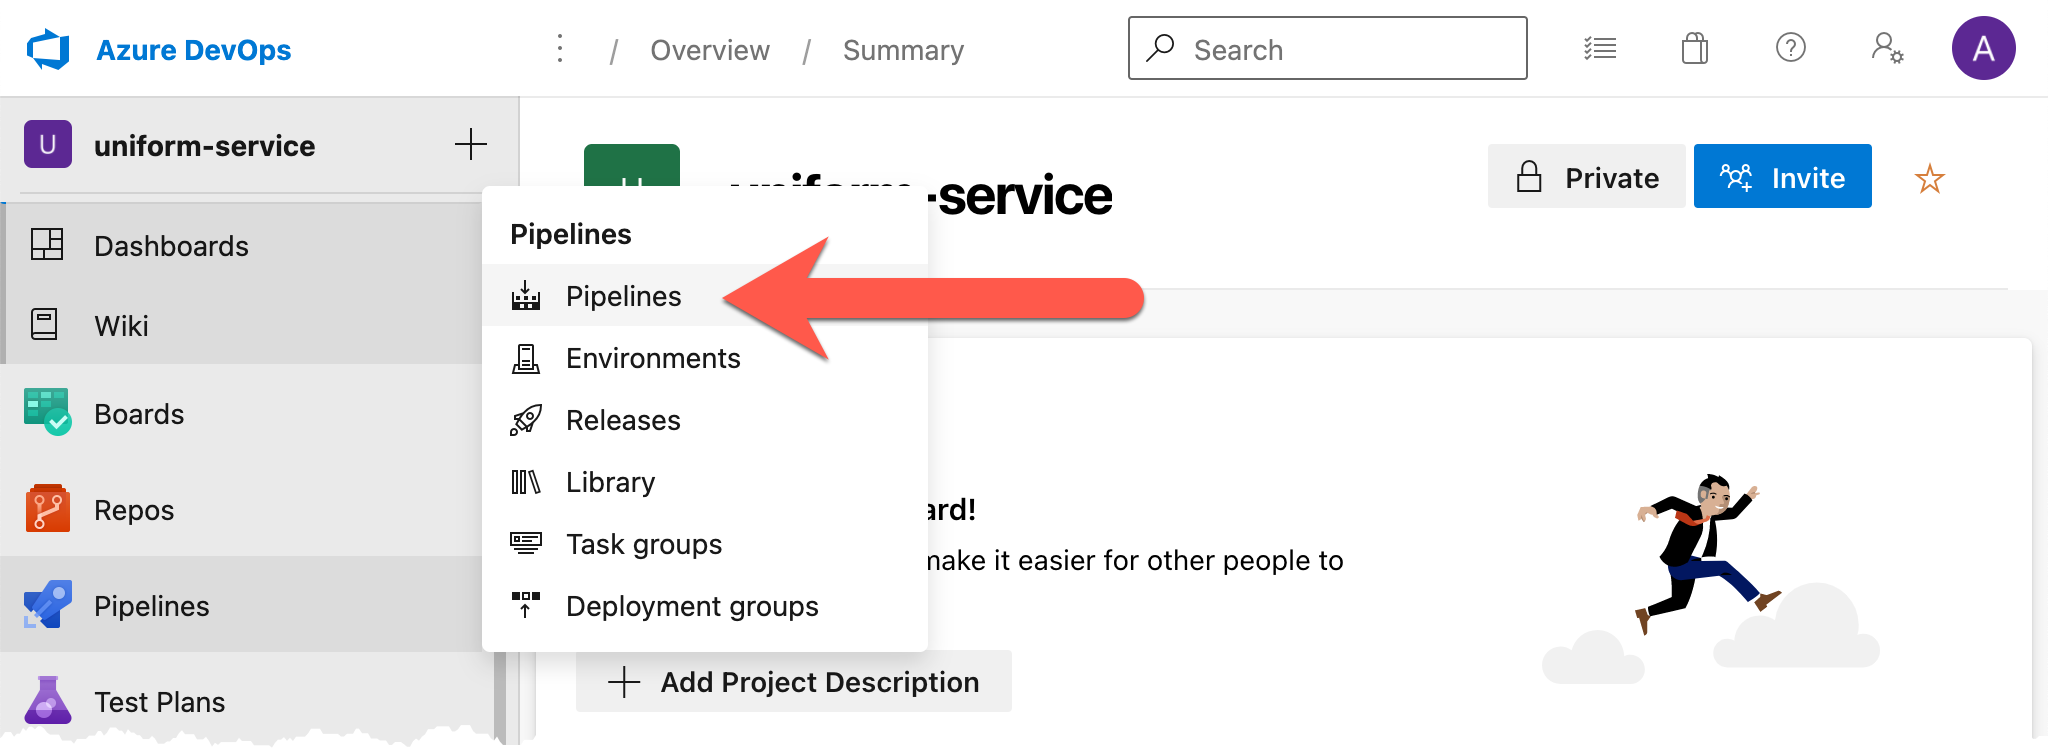
Click Create Pipeline.
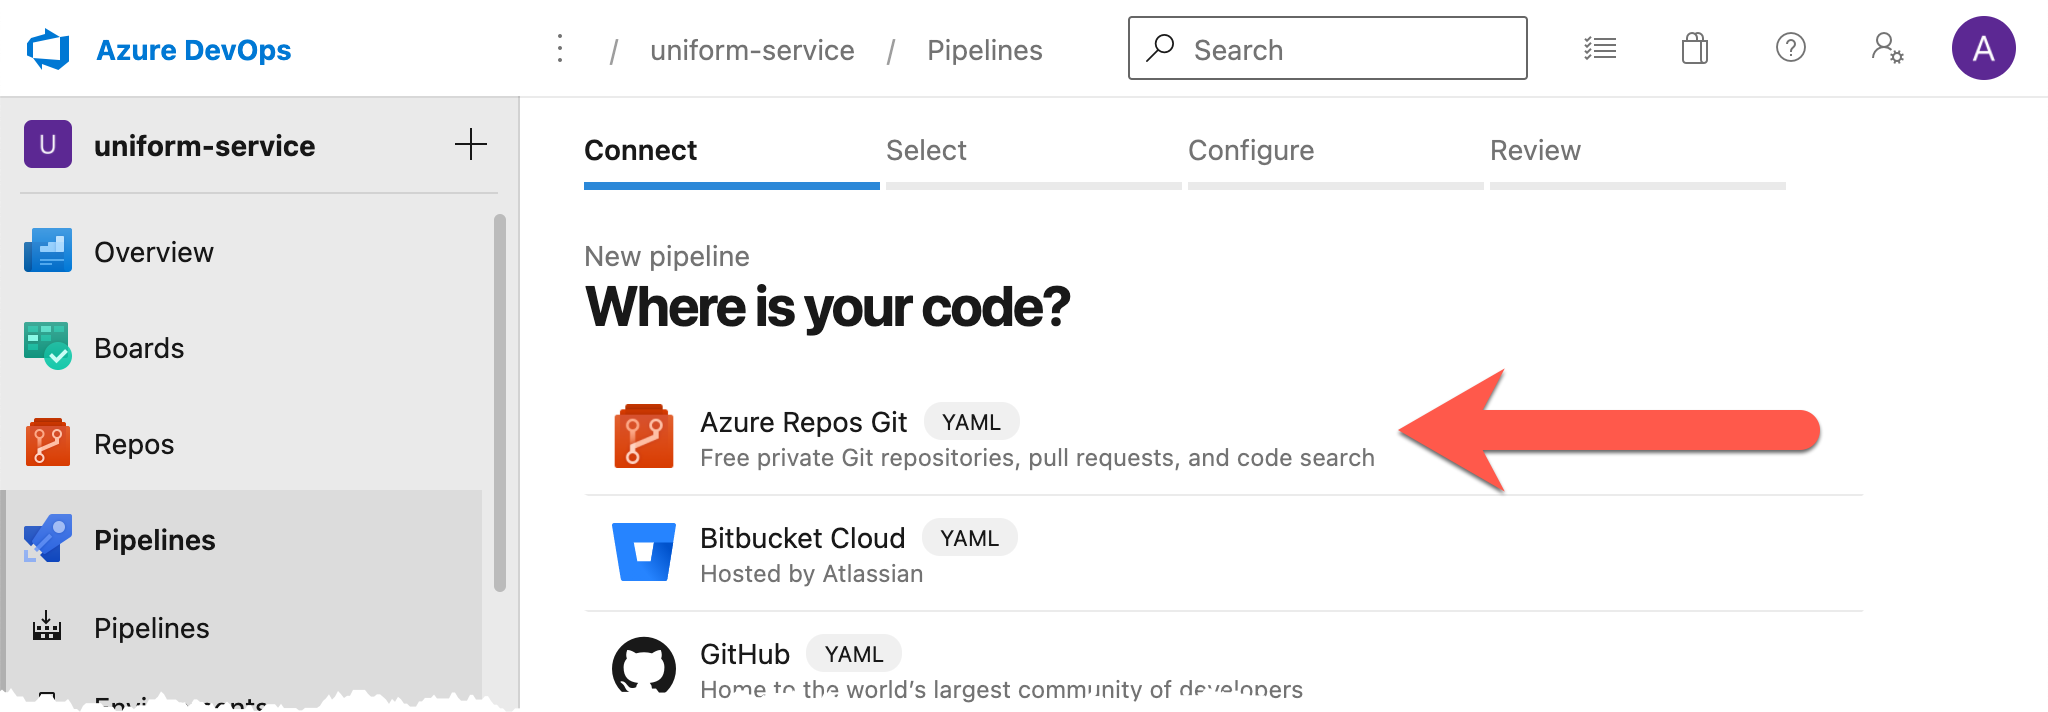
Click Azure Repos Git.
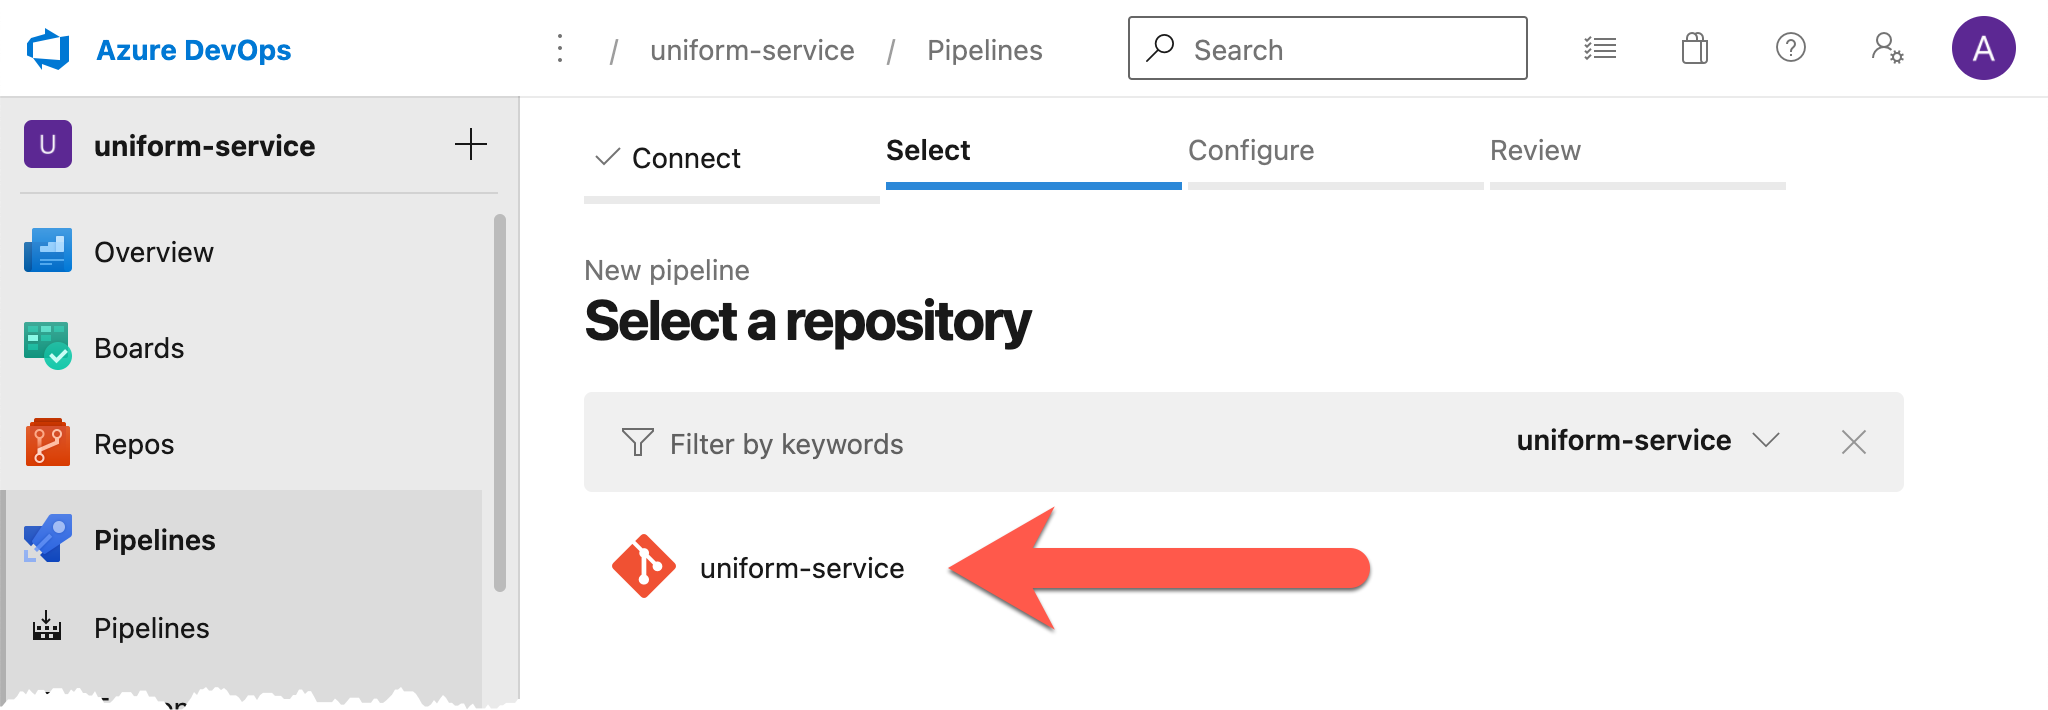
Select your repository.
Scroll down and click Show more.
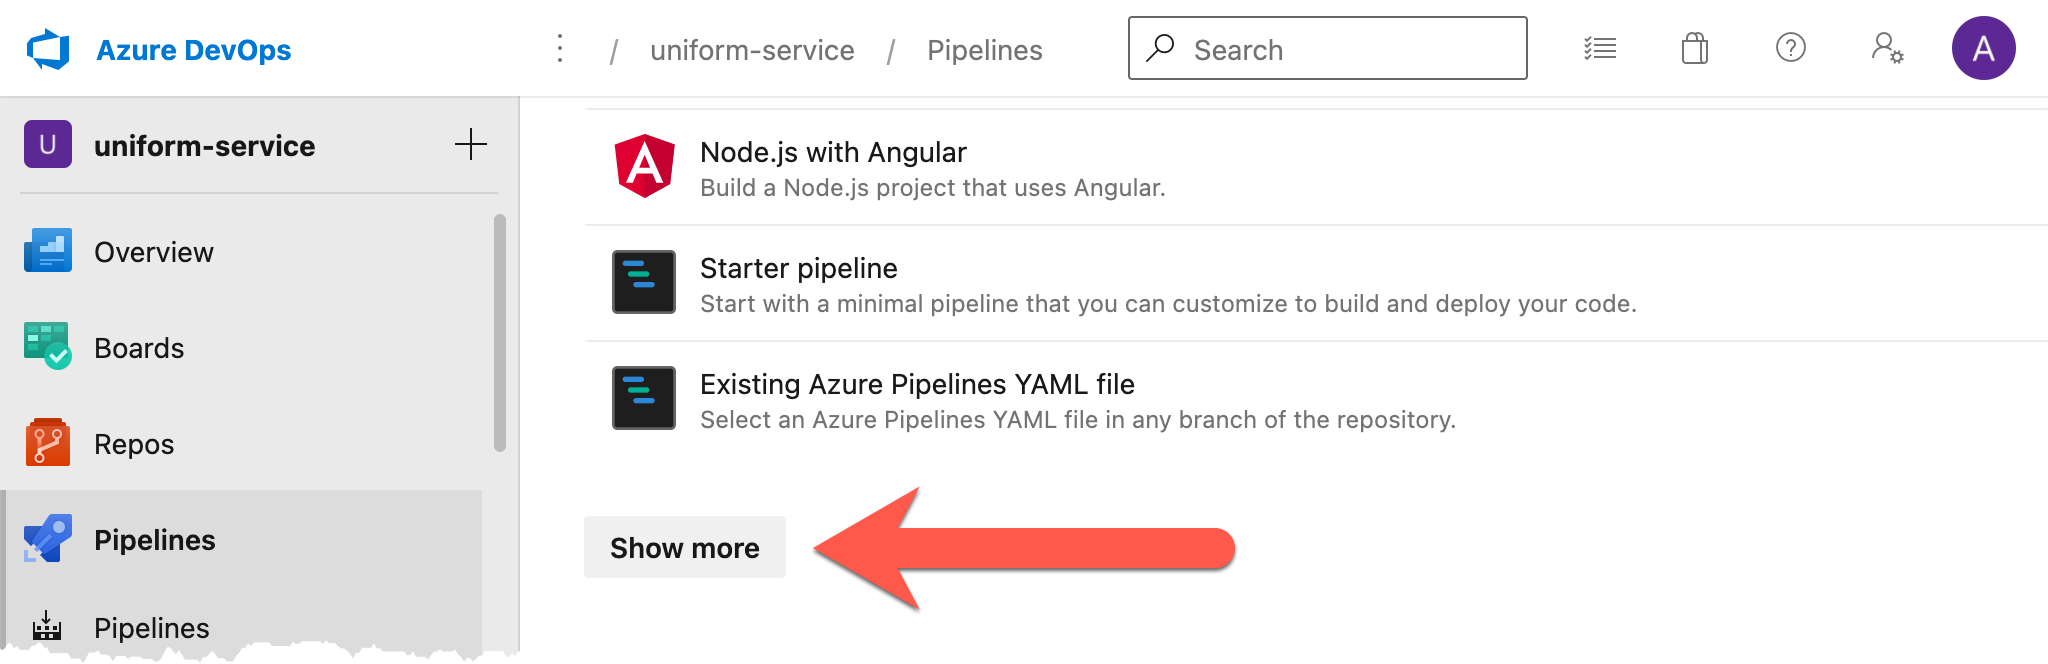
Scroll down and select Docker: Build and push an image to Azure Container Registry.
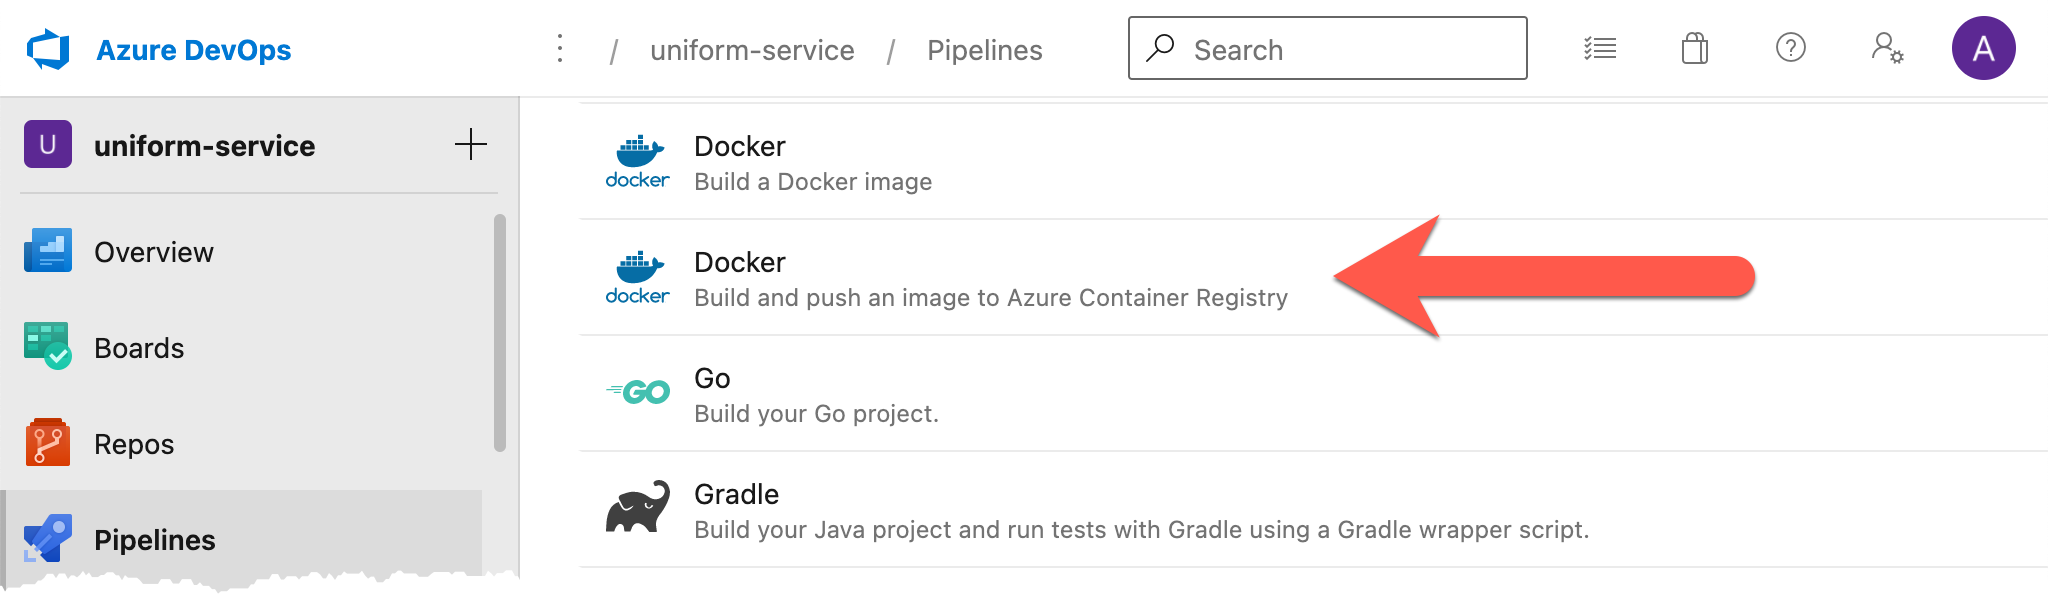
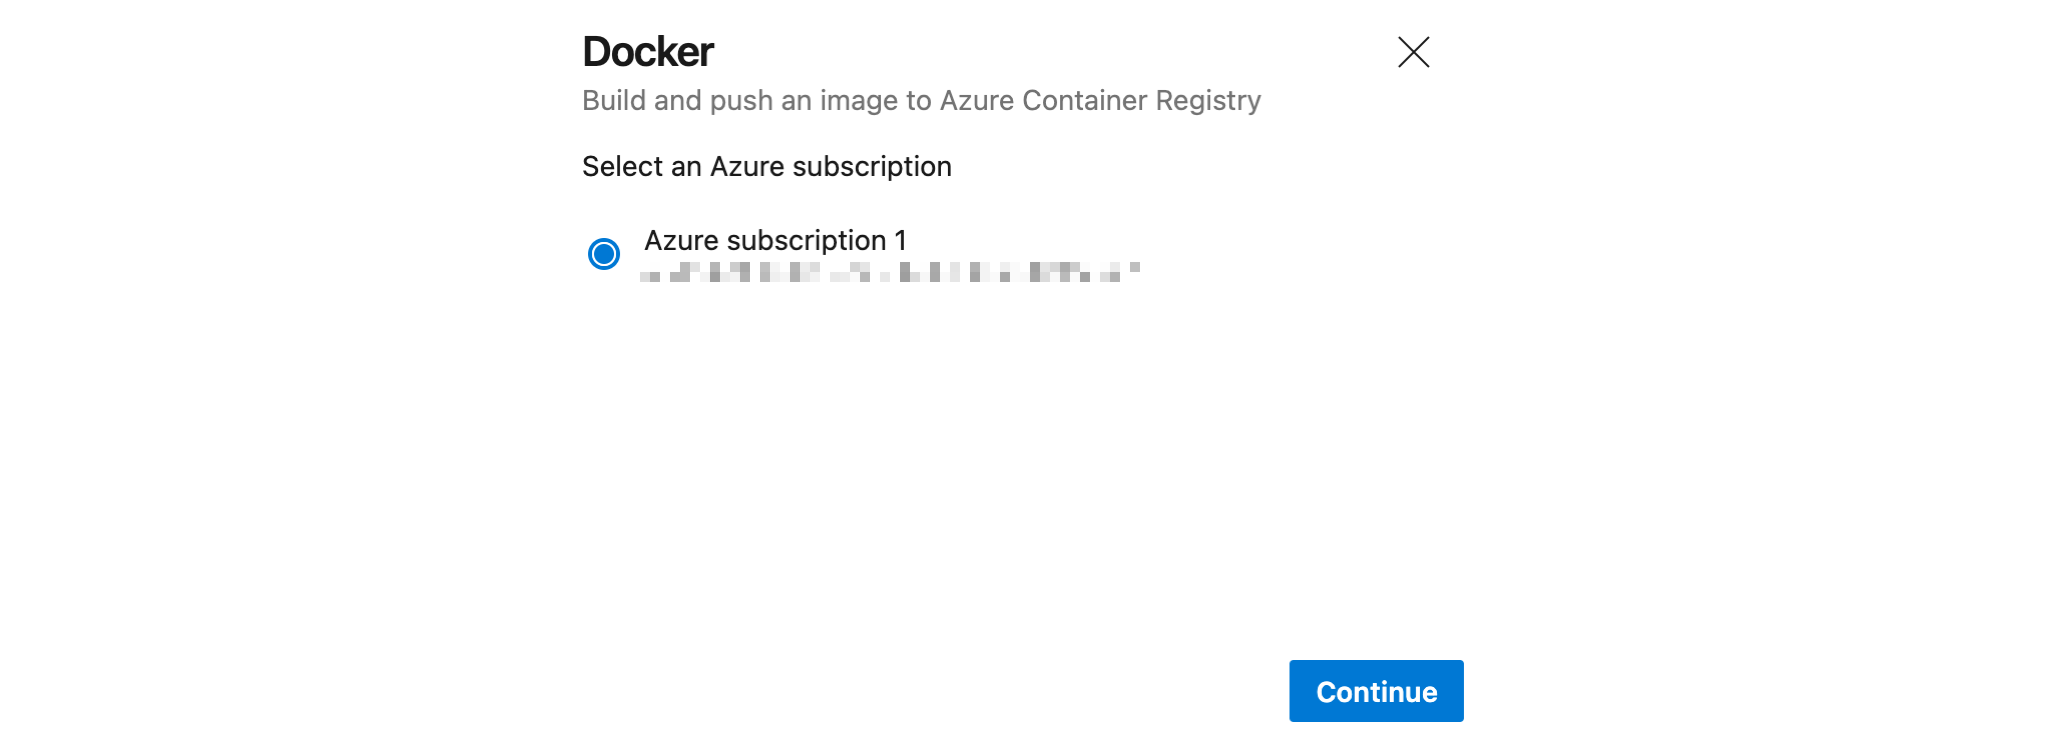
Select your Azure subscription and click Continue.
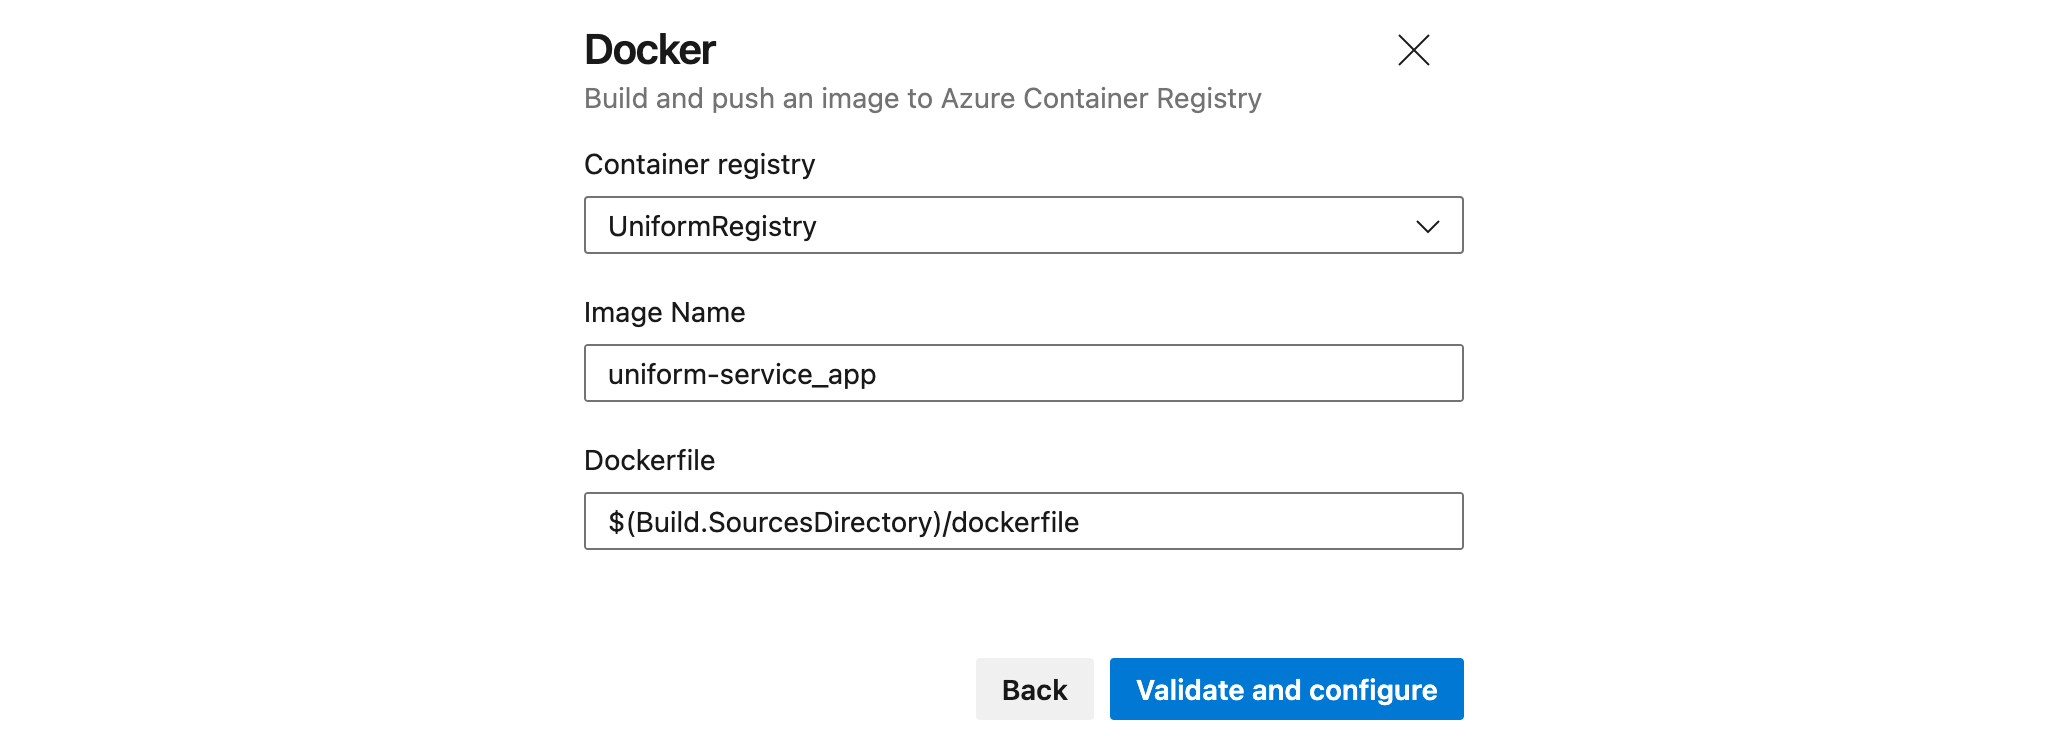
Enter the following values and click Validate and configure:
- Container registry -
<YOUR-CONTAINER-REGISTRY-NAME> - Image Name -
<YOUR-IMAGE-NAME> - Dockerfile -
$(Build.SourcesDirectory)/dockerfile
- Container registry -
The file
azure-pipelines.ymlis generated.
Update pipeline#
In the file
azure-pipelines.yml, replace the following line:- Original -
tag: '$(Build.BuildId)' - New -
tag: latest
- Original -
Replace the following line:
- Original -
vmImageName: 'ubuntu-latest' - New -
pool: '<YOUR-AGENT-POOL-NAME>'
- Original -
Replace the following line:
- Original -
pool: - New -
pool: '<YOUR-AGENT-POOL-NAME>'
- Original -
Remove the following line:
vmImage: $(vmImageName)Click Save and run
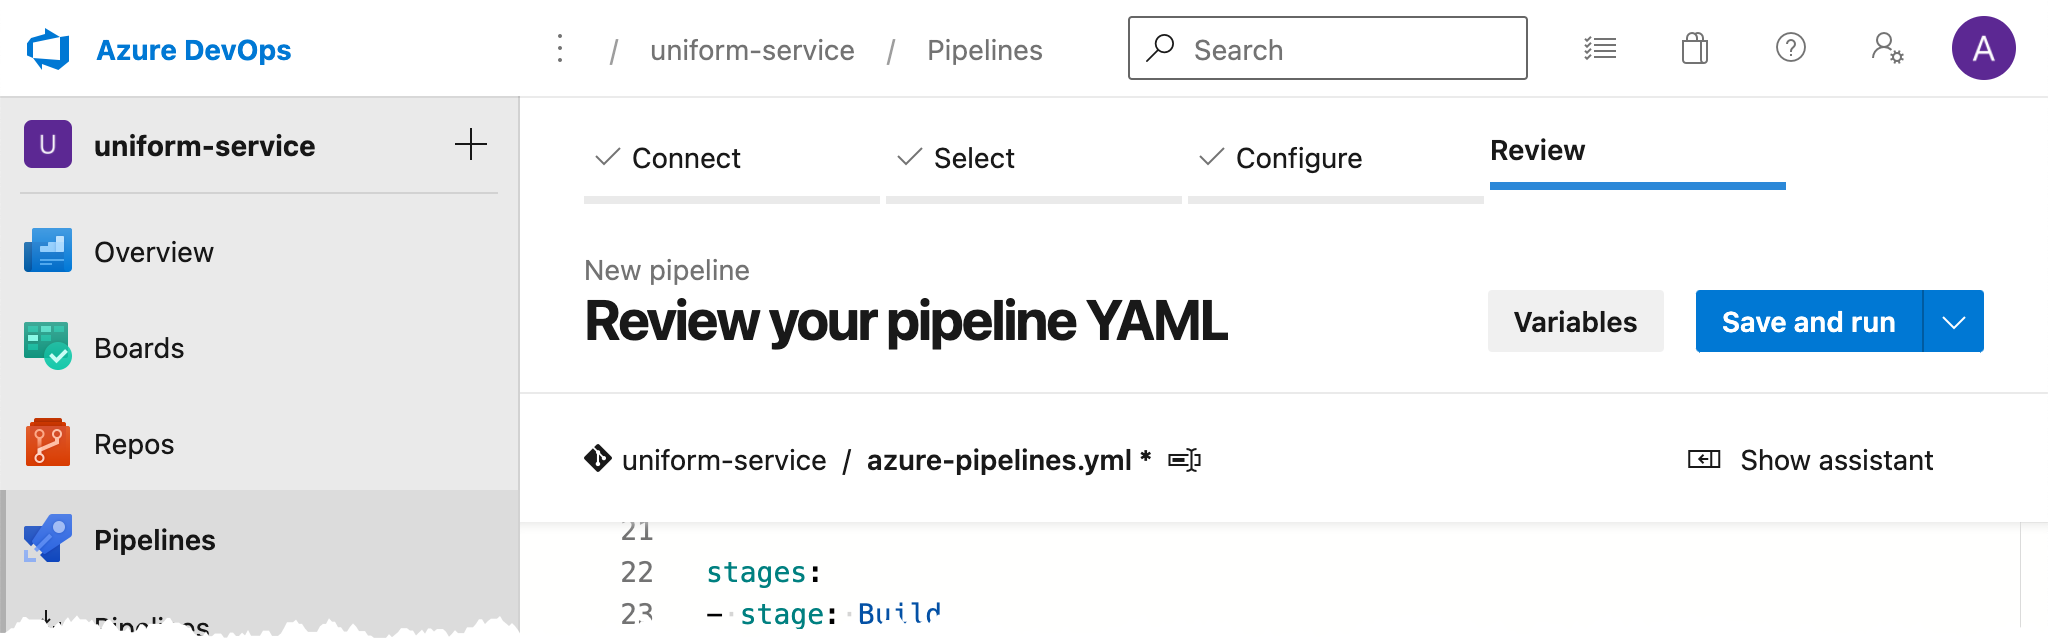
Enter the following values and click Save and run:
- Commit message -
Set up CI with Azure Pipelines - Commit directly to the master branch -
ticked
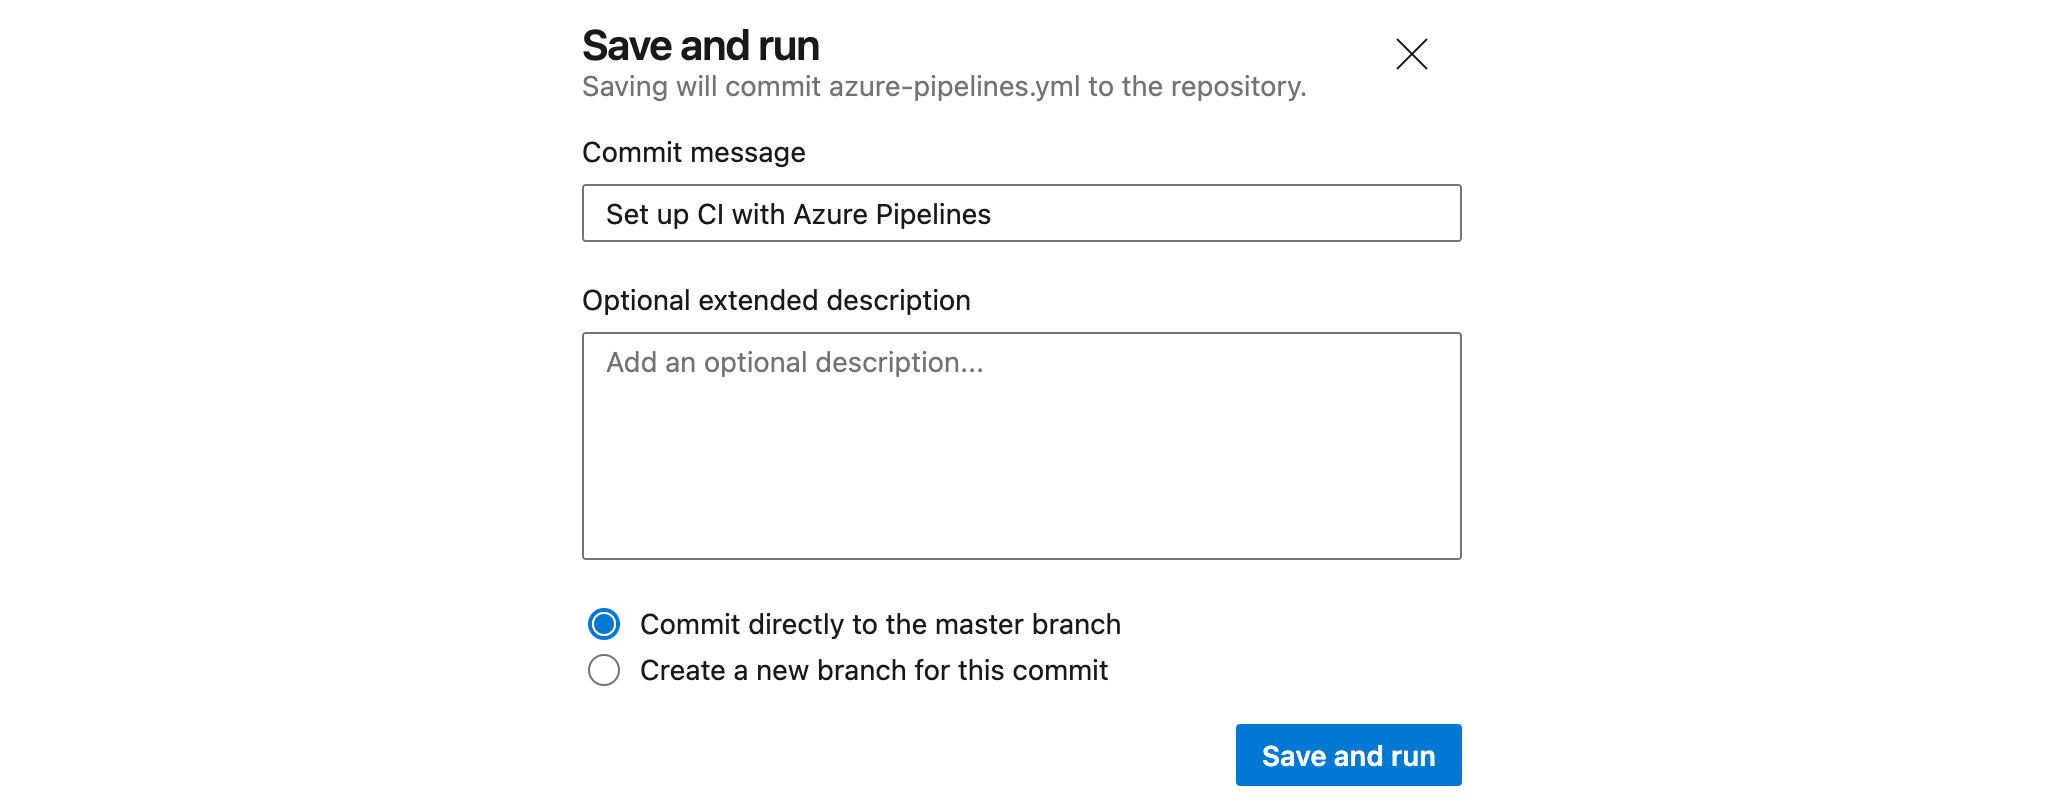
- Commit message -
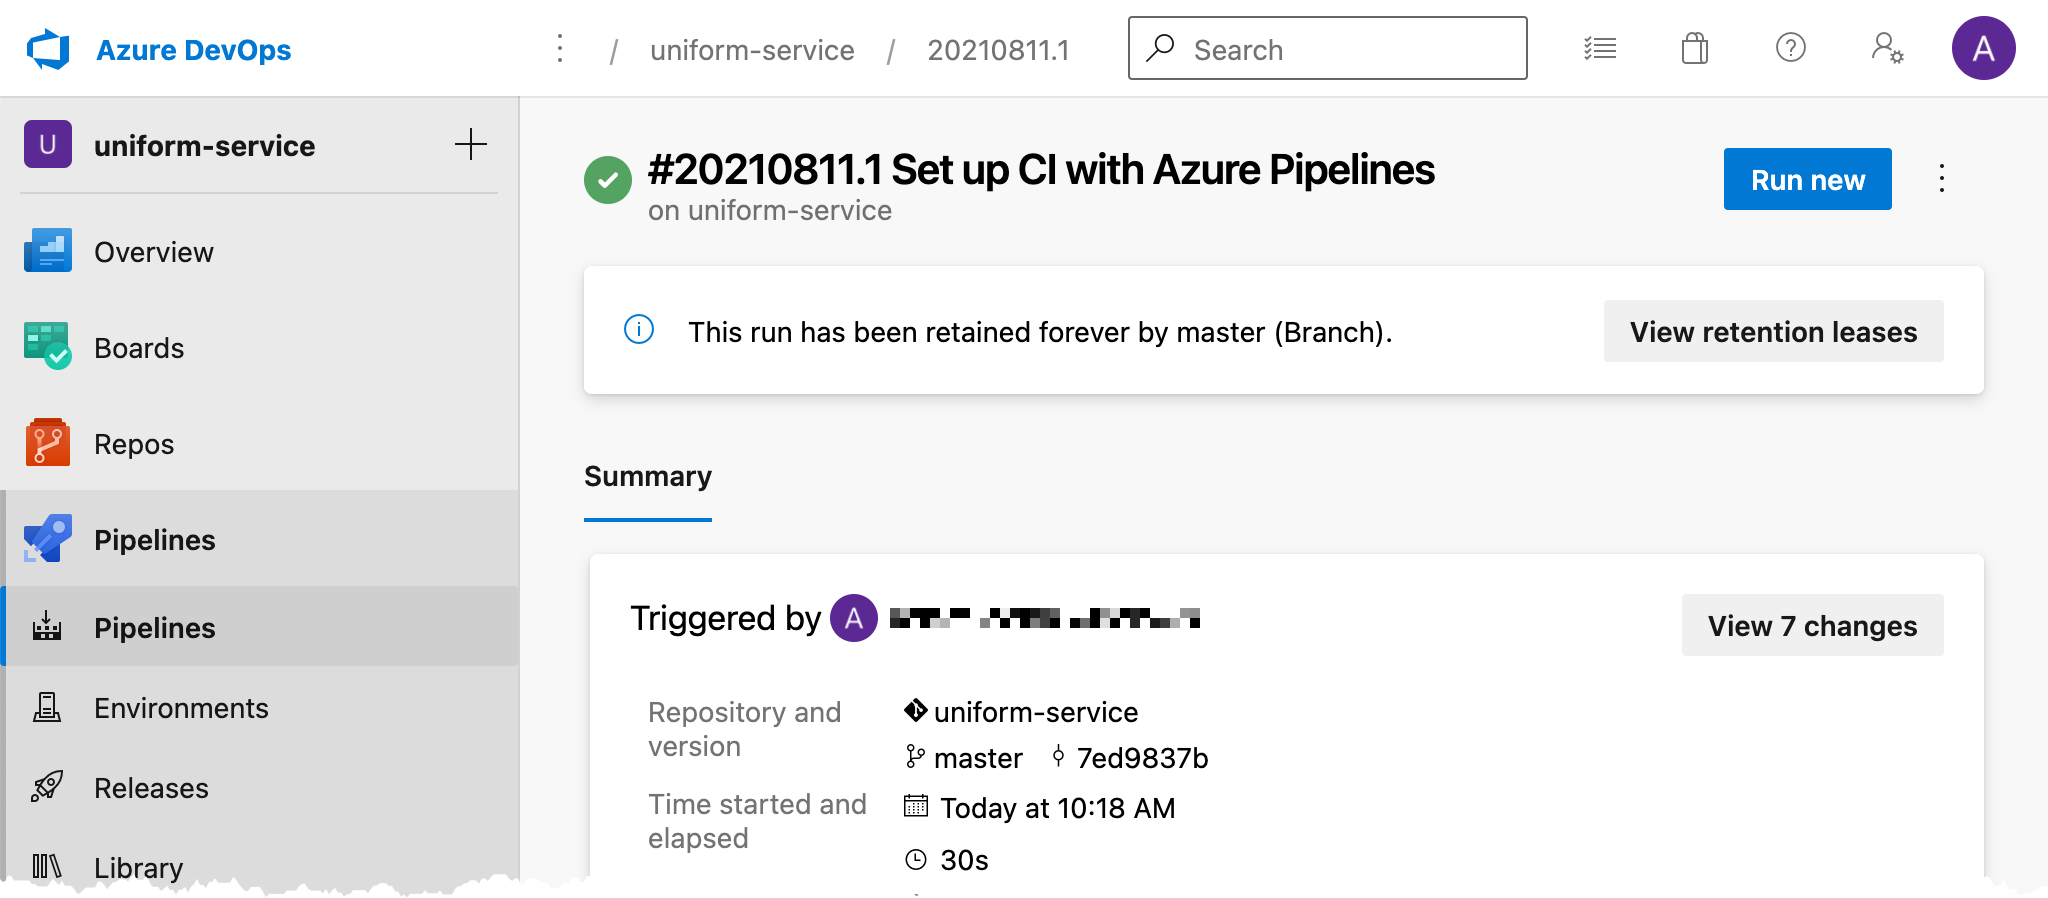
After the pipeline is finished running, you should see a summary of the job.
In a browser window, open
https://<YOUR-DEFAULT-HOSTNAME>. You should see your site.