How to deploy to Azure Blob Storage
Introduction#
The whole Azure cloud is built on the Azure Blob Storage as a building block. You won't get a more reliable, more resilient, and more cost-effective way for the new origin for your static site artifacts on Azure cloud.
Azure Blob Storage also comes with a built-in static website feature that lets a storage container act as a web server. This makes deploying a Jamstack site a breeze because you simply copy your site files to the storage container. Learn more about static website hosting in Azure here.
Azure also supports a service called Azure Static Web Apps. At the time this article was written, Azure Static Web Apps was still in preview. Therefore, using the static website feature is recommended approach for using Azure to host a Jamstack site.
Pre-requisites#
- You have completed the Getting Started section, so your site is ready to be deployed to static storage.
- Uniform for Sitecore starter kit (for Deploy).
- Azure account with the ability to create new storage accounts.
- Download the azcopy.exe v10.4,
it is an older version of AzCopy Tool.
It is important to use this specific version v10.4 which has passed all our tests, while newer versions are known to have issues.
You will configure the Uniform Deployment Service to use this tool to copy your site files to Azure. You must download the version that matches the operating system where you are running the Uniform Deployment Service.
Setup (Azure Portal)#
If you prefer to use the Azure CLI, skip to the next step.
important
Microsoft changes the Azure Portal UI quite frequently. The screens described in this article may not perfectly match the screens you see. This is especially true of how the navigation menus are displayed.
Create Storage Account#
A storage account is where the files that are deployed by the Uniform Deployment Service are stored. A storage account is an Azure resource that must be created before you can deploy a site to Azure.
Log into Azure Portal.
If you have an existing Resource Group you want to use, select it, otherwise, create a new Resource Group using the following values:
- Resource group -
<YOUR-RESOURCE-GROUP-NAME> - Region - Select a region that is as close (geographically) as possible to where your Uniform Deployment Service app will run.
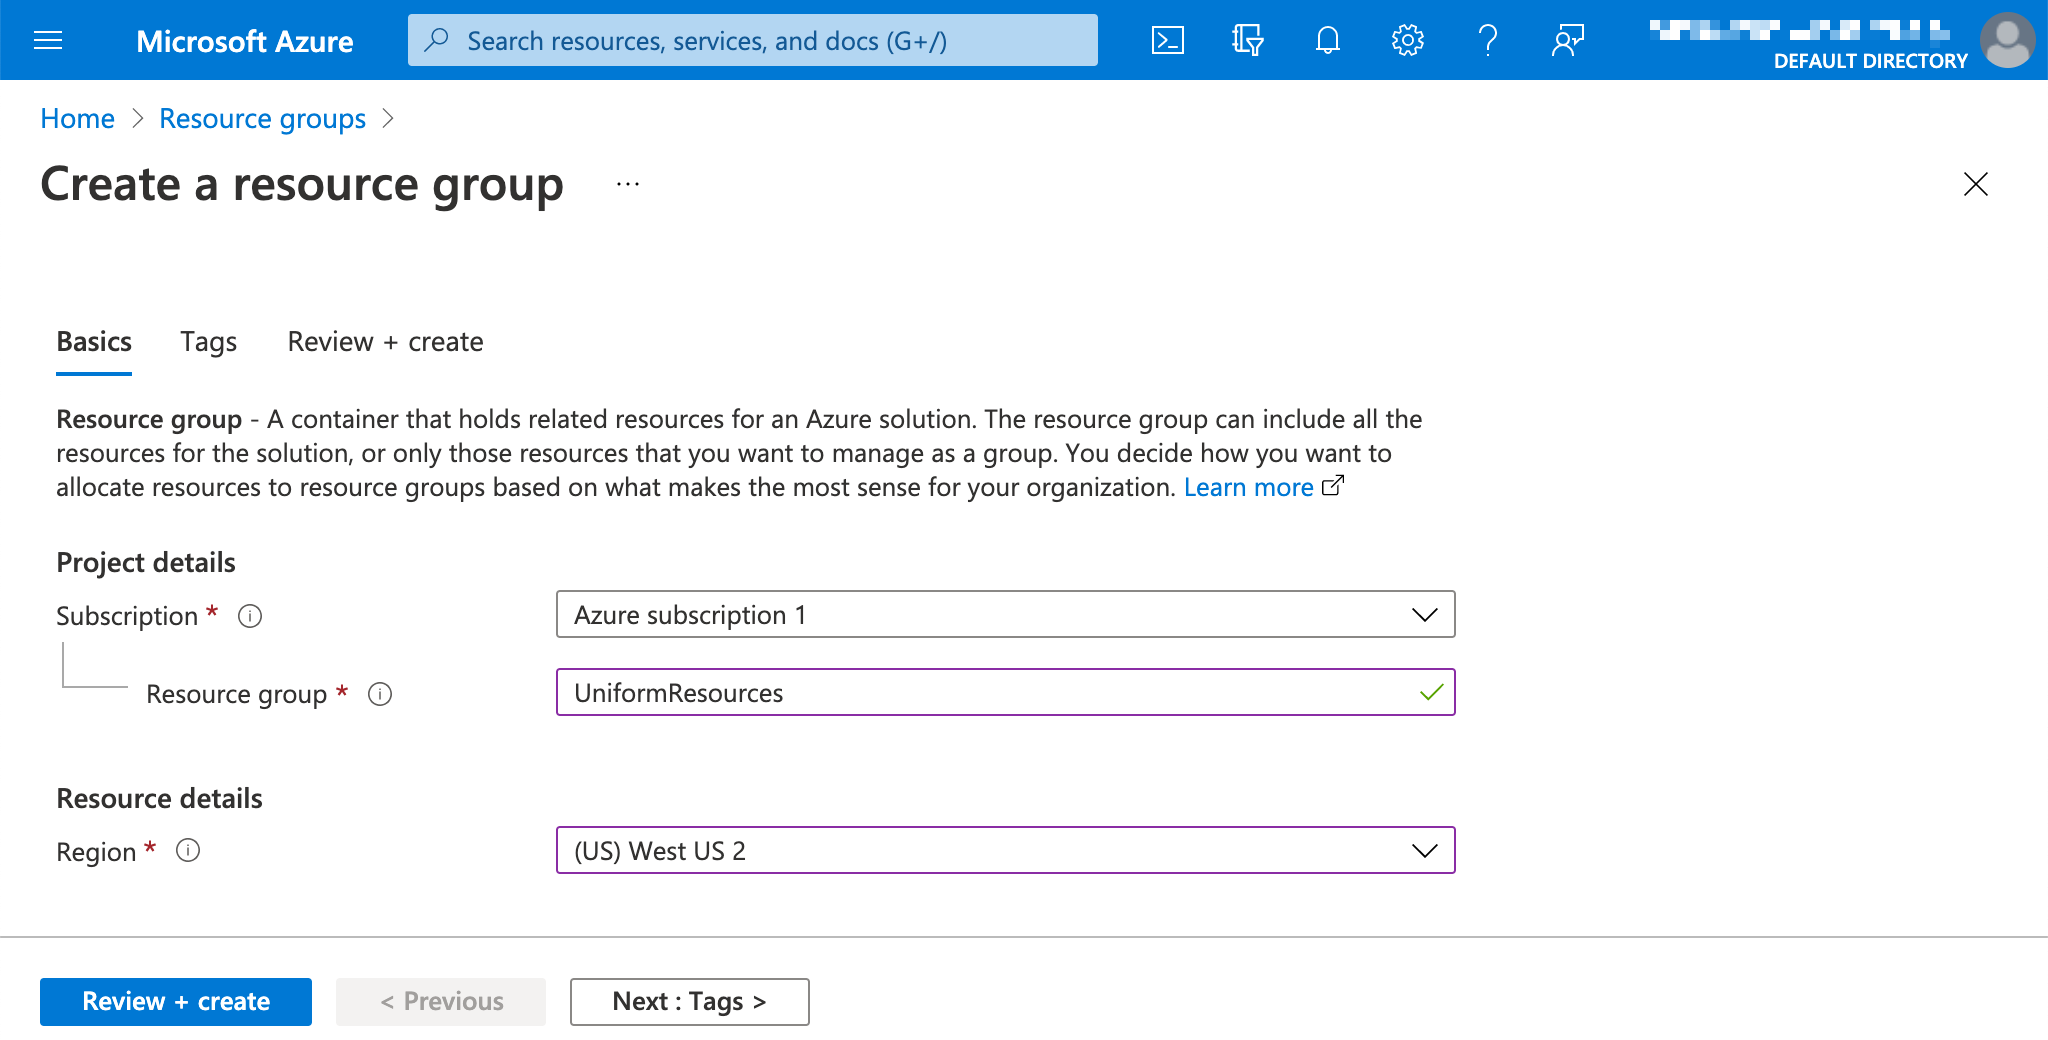
- Resource group -
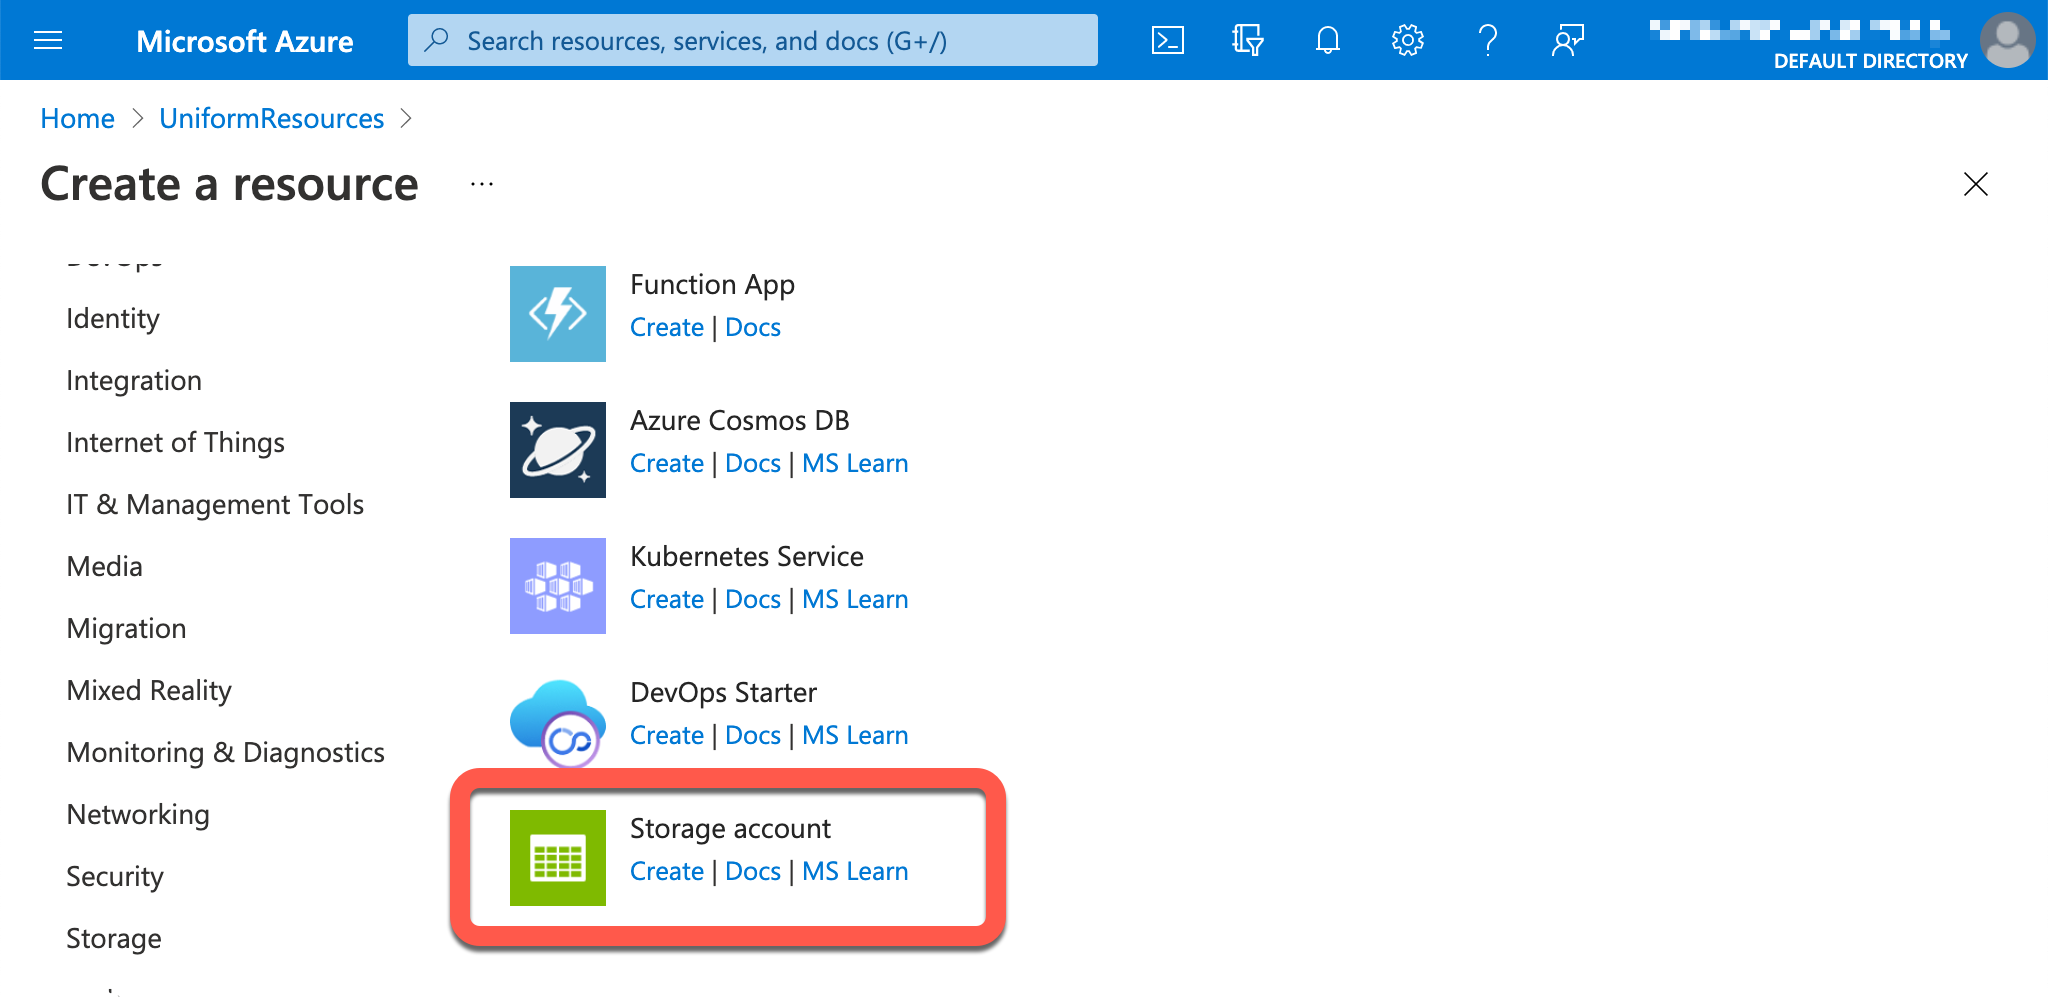
Create a new Storage account resource.
Enter the following values then click Review + create:
- Storage account name -
<YOUR-STORAGE-ACCOUNT-NAME> - Location - Select a region that is as close (geographically) as possible to where your Uniform Deployment Service app will run.
- Performance -
Standard - Account kind -
StorageV2 (general purpose v2)
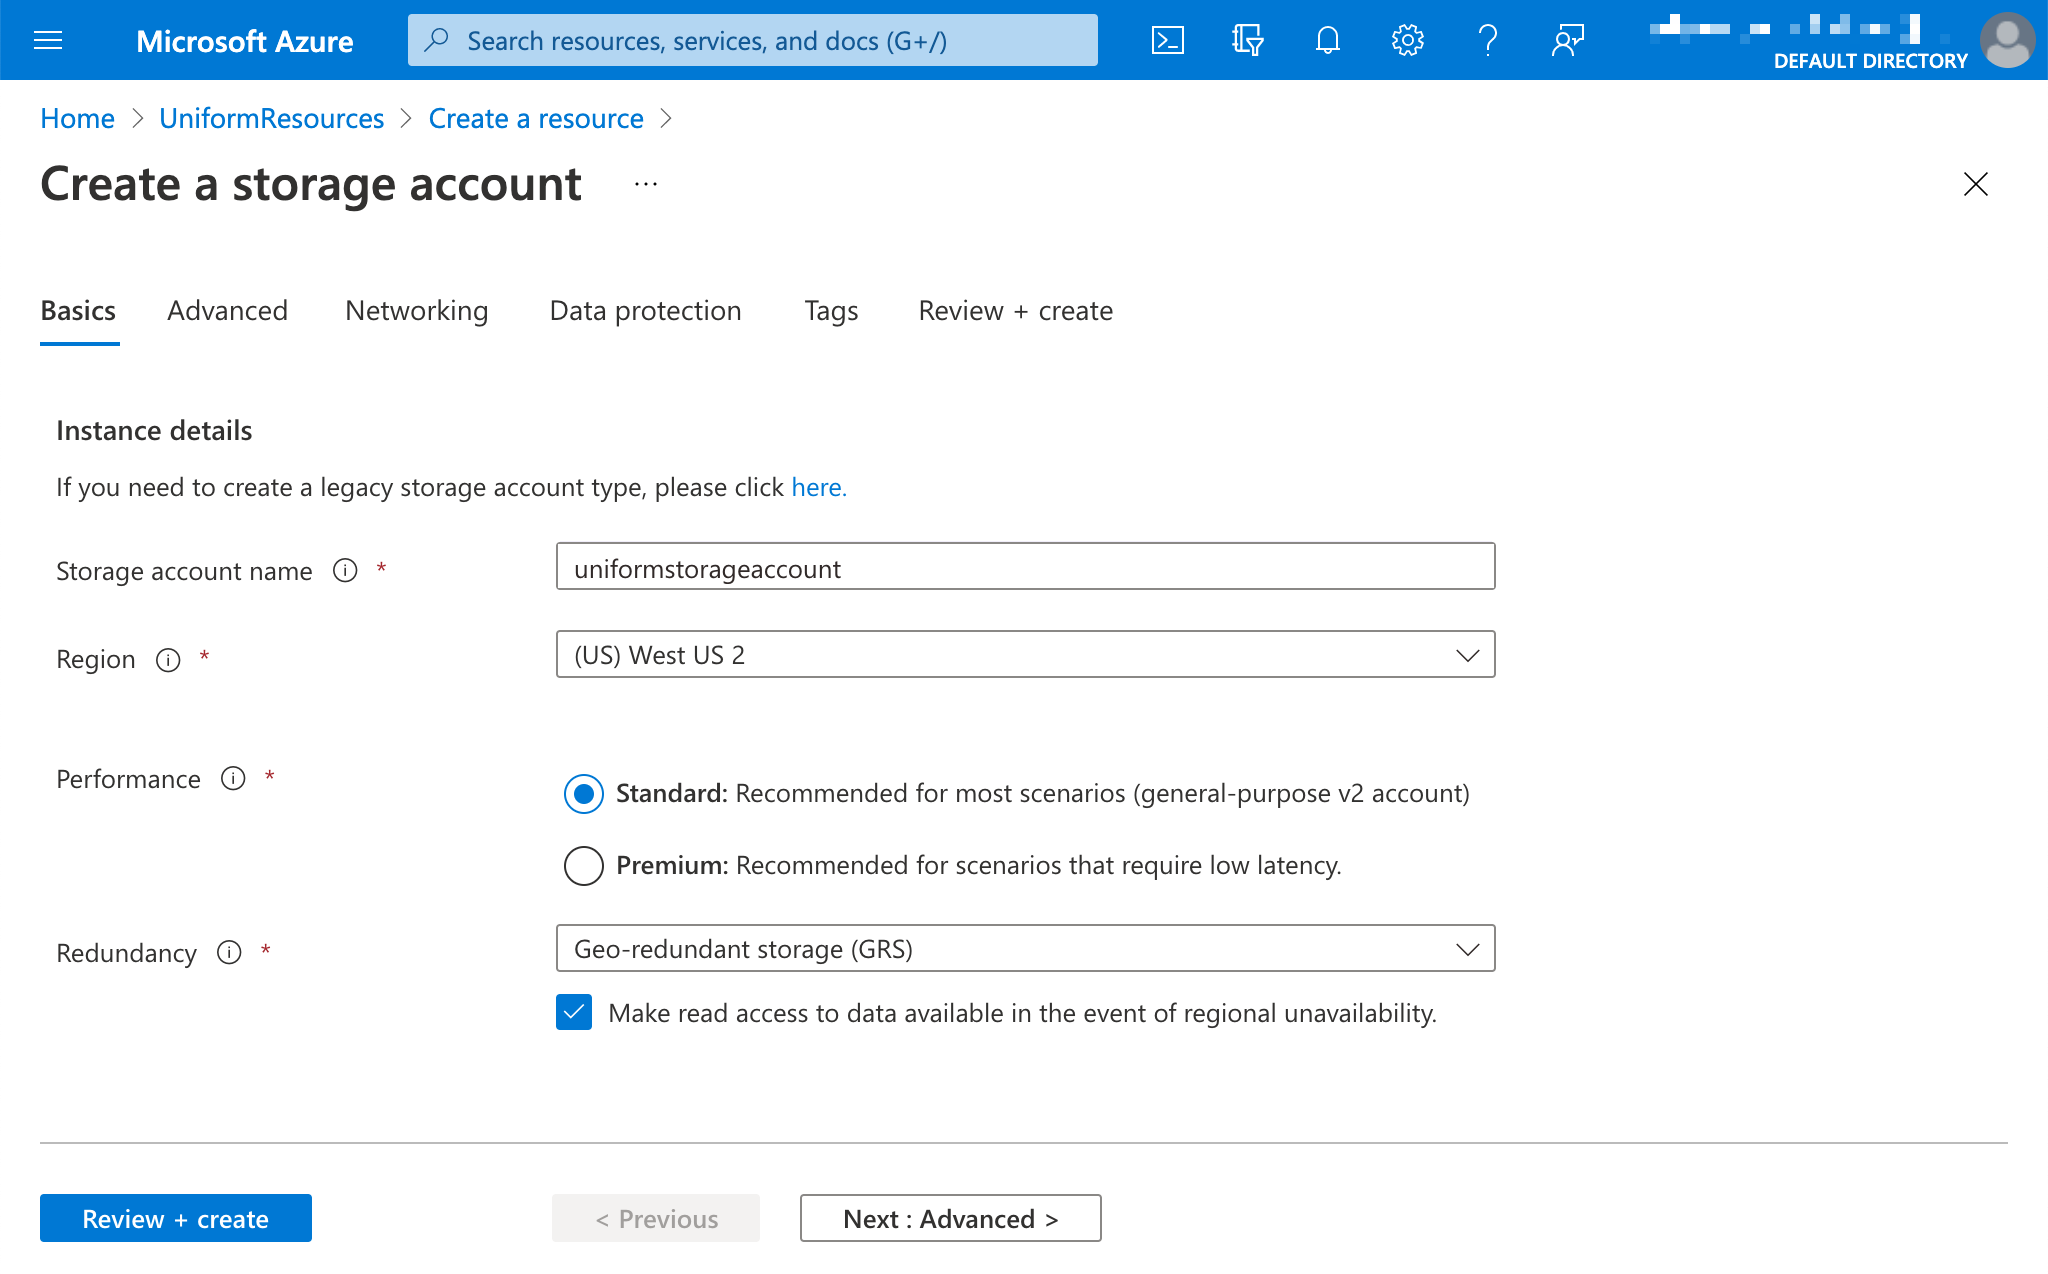
- Storage account name -
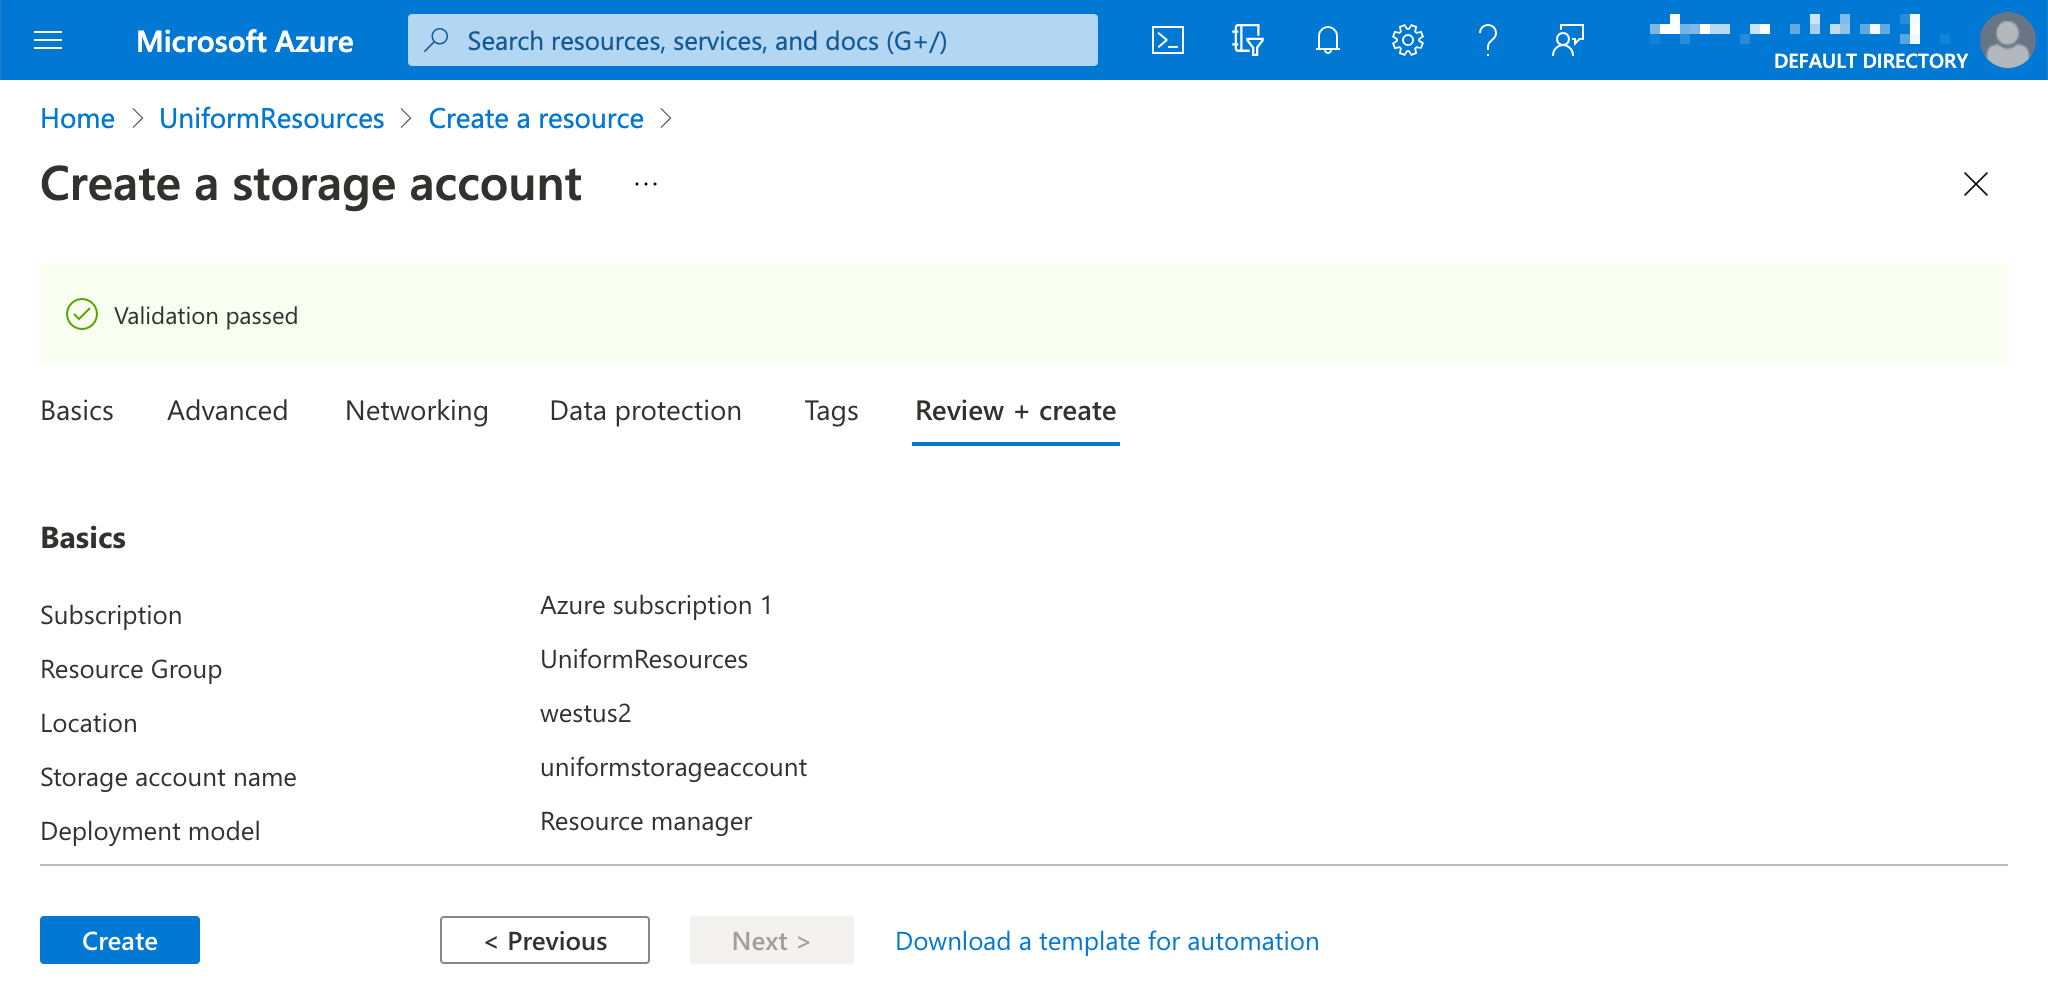
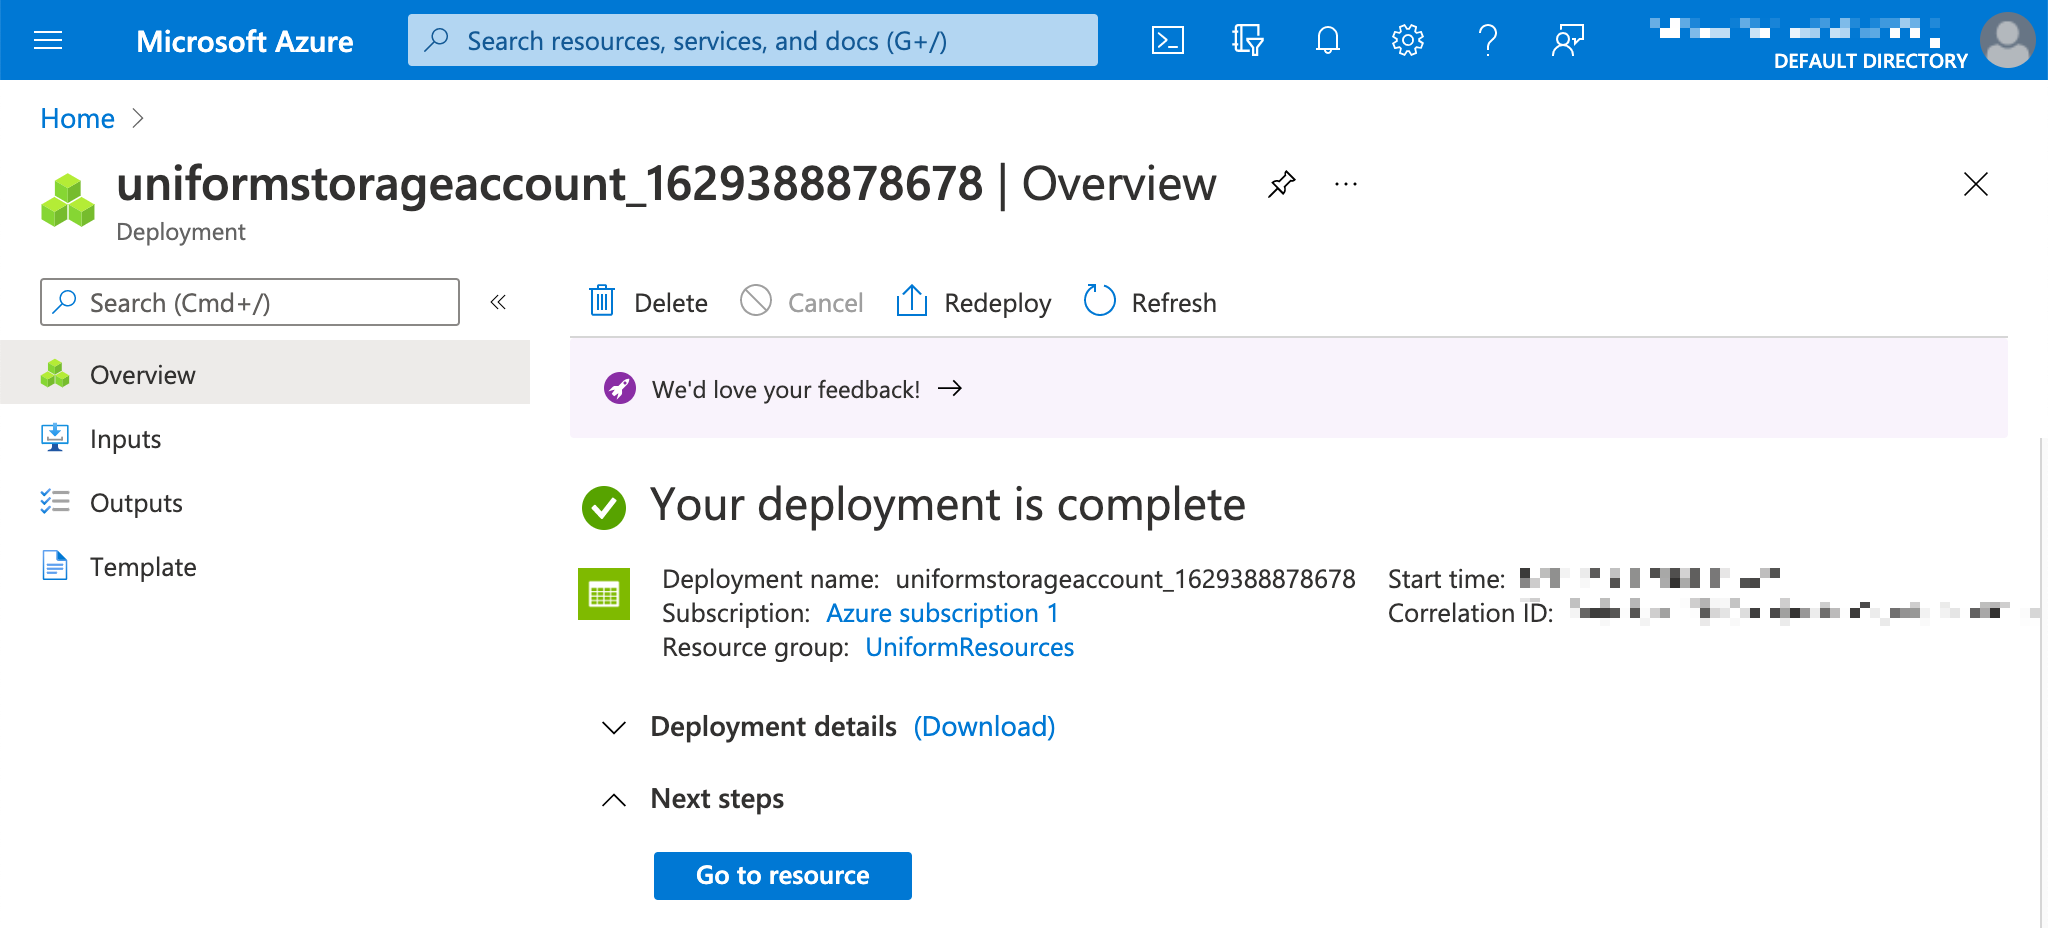
Click Create.
Click Go to resource.
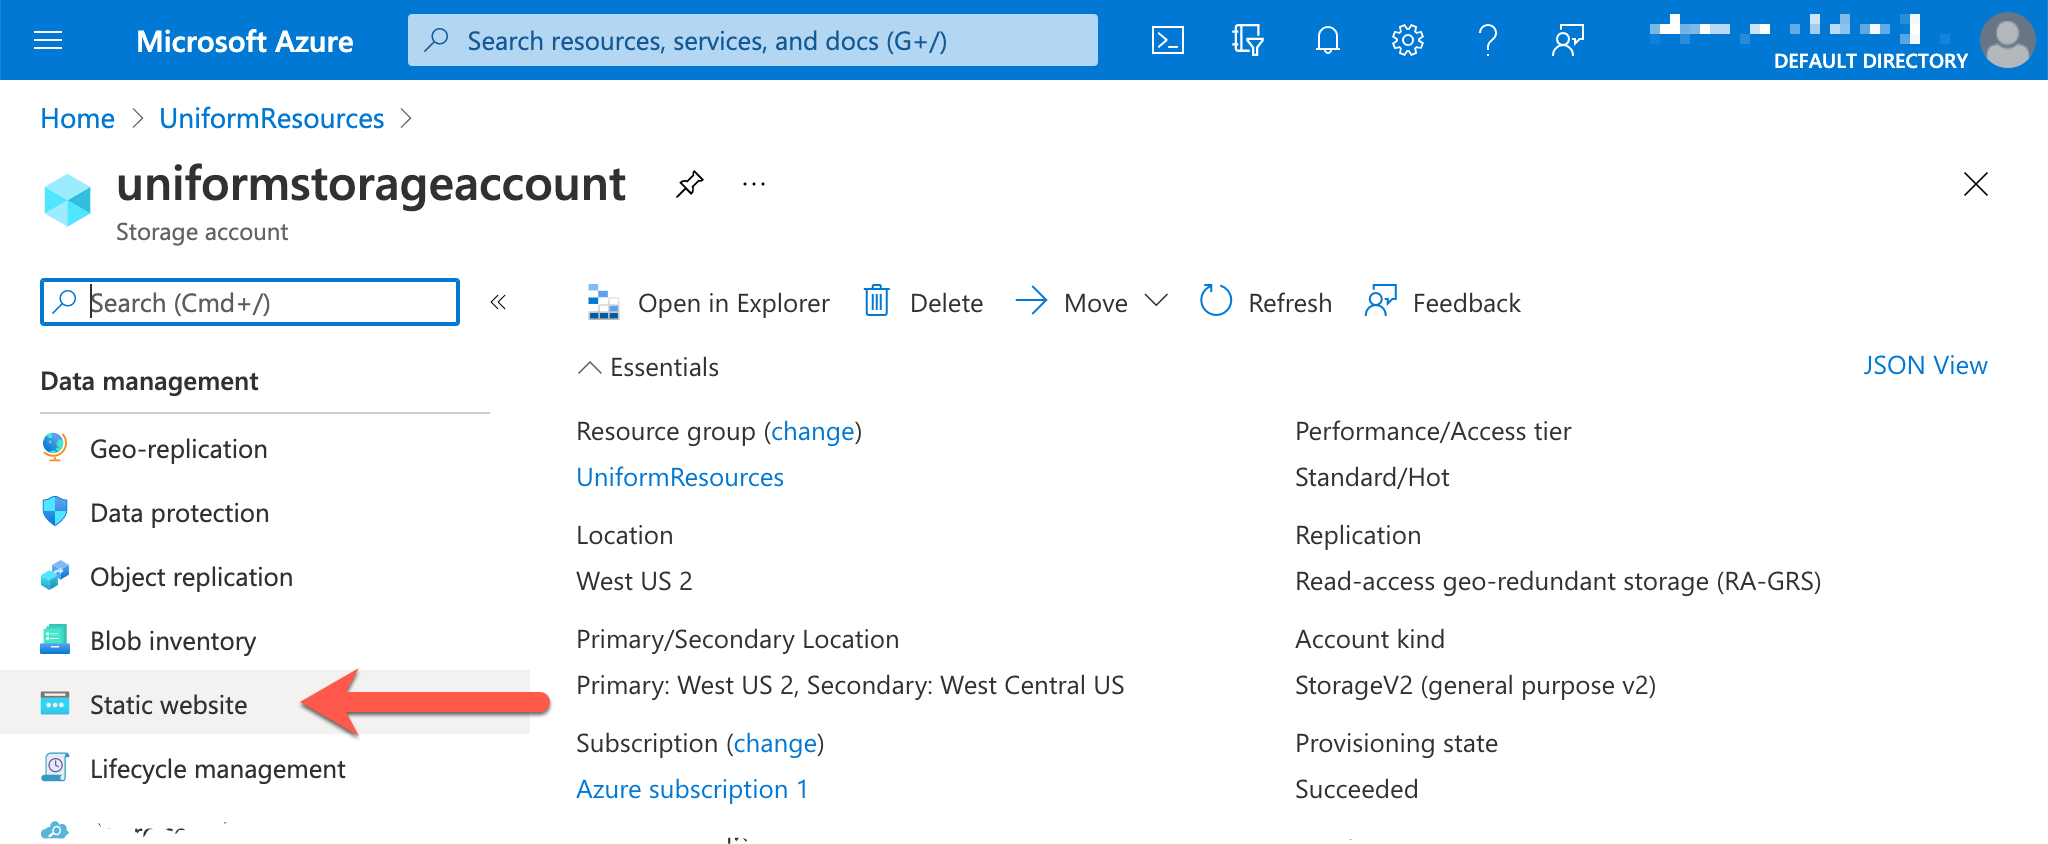
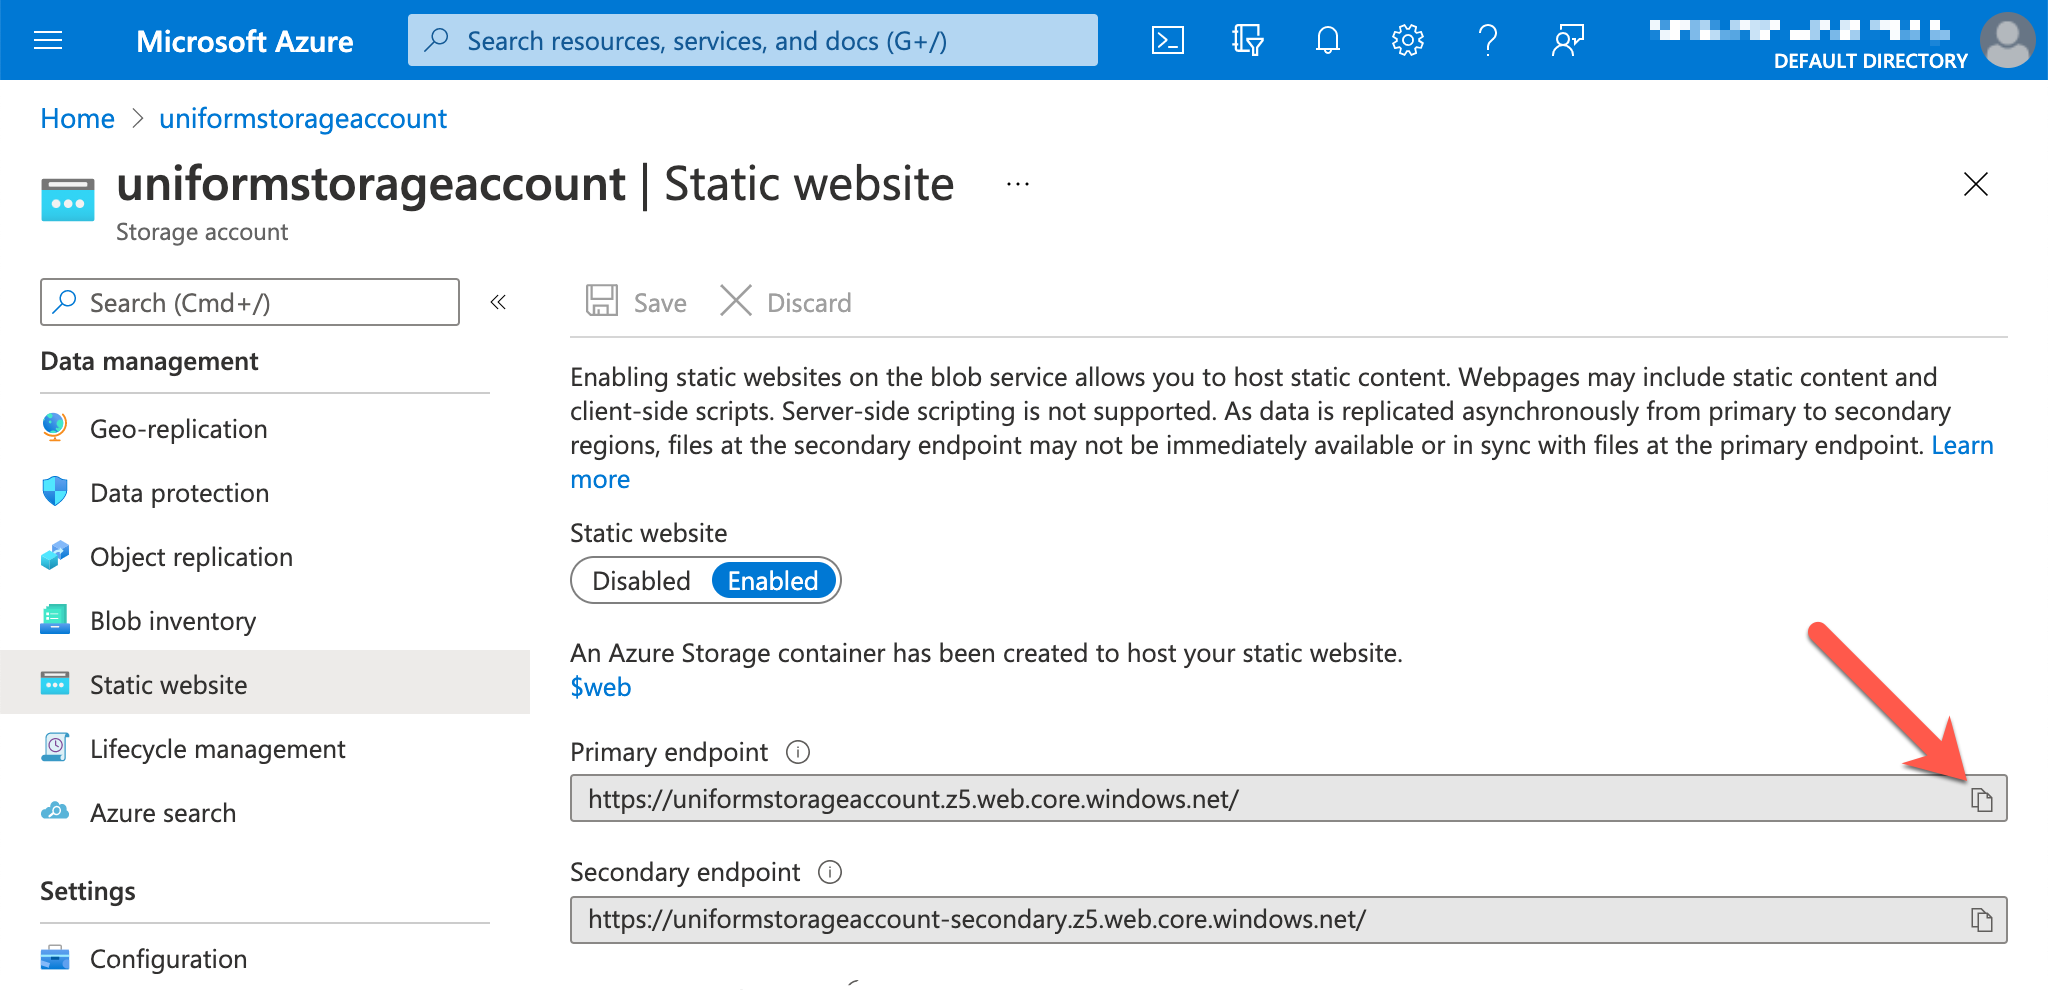
Configure static website hosting#
In the left menu, under the section Data management, click Static website.
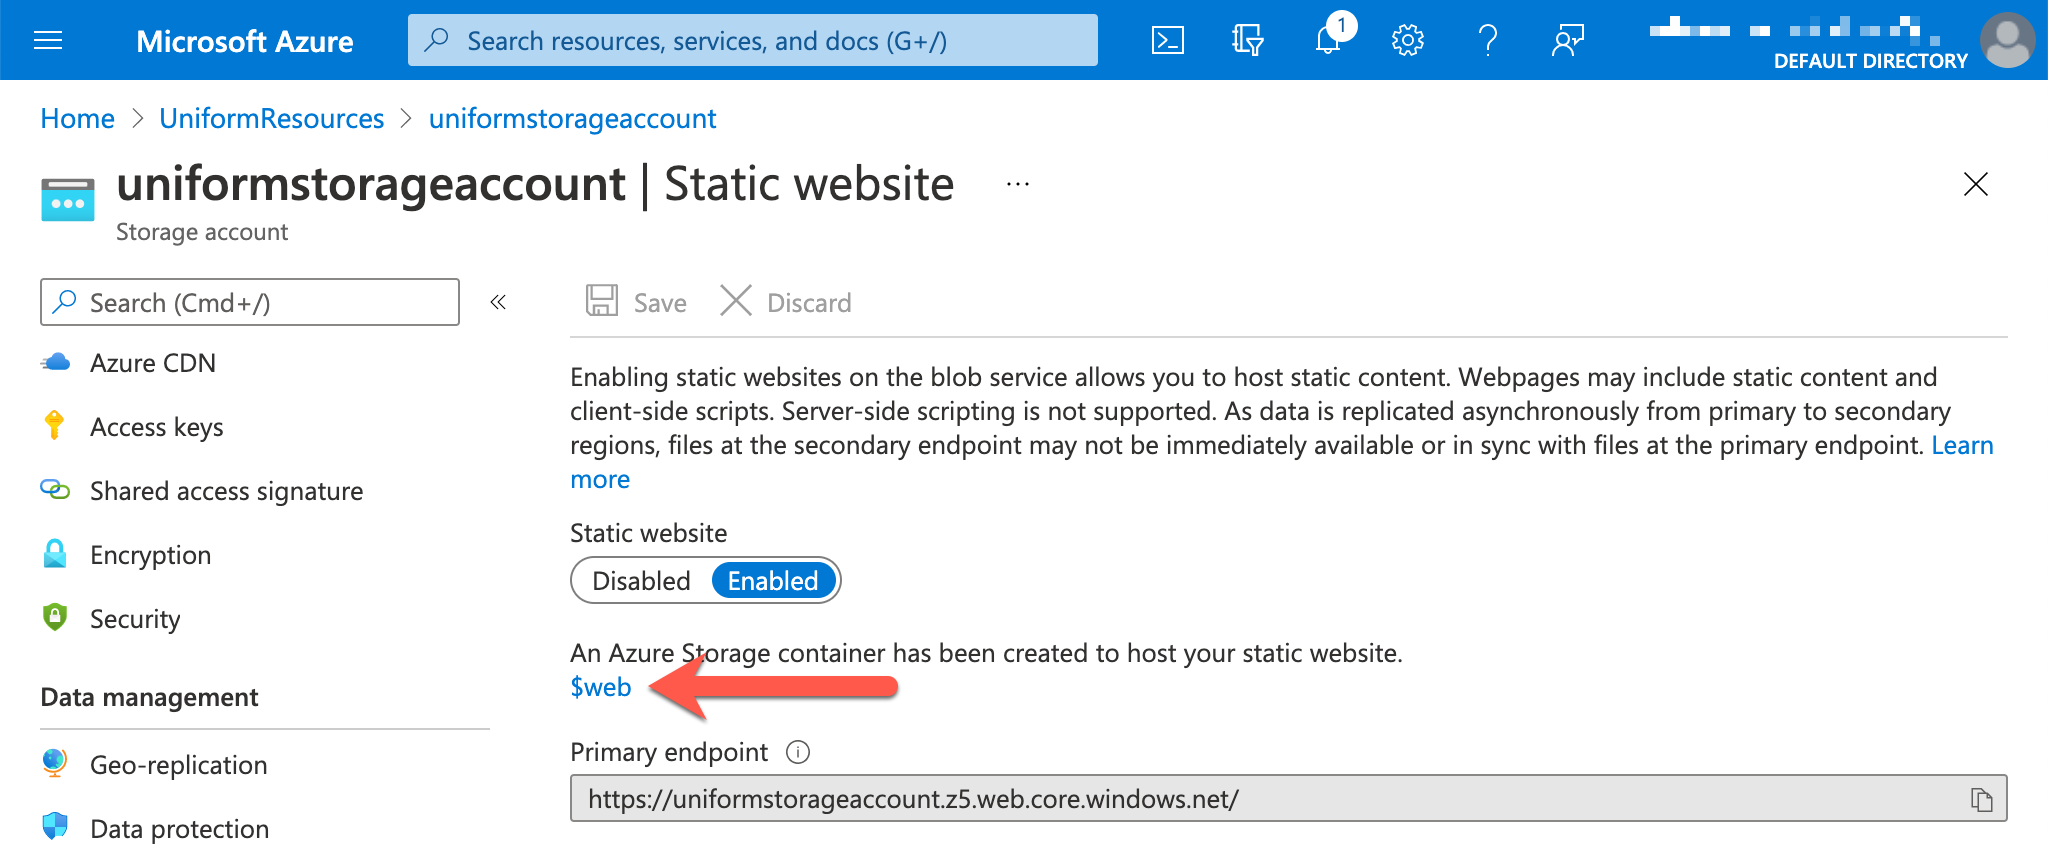
Enter the following values then click Save.
- Static website -
Enabled - Index document name -
index.html - Error document name -
404/index.html

- Static website -
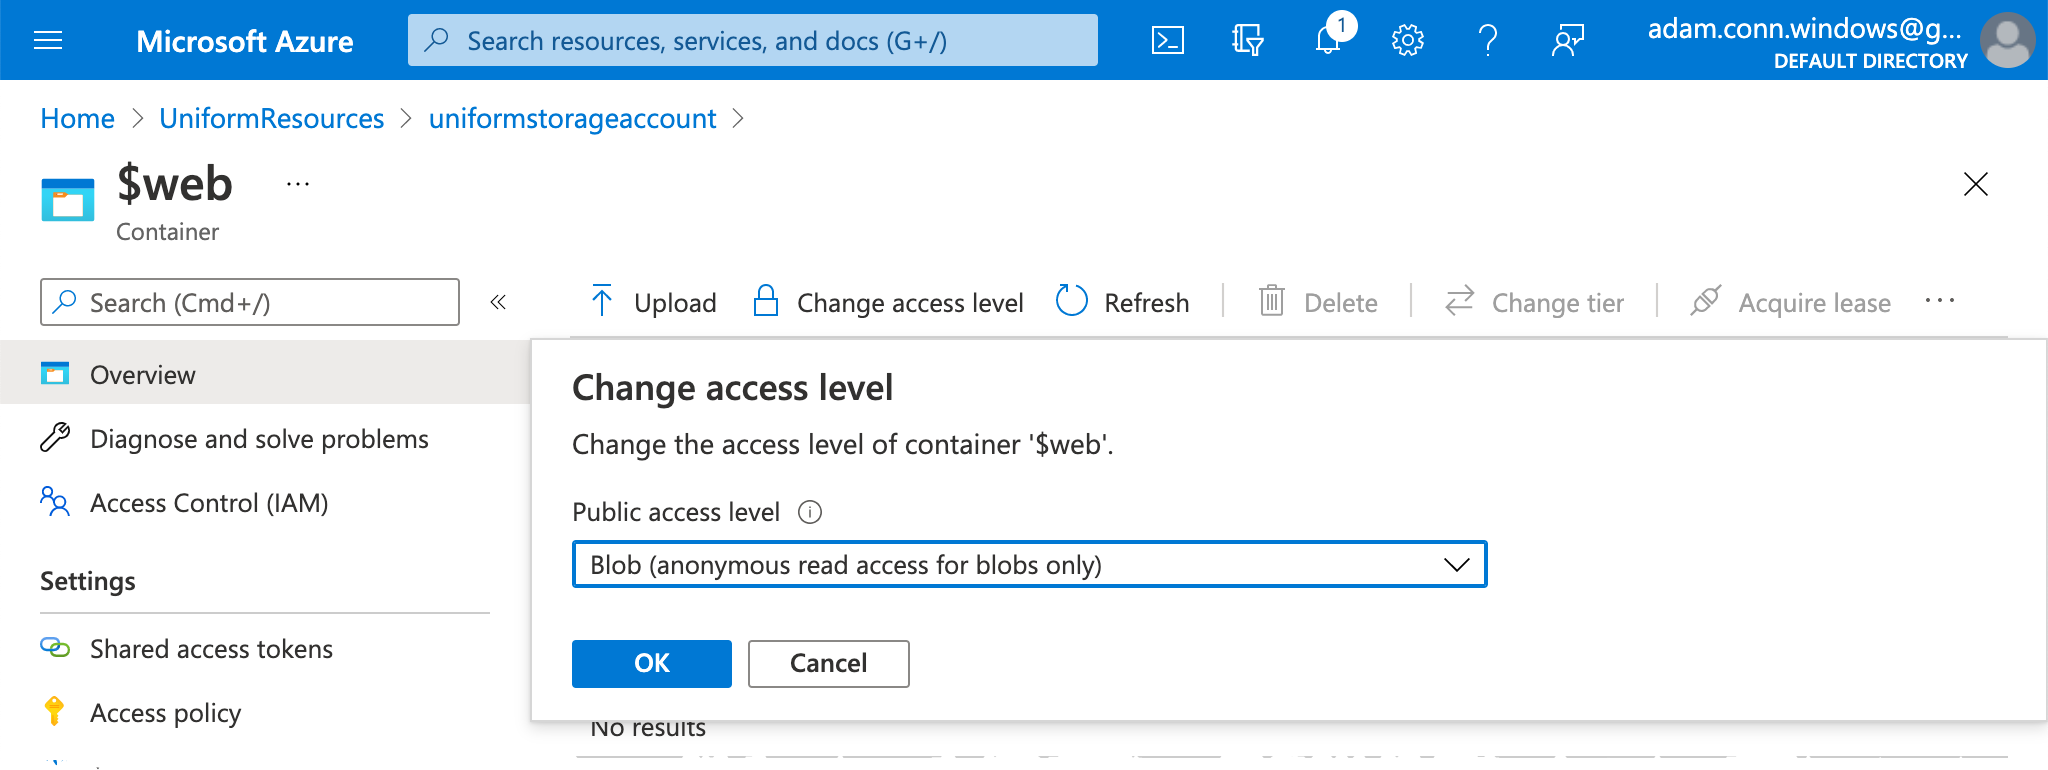
Click the link $web.
Click Change access level.
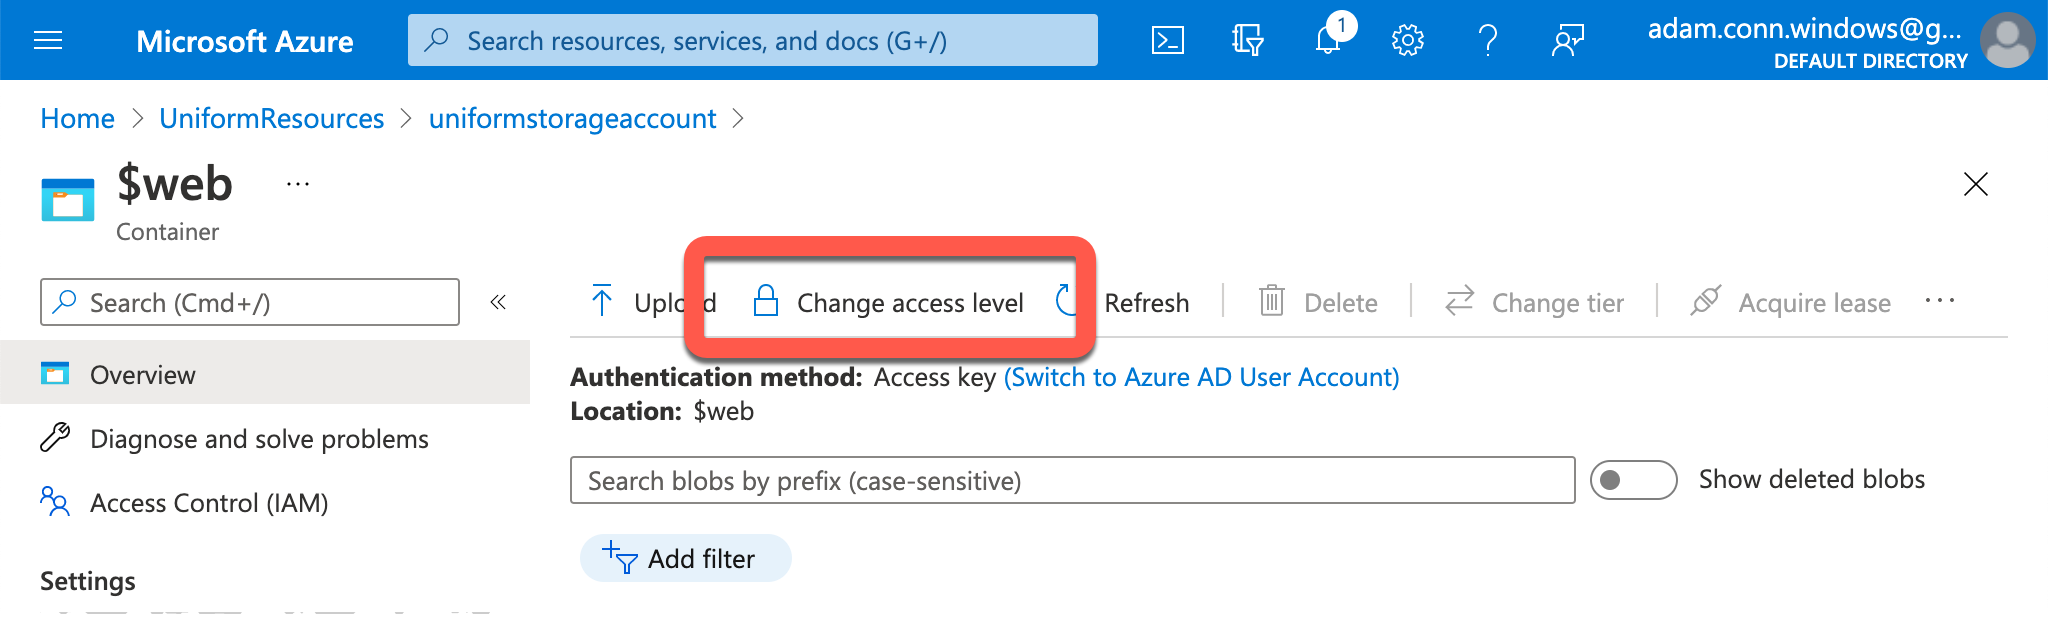
Select Blob (anonymous read access for blobs only) then click OK.
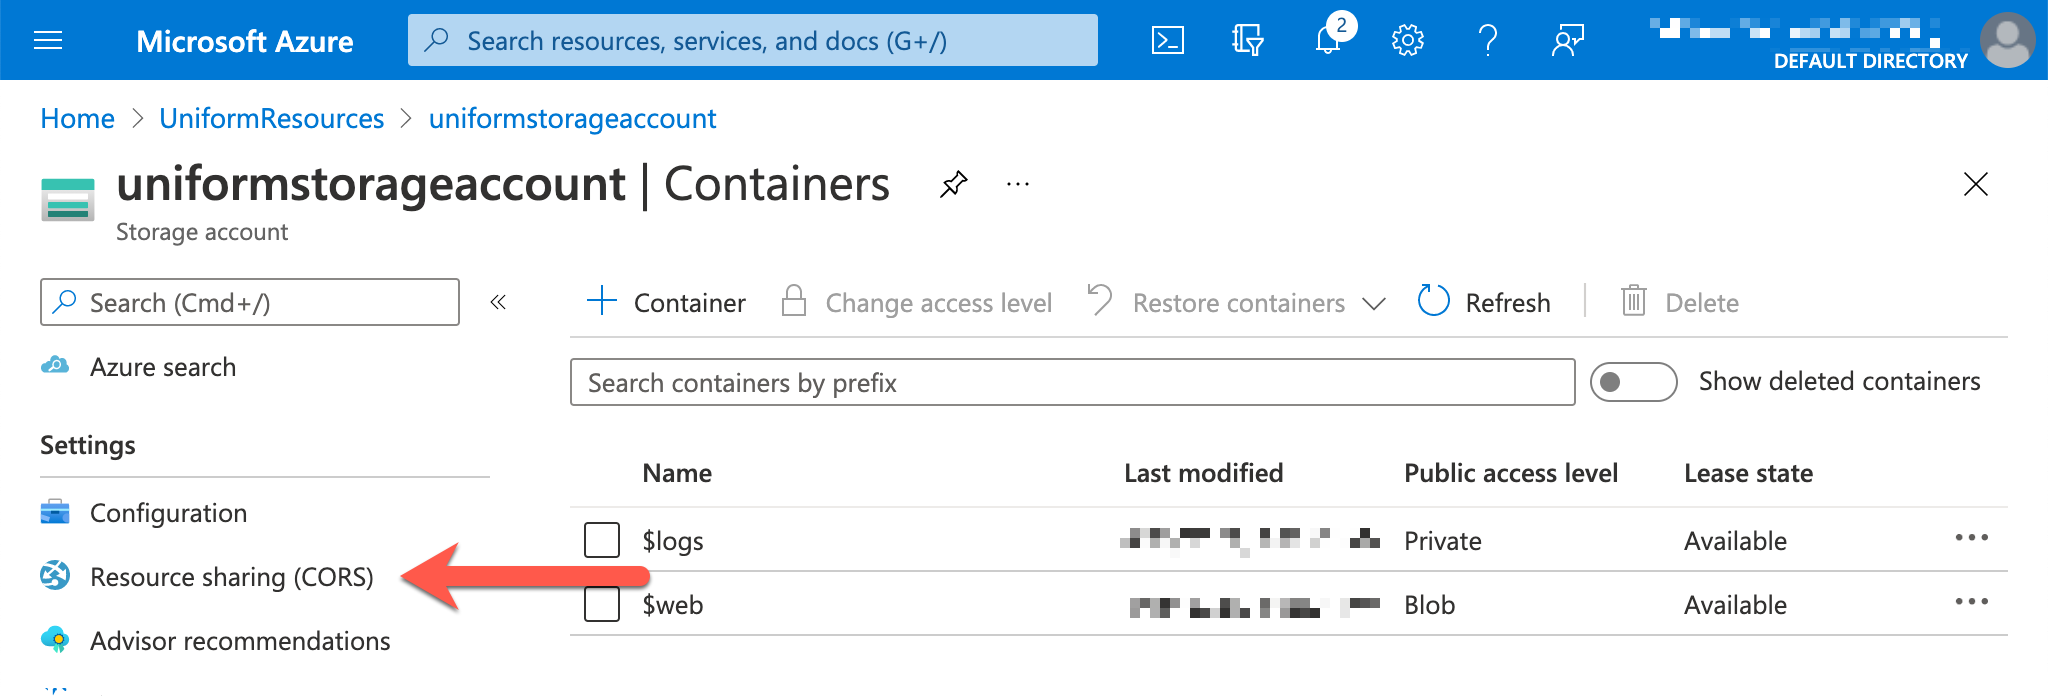
In the left menu, under the section Settings, click Resource sharing (CORS).
Enter the following values then click Save:
- Allow origins -
* - Allowed methods -
GET
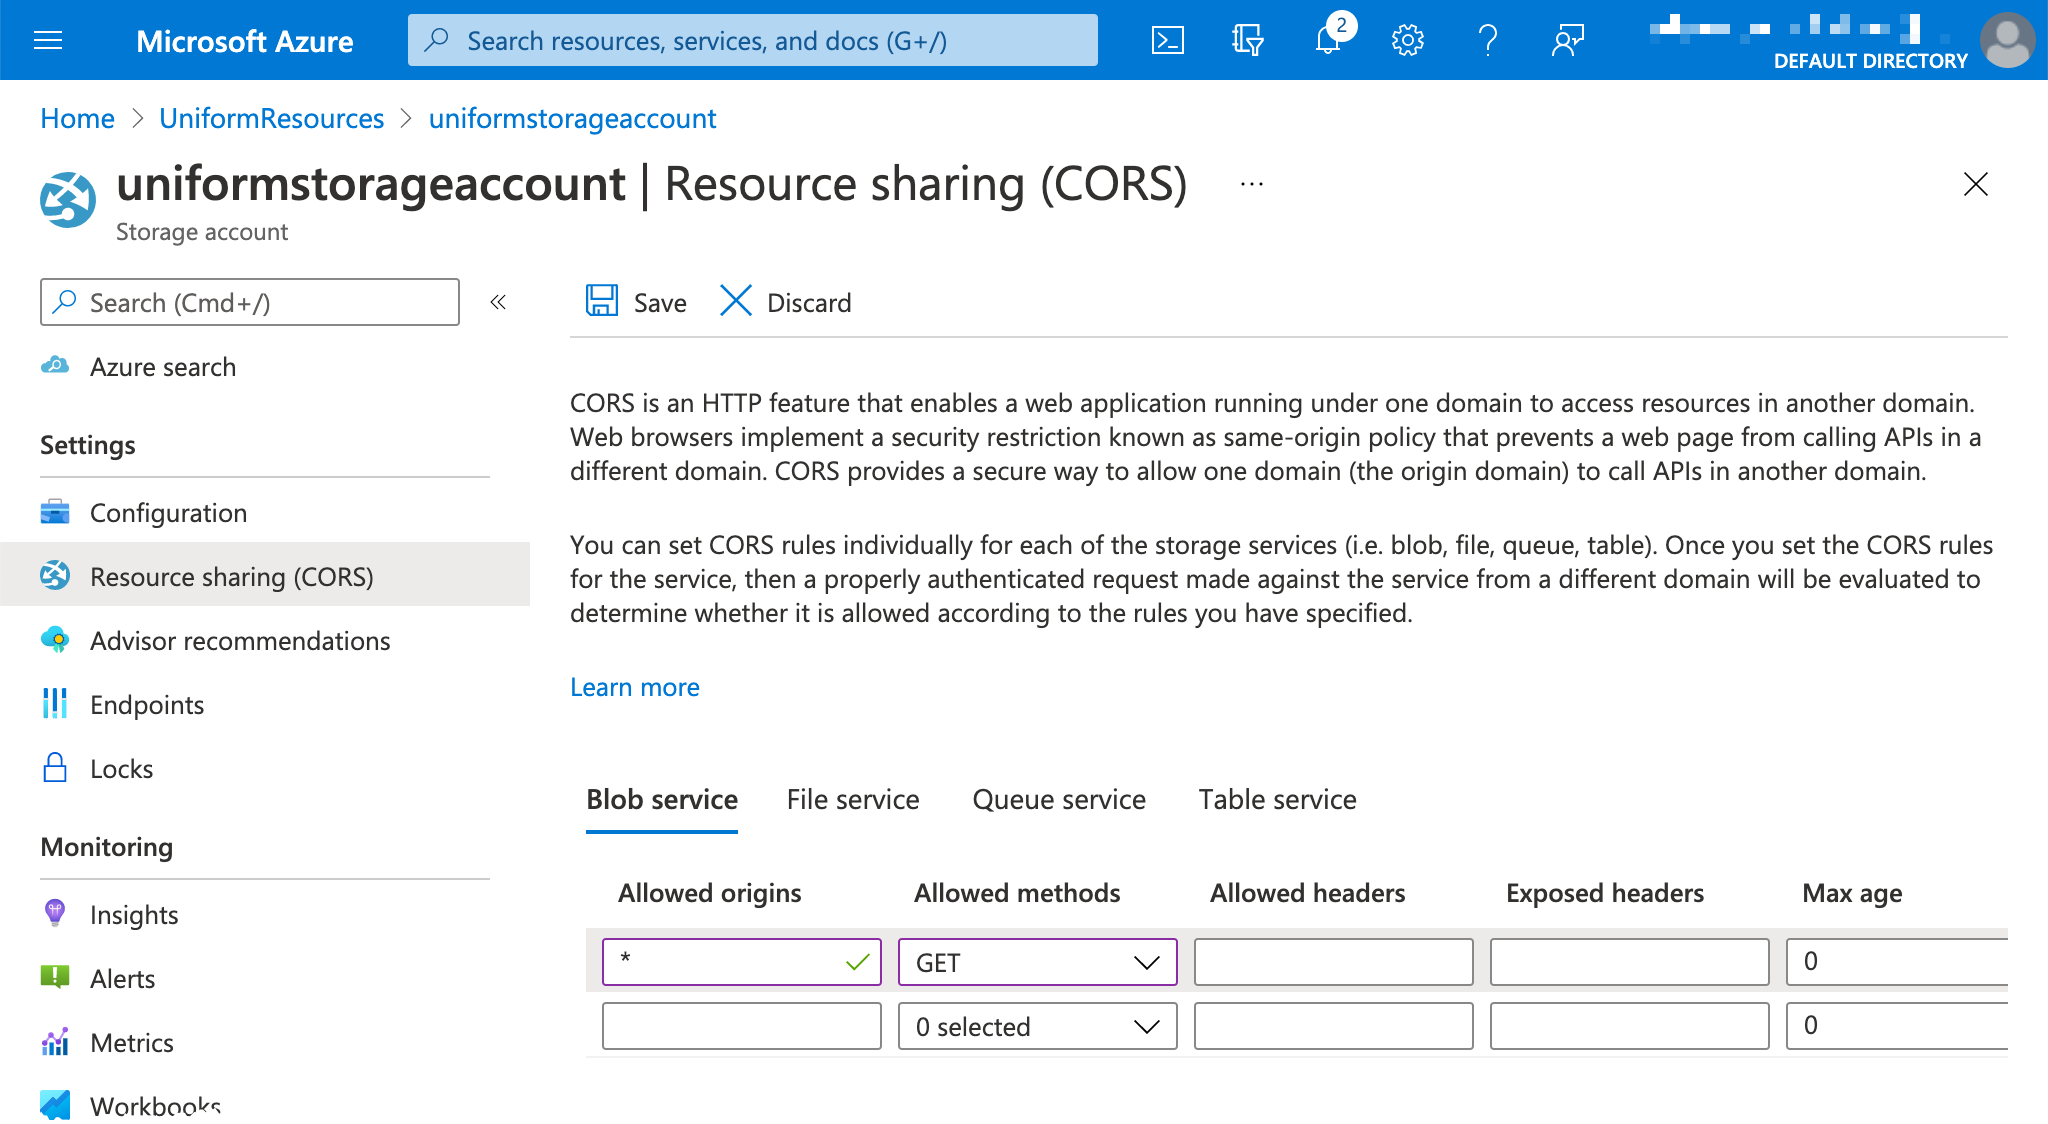
- Allow origins -
Collect settings#
During the deployment process, the Uniform Deployment Service copies files to Azure. In order to do this, several settings must be retrieved from Azure.
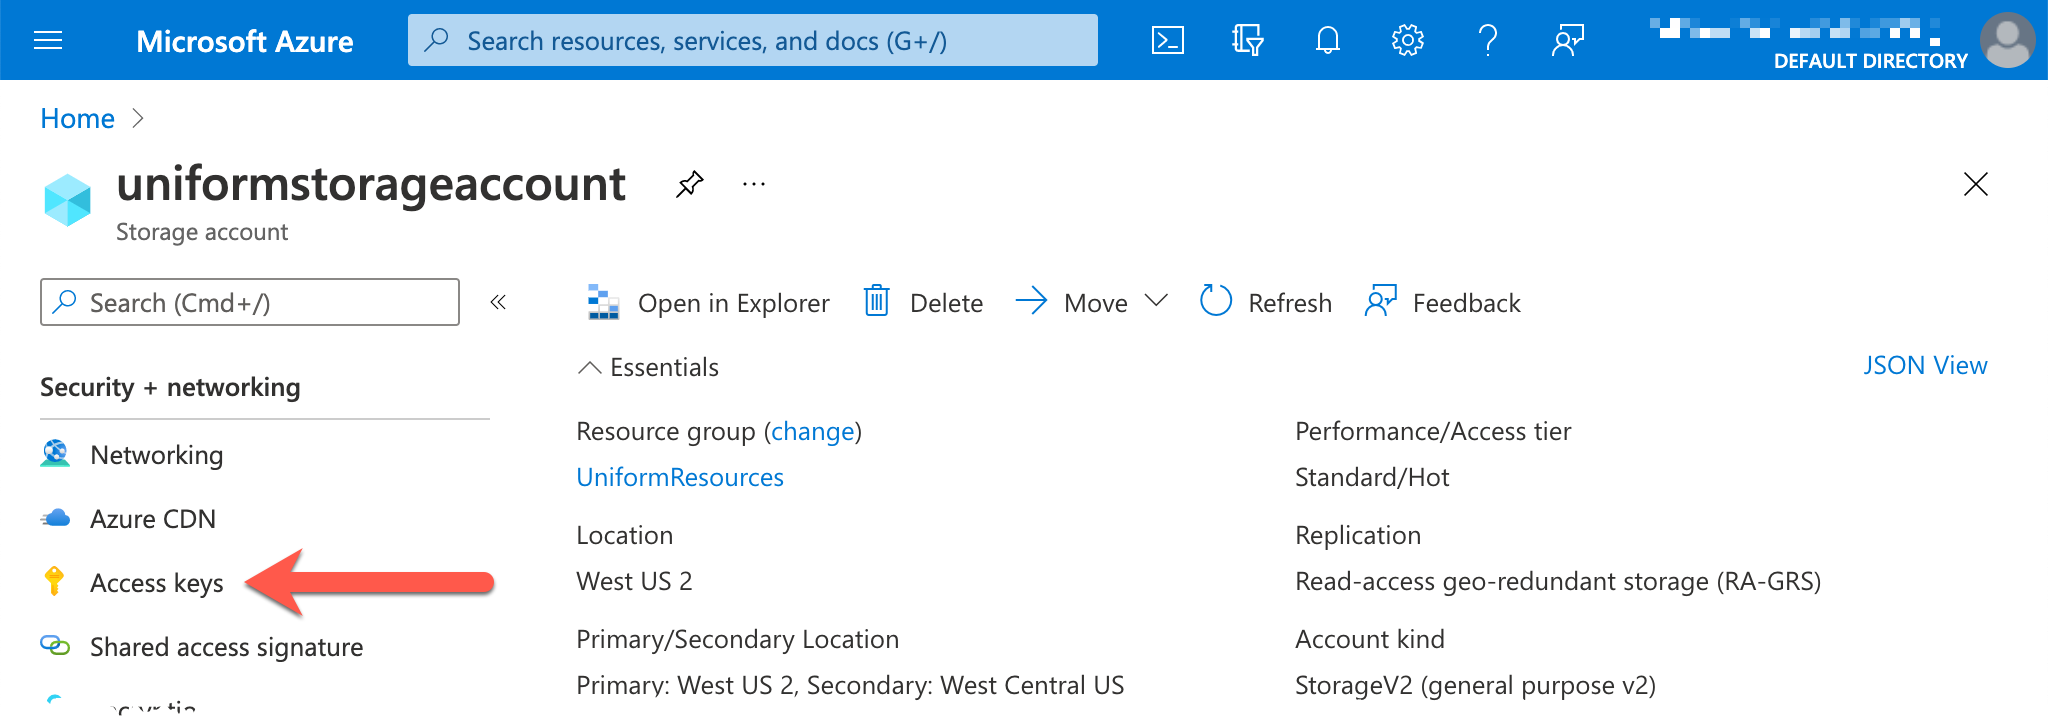
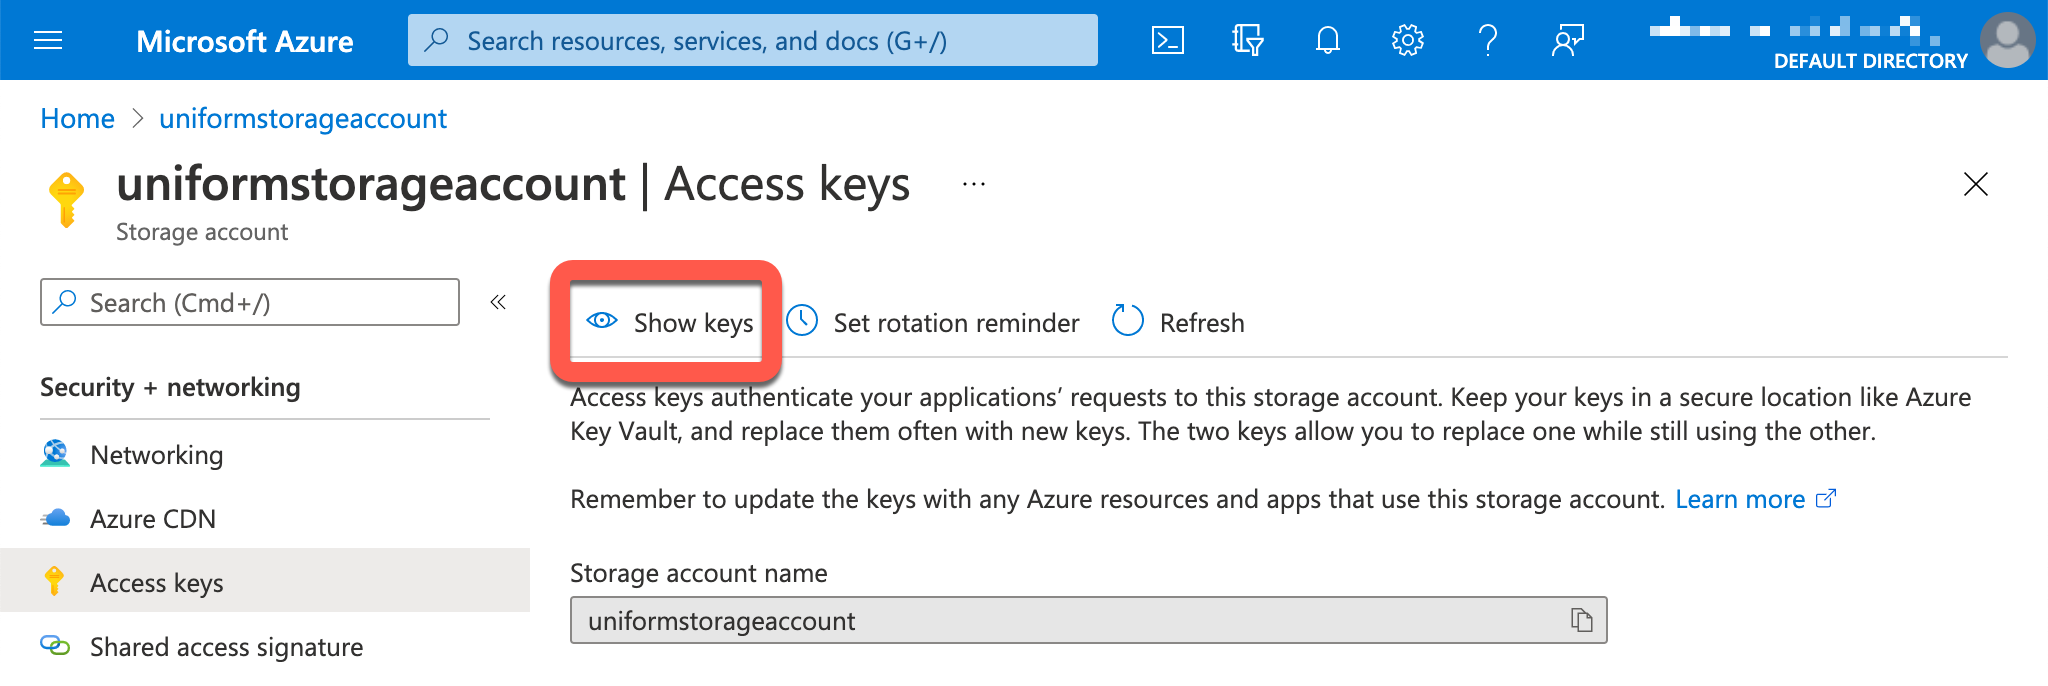
In the left menu, under Security + networking, click Access keys.
Click Show keys.
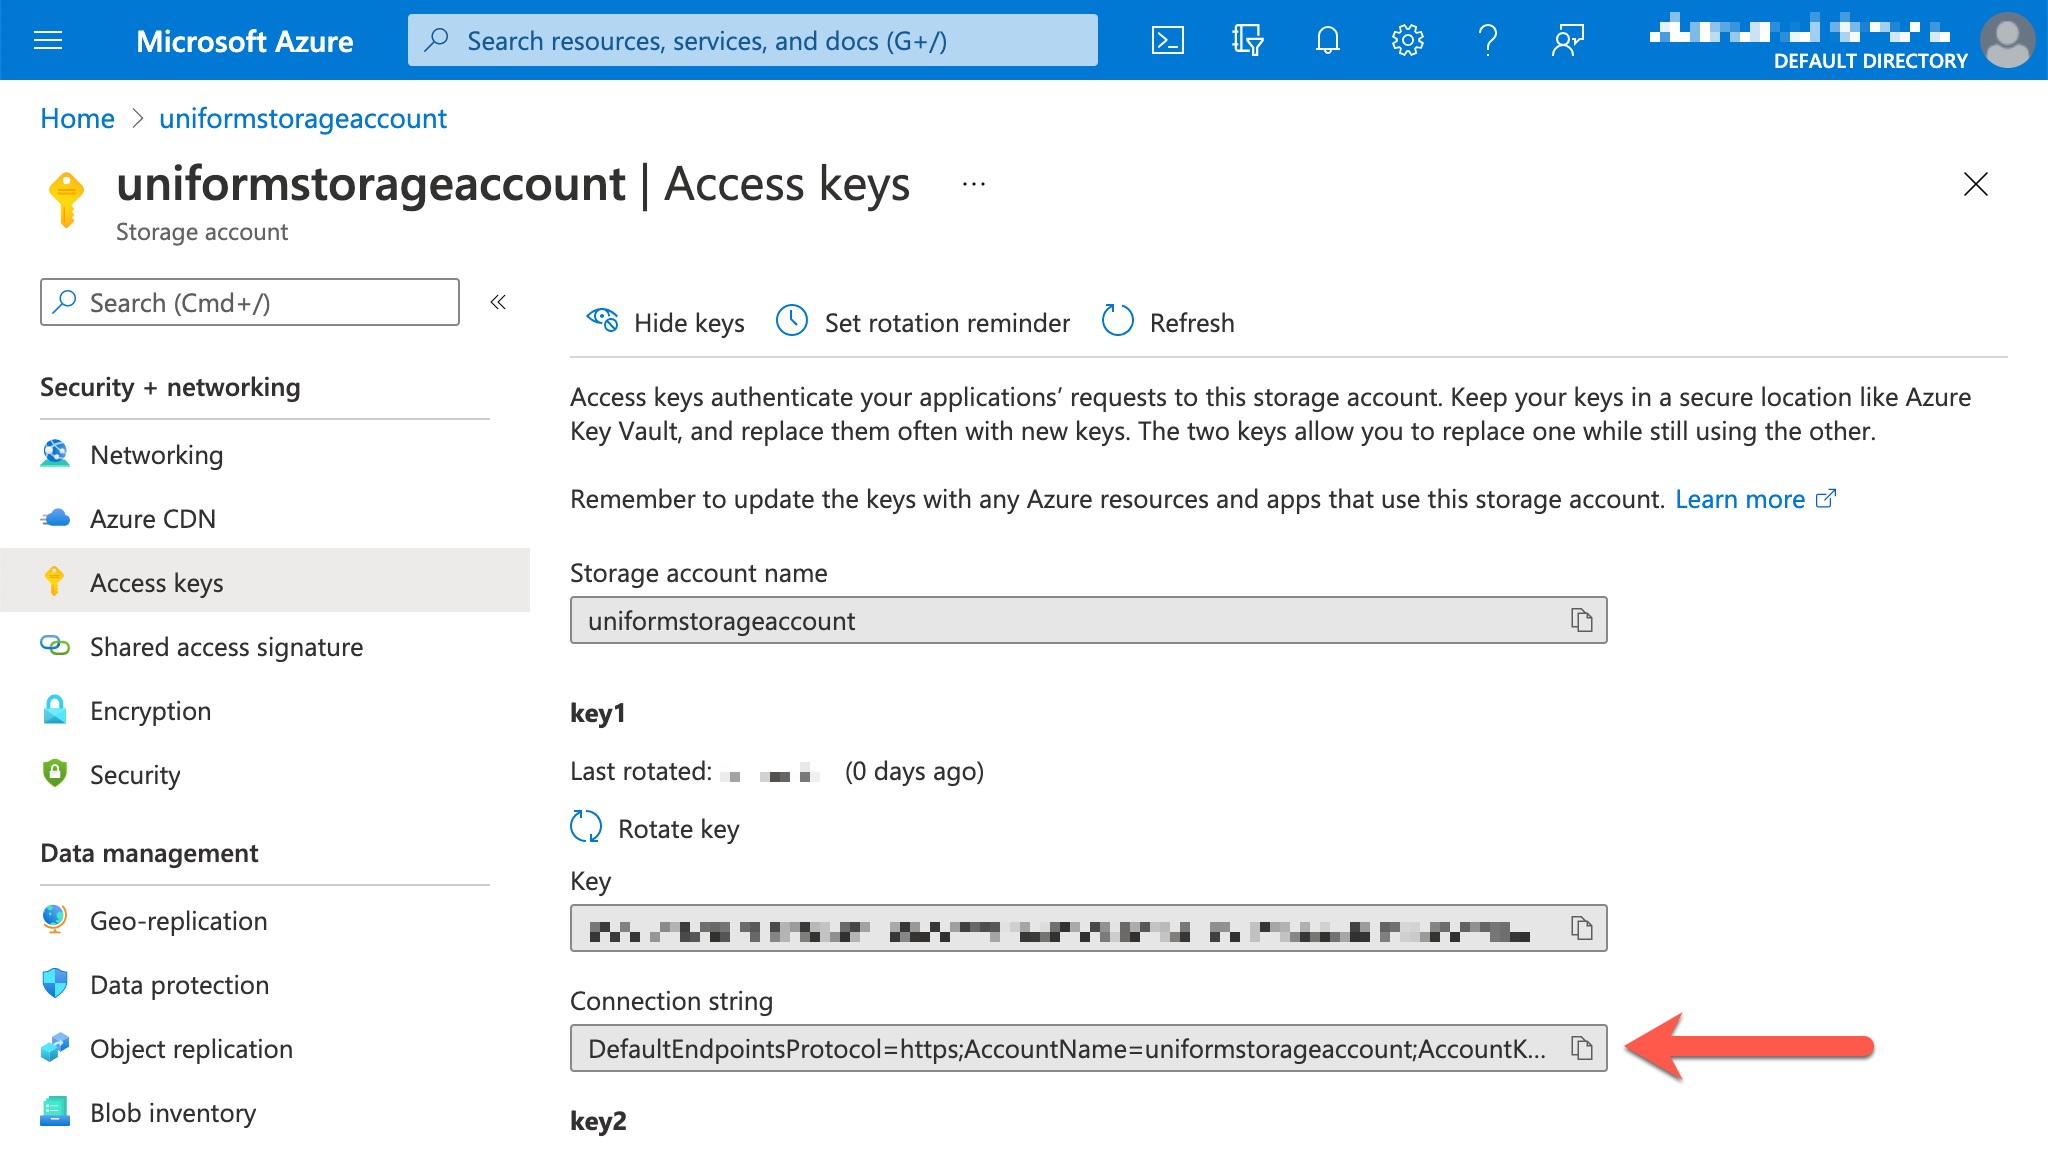
Under the section key1, note the value for Connection string.
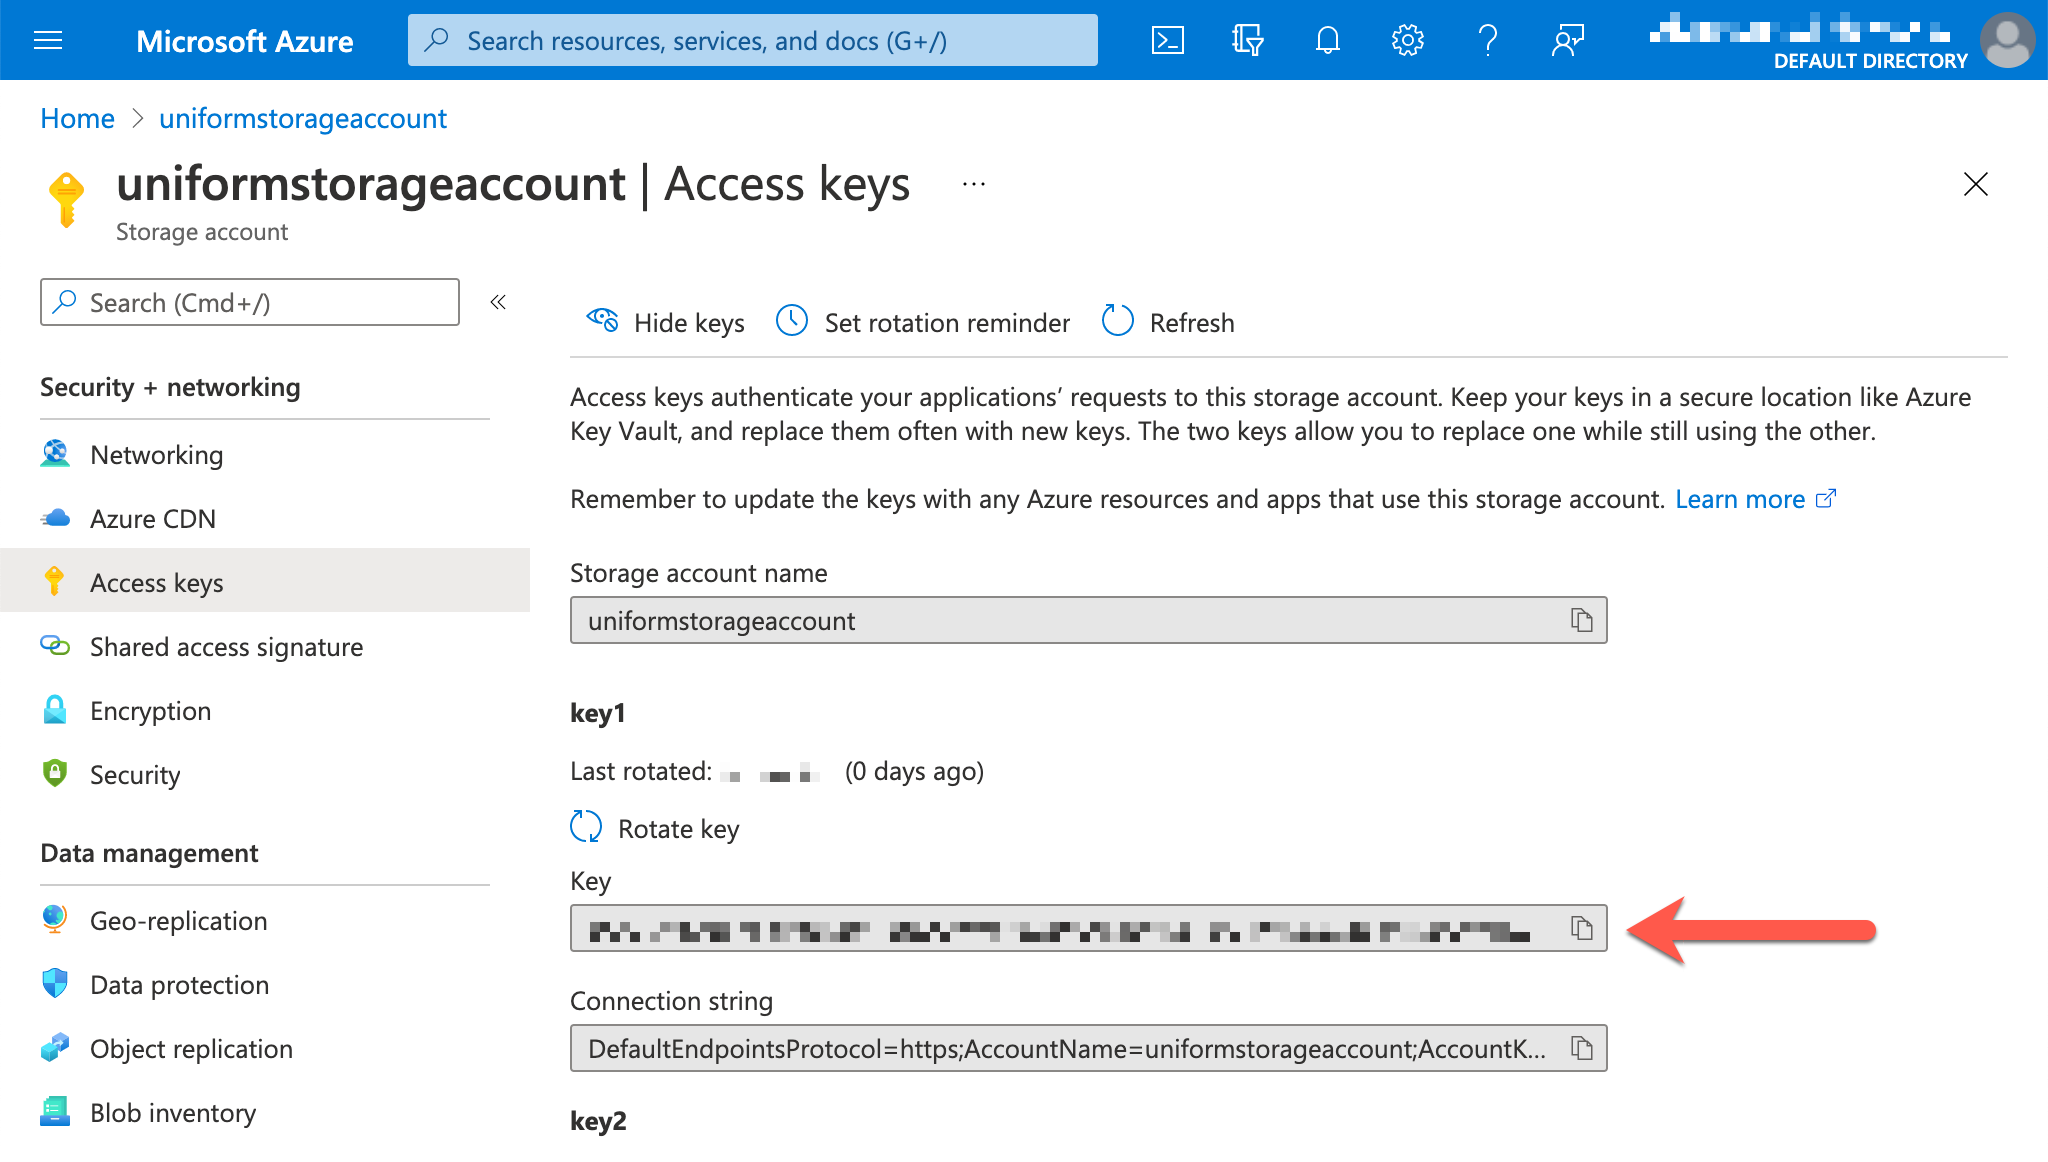
If you don't want the Uniform Deployment Service to use the connection string to connect to Azure, you can use the access key instead. Note the value for key1 > Key:
In the left menu, under Data management, click Static website.
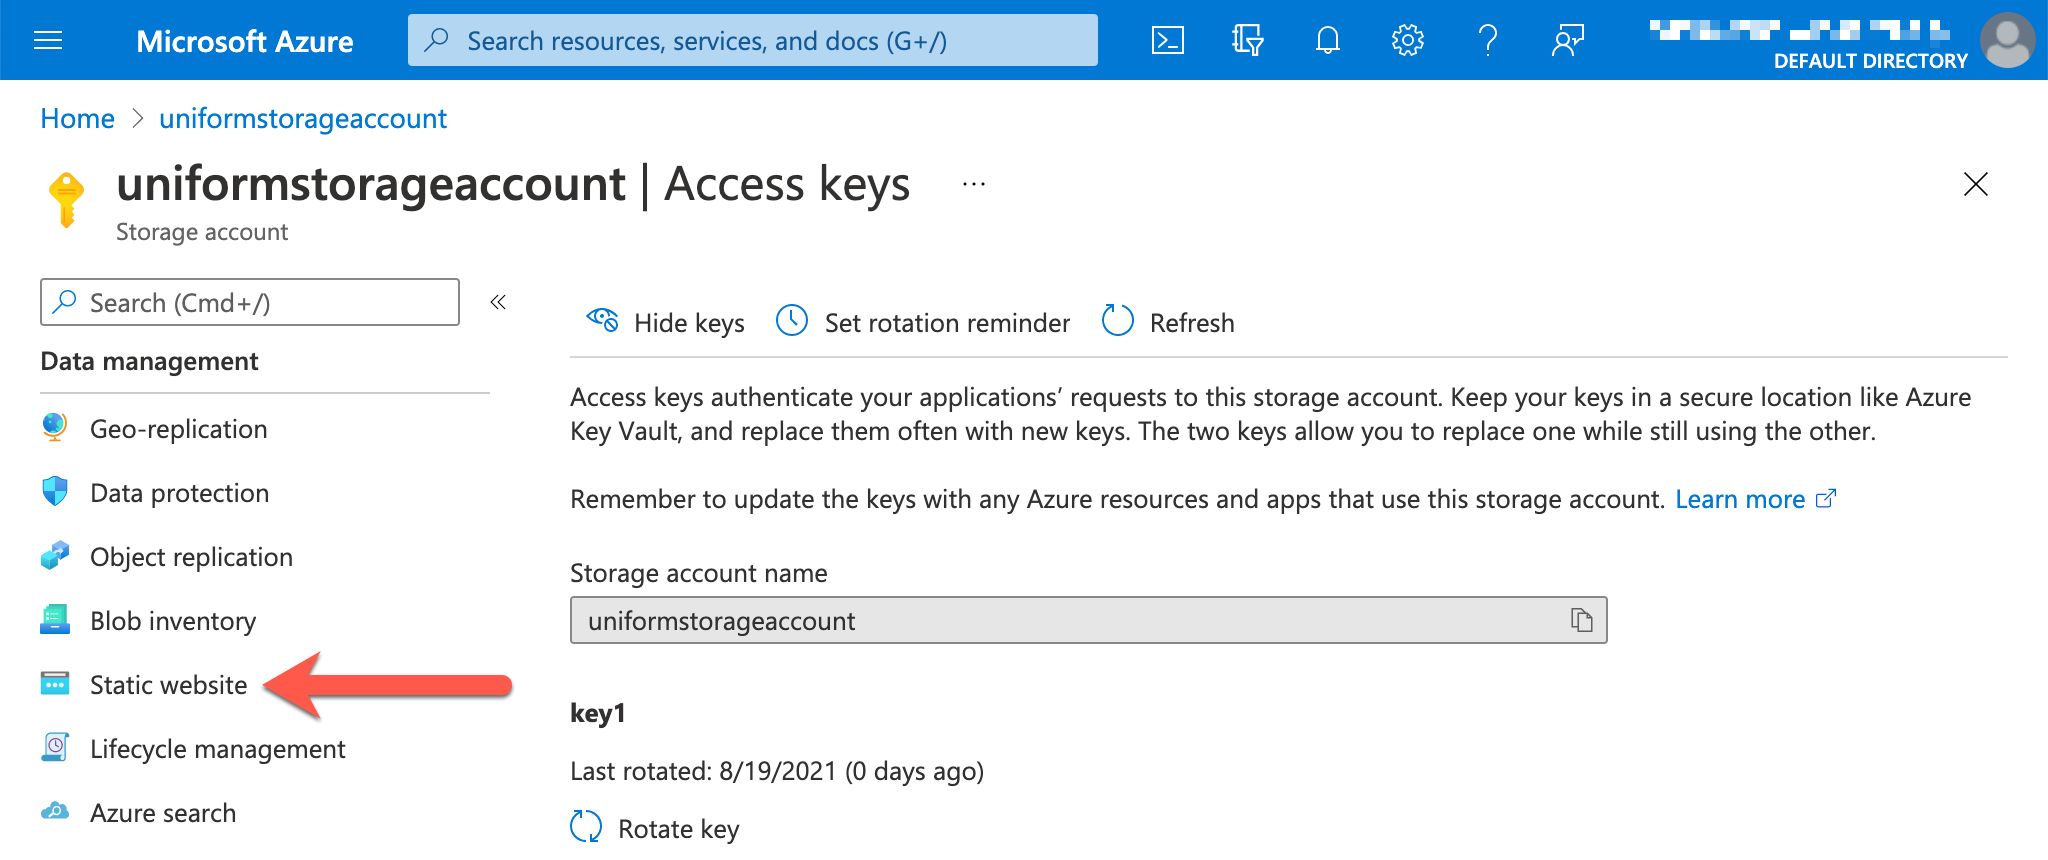
Note the value for Primary endpoint.
Continue to the steps section.
Setup (Azure CLI)#
If you already completed the setup using the Azure Portal, skip to the steps section.
Install Azure CLI#
Install the Azure CLI on your machine.
Open a terminal window (or Command Prompt or PowerShell).
Enter the following command:
az login
Create Storage Account#
A storage account is where the files that are deployed by the Uniform Deployment Service are stored. A storage account is an Azure resource that must be created before you can deploy a site to Azure.
Enter the following command to create a new resource group:
If you do not know the appropriate region name to use, a section under Azure CLI tips offers instructions on how to determine this value.
az group create --name <YOUR-RESOURCE-GROUP-NAME> --location <YOUR-REGION-NAME>Enter the following command to create a new storage account:
az storage account create --name <YOUR-STORAGE-ACCOUNT-NAME> --resource-group <YOUR-RESOURCE-GROUP-NAME> --location <YOUR-REGION-NAME> --sku Standard_LRS
Configure static website hosting#
Enter the following command to enable static website hosting on the storage account.
az storage blob service-properties update --account-name <YOUR-STORAGE-ACCOUNT-NAME> --static-website --404-document 404/index.html --index-document index.htmlEnter the following command to enable CORS on all GET requests:
az storage cors add --account-name <YOUR-STORAGE-ACCOUNT-NAME> --services b --methods GET --origins '*'At the time these instructions were written there is no way to change the access level on a storage container from the Azure CLI. This must be done using Azure Portal. Login to Azure Portal.
Navigate to your storage account.
In the left menu, under the section Data storage, click Containers.
Select the row for container $web.
Click Change access level.
Select Blob (anonymous read access for blobs only) then click OK.
Collect settings#
During the deployment process, the Uniform Deployment Service copies files to Azure. In order to do this, several settings must be retrieved from Azure.
In the terminal window, enter the following command to get the connection string for the storage account:
az storage account show-connection-string --name <YOUR-STORAGE-ACCOUNT-NAME> --output tsvIf you don't want the Uniform Deployment Service to use the connection string to connect to Azure, you can use the access key instead. Enter the following command:
az storage account keys list --account-name <YOUR-STORAGE-ACCOUNT-NAME> --query "[?contains(keyName, 'key1')].value" --output tsvEnter the following command to get the primary endpoint for the static website:
az storage account show --name <YOUR-STORAGE-ACCOUNT-NAME> --query "primaryEndpoints.web" --output tsvContinue to the steps section.
Steps#
important
Before starting this section you need to have completed either the setup using either Azure Portal or Azure CLI.
Configure service settings#
Settings can be specified for the Uniform Deployment Service in multiple ways:
- On the service - This option is useful during testing and development, but it is not recommended for production environments because the service cannot be shared across multiple sites.
- In Sitecore - This option is recommended for production environments because it allows Sitecore to pass the settings to the Uniform Deployment Service at deploy-time, meaning multiple sites can be deployed using the same service.
Option 1. On the service (connection string)#
In the root folder for the Uniform Deployment Service, add the file .env:
AZURE_STORAGE_CONNECTION_STRING=<YOUR-AZURE-STORAGE-ACCOUNT-CONNECTION-STRING>
# these are fixed values for Azure Blob Storage targetUNIFORM_PUBLISH_TARGET=azureblobAZURE_CONTAINER=$webOption 2. On the service (access key)#
In the root folder for the Uniform Deployment Service, add the file .env:
AZURE_STORAGE_ACCOUNT=<YOUR-AZURE-STORAGE-ACCOUNT-NAME>AZURE_STORAGE_ACCESS_KEY=<YOUR-AZURE-STORAGE-ACCESS-KEY>
# these are fixed values for Azure Blob Storage targetUNIFORM_PUBLISH_TARGET=azureblobAZURE_CONTAINER=$webOption 3. In Sitecore (connection string)#
Add a config file to your Sitecore instance:
<sitecore> <uniform> <siteConfigurations> <siteConfiguration name="uniform-mvc-kit"> <deployment> <deploymentService set:ref="uniform/services/hostedDeploymentService"> <ServiceUrl>http://localhost:3000</ServiceUrl> <environmentVariables hint="raw:AddEnvironmentVariable"> <variable name="UNIFORM_PUBLISH_TARGET">azureblob</variable> <variable name="AZURE_CONTAINER">$web</variable> <variable name="AZURE_STORAGE_CONNECTION_STRING"><YOUR-AZURE-STORAGE-ACCOUNT-CONNECTION-STRING></variable> </environmentVariables> </deploymentService> </deployment> </siteConfiguration> </siteConfigurations> </uniform></sitecore>Option 4. In Sitecore (access key)#
Add a config file to your Sitecore instance:
<sitecore> <uniform> <siteConfigurations> <siteConfiguration name="uniform-mvc-kit"> <deployment> <deploymentService set:ref="uniform/services/hostedDeploymentService"> <ServiceUrl>http://localhost:3000</ServiceUrl> <environmentVariables hint="raw:AddEnvironmentVariable"> <variable name="UNIFORM_PUBLISH_TARGET">azureblob</variable> <variable name="AZURE_CONTAINER">$web</variable> <variable name="AZURE_STORAGE_ACCOUNT"><YOUR-AZURE-STORAGE-ACCOUNT-NAME></variable> <variable name="AZURE_STORAGE_ACCESS_KEY"><YOUR-AZURE-STORAGE-ACCESS-KEY></variable> </environmentVariables> </deploymentService> </deployment> </siteConfiguration> </siteConfigurations> </uniform></sitecore>Configure AzCopy#
The Uniform Deployment Service uses AzCopy to copy the static site files to your Azure storage account. AzCopy is a standard Microsoft tool for copying files to Azure.
Copy the AzCopy executable (e.g.
azcopy.exefor Windows) to a path that can be accessed by the Uniform Deployment Service.In the
.envfile for the Uniform Deployment Service, add the following environment variable:UNIFORM_PUBLISH_PROVIDER_AZUREBLOB_AZCOPY_PATH=<PATH-TO-AZCOPY-EXECUTABLE>If the Uniform Deployment Service is running on a Windows machine, your
.envfile might look like the following:UNIFORM_PUBLISH_PROVIDER_AZUREBLOB_AZCOPY_PATH=Z:\tools\azcopy.exeIf you copied the AzCopy executable to the same folder as the Uniform Deployment Service (and you are running on a Windows machine), your
.envfile might look like the following:UNIFORM_PUBLISH_PROVIDER_AZUREBLOB_AZCOPY_PATH=.\azcopy.exe
Test your configuration#
Start the Uniform Deployment Service.
In Sitecore, republish of any page-level item under the
/sitecore/content/[SiteName]item.In the app console for the Uniform Deployment Service, you should see something like the following:
02/00-10:24:59 info: Received deploy status request, ticket: 5, message: Generating HTML site files 02/00-10:25:00 info: Exporting has succeeded. 02/00-10:25:00 info: Creating .timestamp.txt file 02/00-10:25:00 info: Starting deployment02/00-10:25:00 info: Container '$web' created 02/00-10:25:00 info: Site was enabled. 02/00-10:25:00 info: Start uploading file to azure. container: $web, folder: C:\sitecore-mvc-nextjs-starterkit\.temp\5 Exec: ".\azcopy.exe" copy "C:\sitecore-mvc-nextjs-starterkit\.temp\5\*" "https://thisisjustfordemo.blob.core.windows.net/$web?st=1970-01-01T00%3A00%3A00Z&se=2021-02-22T04%3A25%3A00Z&sp=racwdl&spr=https&sv=2018-03-28&sr=c&sig=pf0L44Vq39IhMLFvfKG%2B2ukljfw29E2CQ0VU6rgR7VU%3D" --recursive --overwrite true02/00-10:25:01 info: Received deploy status request, ticket: 5, message: Uploading HTML site files 02/00-10:25:03 info: AzurePublishProvider deployed site files: C:\sitecore-jss-nextjs-starterkit\.temp\5 02/00-10:25:03 info: Successfully deployed 02/00-10:25:03 info: Deleting temp dir: C:\sitecore-mvc-nextjs-starterkit\.temp\5 02/00-10:25:03 info: Temp dir was deleted: C:\sitecore-mvc-nextjs-starterkit\.temp\5 02/00-10:25:03 info: Received deploy status request, ticket: 5, message: Deployment is completeIn a browser, navigate to your site using the primary endpoint for the static website. Your site should render normally.
Since you have deployed your site to Azure, it is fully decoupled from your Sitecore CD instance. If you want, you can shut down your Sitecore CD instance.
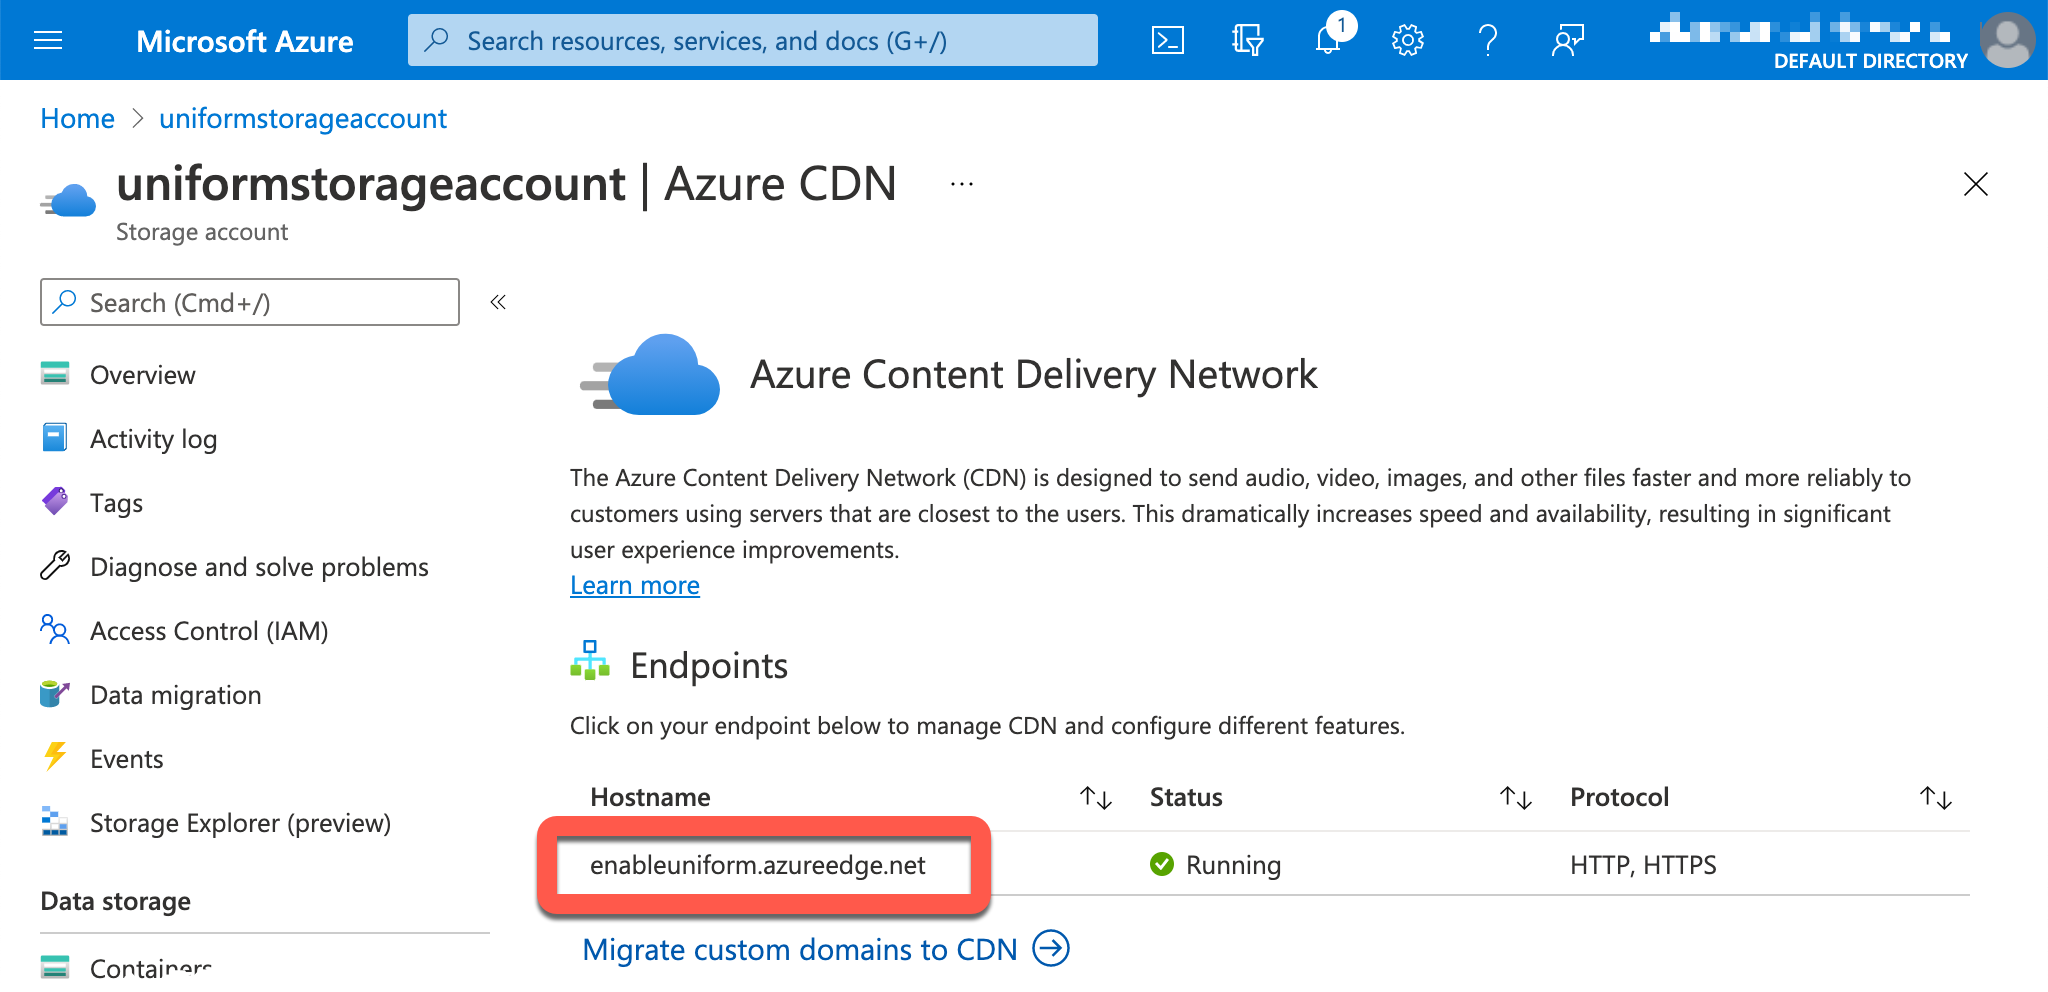
Add Azure CDN (optional)#
Having a CDN in front of your Azure storage account is recommended for production. A CDN can help with global distribution of the static assets, compression (gzip or brotli), etc.
Enabling Azure CDN for an Azure storage account is very easy to do using either Azure Portal or Azure CLI.
Azure Portal#
In Azure Portal, select your storage account.
In the left menu, under Security + networking, click Access keys.
Enter the following values then click Create.
- CDN profile -
Create new - CDN profile name -
<YOUR-CDN-PROFILE-NAME> - Pricing tier -
Standard Microsoft - CDN endpoint name -
<YOUR-CDN-ENDPOINT-NAME> - Origin hostname - Select your static website from the list.

- CDN profile -
After the CDN is added, the endpoint will be displayed. This is the url you can use to view your site.
Azure CLI#
In the terminal window, enter the following command to create a new CDN profile:
az cdn profile create --resource-group <YOUR-RESOURCE-GROUP-NAME> --name <YOUR-CDN-PROFILE-NAME> --sku Standard_Microsoft --location globalEnter the following command to create a new CDN endpoint:
Your static site primary endpoint host name is the primary site endpoint without the
https://or the trailing/. For example, if the endpoint ishttps://myaccount.z5.web.core.windows.net/, the endpoint host name ismyaccount.z5.web.core.windows.net.az cdn endpoint create --resource-group <YOUR-RESOURCE-GROUP-NAME> --origin <YOUR-STATIC-SITE-PRIMARY-ENDPOINT-HOST-NAME> --origin-host-header <YOUR-STATIC-SITE-PRIMARY-ENDPOINT-HOST-NAME> --profile-name <YOUR-CDN-PROFILE-NAME> --name <YOUR-CDN-ENDPOINT-NAME> --location global --enable-compression trueIf you get an error
(Conflict) That resource name isn't available., you are trying to use an endpoint name that has already been taken. You must use a different value and run the command again.Enter the following command to get the CDN endpoint host name. You can use this host name to access your site:
az cdn endpoint show --resource-group <YOUR-RESOURCE-GROUP-NAME> --profile-name <YOUR-CDN-PROFILE-NAME> --name <YOUR-CDN-ENDPOINT-NAME> --query 'hostName' --output tsv
Azure CLI tips#
Determine your region#
When you create Azure resources, you must specify the region where the resource is created. If you already know the name of the region you want to use, you can skip this section.
The following command can be entered in the terminal window. The will return a list of regions. The value from the column Name is the value you will use in later sections.
For a list of all available regions:
az account list-locations --query 'sort_by([], ®ionalDisplayName)' --output tableThe output will look like the following:
Name DisplayName RegionalDisplayName------------------- ------------------------ -------------------------------------southafricanorth South Africa North (Africa) South Africa Northsouthafricawest South Africa West (Africa) South Africa Westaustraliacentral Australia Central (Asia Pacific) Australia Centralaustraliacentral2 Australia Central 2 (Asia Pacific) Australia Central 2australiaeast Australia East (Asia Pacific) Australia EastFor a list of regions filtered by continent:
az account list-locations --query "sort_by([?contains(regionalDisplayName, '<YOUR-CONTINENT>')], &displayName)" --output tableThe output will look like the following:
Name DisplayName RegionalDisplayName------------------ -------------------- -----------------------------europe Europe Europefrancecentral France Central (Europe) France Centralfrancesouth France South (Europe) France Southgermanynorth Germany North (Europe) Germany Northgermanywestcentral Germany West Central (Europe) Germany West Central